Mounting Tracks: Difference between revisions
Jump to navigation
Jump to search
Tom Griffing (talk | contribs) (Created page with "Introduction The optional tracks provide the LifeTrac with additional weight and traction. These instructions provide mounting instructions for the tracks. Procedure # Posit...") |
(added to Category:LifeTrac) |
||
| (6 intermediate revisions by one other user not shown) | |||
| Line 1: | Line 1: | ||
Introduction | == Introduction == | ||
The optional tracks provide the LifeTrac with additional weight and traction. These instructions provide mounting instructions for the tracks. | The optional tracks provide the LifeTrac with additional weight and traction. These instructions provide mounting instructions for the tracks. | ||
Procedure | == Procedure == | ||
# Position the LifeTrac on a level work surface. | # Position the LifeTrac on a level work surface. | ||
| Line 12: | Line 12: | ||
# Use a winch and chain to draw the leading and trailing tracks together until they can be secured with the couplers. | # Use a winch and chain to draw the leading and trailing tracks together until they can be secured with the couplers. | ||
# Re-inflate the tires and lower the jack. | # Re-inflate the tires and lower the jack. | ||
# Repeat the above steps for the other side. | |||
[[File:LiftTracWithTracks.jpg|center|600px]] | |||
== Using Tracks == | |||
Use the primarily on soil and not on asphalt or concrete, as the abrasion from these will cause premature wear of the tracks. | |||
[[Category:LifeTrac]] | |||
Latest revision as of 02:41, 29 October 2011
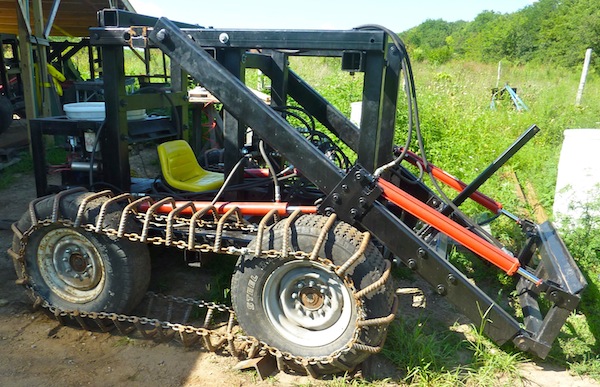
Introduction
The optional tracks provide the LifeTrac with additional weight and traction. These instructions provide mounting instructions for the tracks.
Procedure
- Position the LifeTrac on a level work surface.
- Put blocks in front and behind the wheels of one side of the LifeTrac.
- On the other side of the LifeTrac, let the air out of the two tires until they have about 5 PSI. Position a hydraulic or scissor jack in the center of the frame and extend the jack until both front and rear wheels are 2" above the ground.
- Move the tracks in front of the lifted wheels and pull the leading edge over the top of the tires. Hold the leading track against the tire and rotate the tire until the track is underneath the tire. Do the same with the trailing track and the first tire.
- Use a winch and chain to draw the leading and trailing tracks together until they can be secured with the couplers.
- Re-inflate the tires and lower the jack.
- Repeat the above steps for the other side.

Using Tracks
Use the primarily on soil and not on asphalt or concrete, as the abrasion from these will cause premature wear of the tracks.