CEB Press/Manufacturing Instructions/Hopper sheet metal: Difference between revisions
Jump to navigation
Jump to search
No edit summary |
(→Steps) |
||
| (3 intermediate revisions by the same user not shown) | |||
| Line 29: | Line 29: | ||
=Steps= | =Steps= | ||
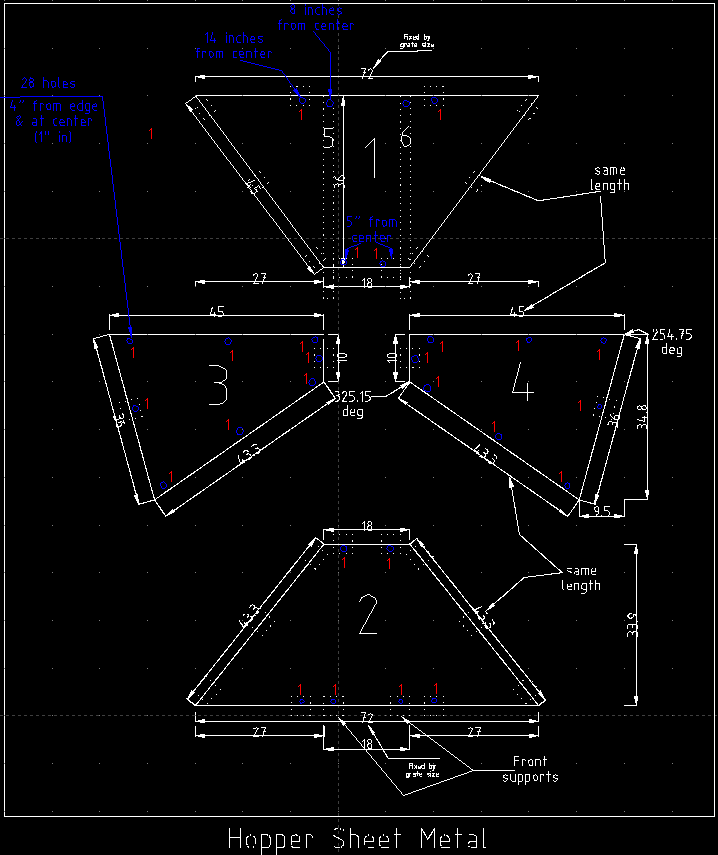
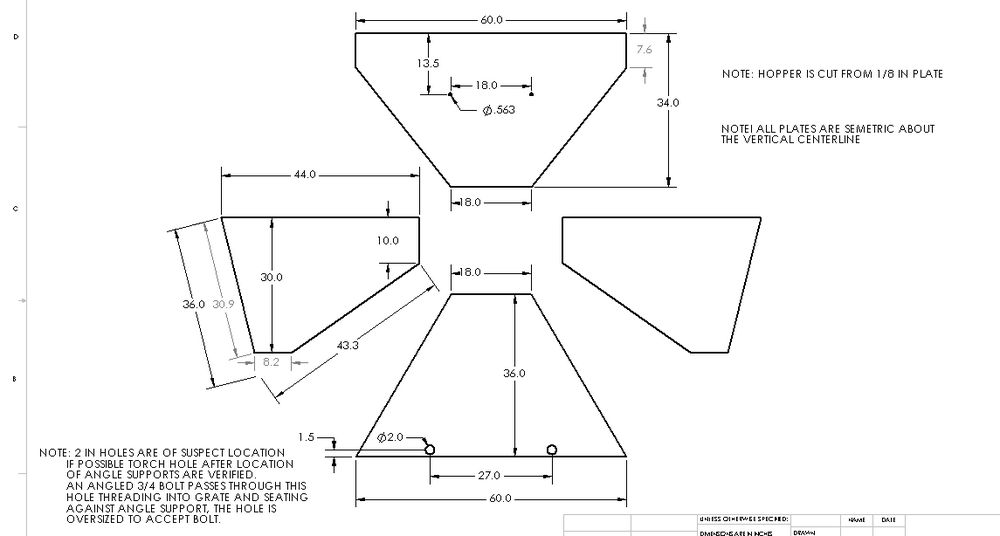
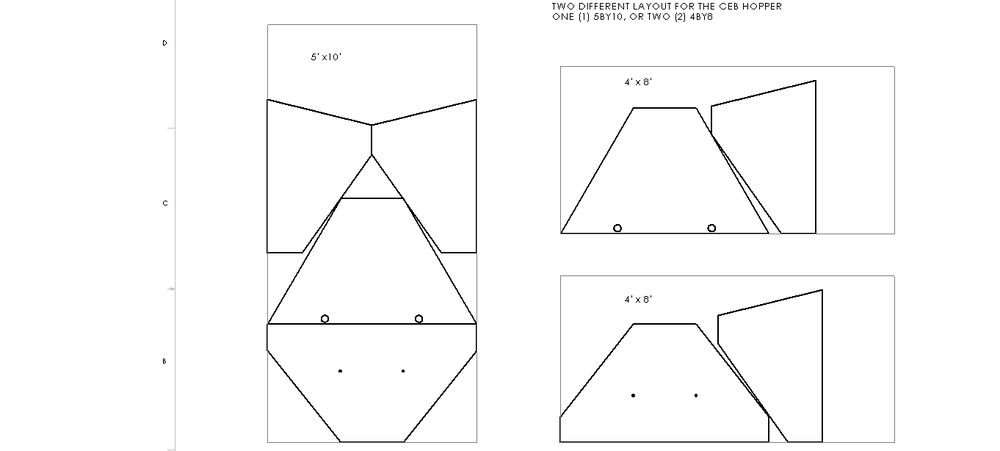
*Torch | *Torch the hopper shapes as shown. Grind away any excess slag. Punch all of the holes shown. | ||
[[Image:hopperfab.png|1000px]] | |||
[[Image:hopper_jpg.jpg|1000px]] | [[Image:hopper_jpg.jpg|1000px]] | ||
[[Image:hopper_layout.jpg|1000px]] | [[Image:hopper_layout.jpg|1000px]] | ||
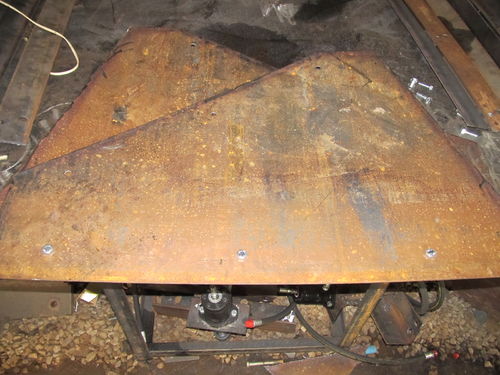
*Insert then weld the 1/2" bolts to the side hopper plates such that the bolt heads would be inside if the hopper were to be assembled. | |||
[[Image:boltshingeplates.jpg|500px|The bolts ready to weld]] | |||
*Cut the 24' bar into 8 sections of 3' length | |||
*Punch 3/4" holes in 4 of the hinge plates as shown. | *Punch 3/4" holes in 4 of the hinge plates as shown. | ||
| Line 38: | Line 47: | ||
[[Image:hingeplates.jpg|500px|Hole locations for the hinge plates]] | [[Image:hingeplates.jpg|500px|Hole locations for the hinge plates]] | ||
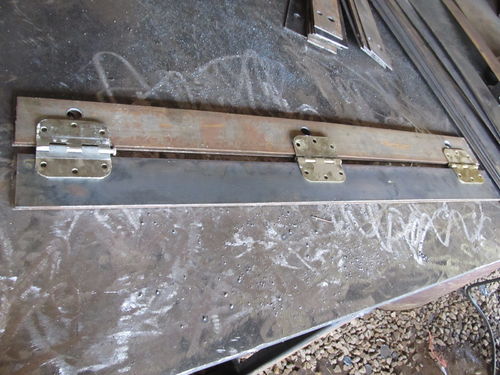
*Weld a holey hinge plate, a non-holey hinge plate and 3 hinges together as shown. Note to make sure the side of the | *Weld a holey hinge plate, a non-holey hinge plate and 3 hinges together as shown. Repeat for a total of 4 holeplate-3hinge-noholeplate welded assemblies. Note to make sure the side of the assembly that sticks out most is on the top; this way it won't interfere with the hopper metal below when installing the hopper. | ||
[[Image:weldinghingeplates.jpg|500px|Welding the hinge plates]] | [[Image:weldinghingeplates.jpg|500px|Welding the hinge plates]] | ||
*Weld the no-hole plates of the 4 plate-hinge-plate assemblies to the sides of the front and rear hopper plates. | |||
* | |||
Latest revision as of 04:50, 23 December 2011
Tools
- Torch
- Welder
- Hole punch with 3/4" dies
Materials
- [12] Door Hinges
- [12] 1/2" x 1 1/2" bolts
- [12] 1/2" washers (12)
- [12] 1/2" lockwashers (12)
- [12] 1/2" nuts (12)
- Steel plate 5' x 10' x 1/8" OR [2] Steel plate 4' x 8' x 1/8"
- Steel bar 3" x 1/8" x 24'
Steps
- Torch the hopper shapes as shown. Grind away any excess slag. Punch all of the holes shown.
- Insert then weld the 1/2" bolts to the side hopper plates such that the bolt heads would be inside if the hopper were to be assembled.
- Cut the 24' bar into 8 sections of 3' length
- Punch 3/4" holes in 4 of the hinge plates as shown.
- Weld a holey hinge plate, a non-holey hinge plate and 3 hinges together as shown. Repeat for a total of 4 holeplate-3hinge-noholeplate welded assemblies. Note to make sure the side of the assembly that sticks out most is on the top; this way it won't interfere with the hopper metal below when installing the hopper.
- Weld the no-hole plates of the 4 plate-hinge-plate assemblies to the sides of the front and rear hopper plates.
