Aidan Williamson Log: Difference between revisions
(→5/21) |
(→5/21) |
||
| Line 19: | Line 19: | ||
*[http://www.mouser.com/ProjectManager/ProjectDetail.aspx?AccessID=3ca1e3ae1a Mouser] | *[http://www.mouser.com/ProjectManager/ProjectDetail.aspx?AccessID=3ca1e3ae1a Mouser] | ||
I also ordered some copper clad PCB here: [http://www.ebay.com/itm/161251960653?ssPageName=STRK:MEWNX:IT&_trksid=p3984.m1497.l2649 ebay] | I also ordered some copper clad PCB here: [http://www.ebay.com/itm/161251960653?ssPageName=STRK:MEWNX:IT&_trksid=p3984.m1497.l2649 ebay] | ||
I also had to have the board layouts printed with a laser printer on glossy paper at my local print shop. They charged me $8.50 which I feel is a bit expensive. | |||
'''Total Cost (w/out shipping or tax)''' : | |||
'''Total Cost (w/out shipping or tax)''' : $93.05 | |||
==5/17== | ==5/17== | ||
Revision as of 17:35, 21 May 2014
Old Logs:
Links:
May 2014
5/21
Ordered Parts For Fab Modules Stepper Motor Drivers (4 count)
Ordered Parts for Fab Modules Stepper Controller
I also ordered some copper clad PCB here: ebay I also had to have the board layouts printed with a laser printer on glossy paper at my local print shop. They charged me $8.50 which I feel is a bit expensive.
Total Cost (w/out shipping or tax) : $93.05
5/17
Ready to begin with the Fab Modules Triple Stepper method for controlling the TAZ for milling. I imagine the RAMBO and the triple stepper boards next to each other with a large jackknife switch to change between the two. Things i've noticed so far:
- The A3982 Stepper Driver is a SOIC only package.
- You will need to make two drivers which recieve the signal from the stepper controller
- It's about $80 in parts to purchase everything for this upgrade.
March 2014
3/17
Install Fab Modules in Ubuntu 12.04 courtesy of mkeeter.
3/6
I emailed John. These were my questions:
1) In the BOM it lists the parts for a stepper driver. Is it possible to use the RAMBO stepper drivers or do I need to
   create an entirely new driver board for milling use?
2) What software do you recommend using? I found the MTM Fab Modules software but have yet to experiment with it.
His Response:
my preferred way is to create an entirely new driver board for milling use that goes with the MTM Fab Modules software.
http://kokompe.cba.mit.edu/index.html
http://mtm.cba.mit.edu/fabinabox/dev/triplestepper/overview.html
I'm awaiting further clarification in order to proceed in automating the toolpath.
3/1
Looks like I was using the 24V motor from the BOM at 12v from my PSU. I will need to buy the right motor or use a dc-dc converter to get the 24v i need.
February 2014
2/28
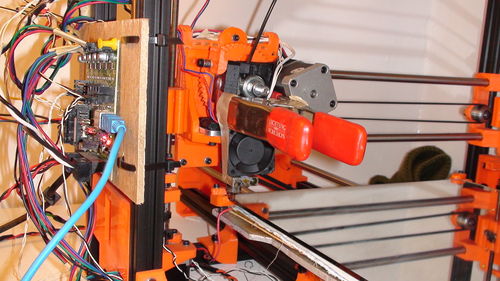
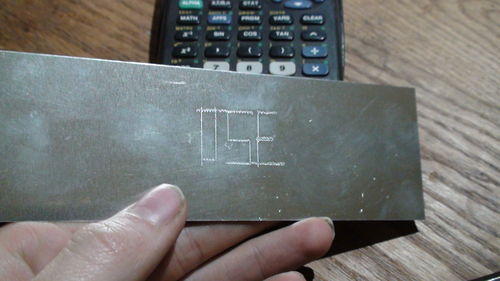
Hydrafabber CNC Spindle has been installed on the TAZ. Some media is below.
Hydrafabber Pics
http://img.youtube.com/vi/rJMkfLgo-N0/default.jpg http://img.youtube.com/vi/z9Z09NNhhtI/default.jpghttp://img.youtube.com/vi/VfQxZMqks_A/default.jpghttp://img.youtube.com/vi/stR6FzeeTsc/default.jpg
2/18
2/15
Working on a Product Development Cycle for Small Scale Farmers based on a thesis by Sam Shepherd, MEE and a collaboration with James Tangorra.
2/8
Printed CNC Spindle Mount:
http://img.youtube.com/vi/2kKC2A5IXlM/default.jpg
2/5
If you are going to use a 12x12 inch bed on the Taz then you will need these bed corners
2/4
Had a snow day on Monday so Gabi and I were able to model most of the water wheel transplanter in sketchup. Automatically updating sketchup file found here
January 2014
1/21
In the wake of two days of failed prints, an update on the Taz:

PLA & The Budaschnozzle:
- Do not let the Budaschnozzle idle at temperature unnecessarily
- Make sure the extruder and the hot end are perfectly alligned
- Slide filament through both holes as you bolt them in. The filament should move without much resistance.
- Install a fan pointed at the heatsinks but blocked from the heater block
I learned those things the hard way yesterday.
Bed adhesion
On my first print a glass bed at 70C was used with no problems. My second print would not stick until I used an elmers glue slurry. 4 Parts water to 1 part glue painted on when the bed is warm.
1/11
The last week was basically spent rethinking our decision on 1/3 to use 3 smaller barrels and designing a way to use 2 55gal barrels.
This required cutting of the old saddle and building/mounting a new, much larger, heavier one. I have my doubts but am otimistic. I want to see some testing with the 1000lb payload on there. Gabi is almost finished the waterwheel lift mechanism. There is no video update because of technical difficulties.
Here is a video of my first print on my Taz!
http://img.youtube.com/vi/MW8Qi5iNOOc/default.jpg
CONGRATS - EPIC WORK on TAZ!!! -MJ
thanks!
1/8
Nice coverage in The New Yorker.
Completed my first print. Video is rendering at home. I will upload it another day. For now I have a video of stopping a leak in the Budaschnozzle.
http://img.youtube.com/vi/W7acDWe4hqU/default.jpg
We decided to use two 55gal drums. I cut off the saddle and will begin workign on the new one on Friday.
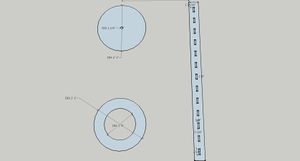
We are making three 25" wheels from laser cut 11ga mild steel. Here are the files we sent to the machine shop:

File:Water Wheel 25.dxf
File:Water Wheel 25.skp
1/6
A fun way to navigate this wiki is to use the random page tool. You can put this link: http://opensourceecology.org/wiki/Special:Random in your bookmarks toolbar if you are in mozilla.
This is from the other day:
http://img.youtube.com/vi/G4G7GXfV9ns/default.jpg
I started to look at the budaschnozzle. It needs to be cleaned. I started that process but ran out of time. I will document it with a video when I finish.
1/3
We decided to add 3 15 gallon barrels to the sides of the 55 gal barrel to give a total capacity of 100gal. We also lengthened our shelves. I'm ready for a day off, which is coming.
http://img.youtube.com/vi/Gpx4PmBSZtg/default.jpg http://img.youtube.com/vi/dfrwYHx87ec/default.jpg
1/2
So Christmas happened and then other stuff and it's now apparently 2014 and I haven't finished the Taz or the Water Wheel...
Ordered a part for the nozzle and then it should be 100% operational after a cleaning. Haven't had any time at all to work on it other than to build a more permanent space for it in my room.
The water wheel is coming along. I will post some videos from youtube below. It is now day 9 but they haven't really been full work days. Nothing like a production run at FeF as we are using rusty material which is not square and we don't have a complete design going in to it. It does look pretty good, though.
Finished
- Main Frame
- Wheels
- Barrel Mount
- Seat arms
- Seats
To Do:
- Water Wheel Welds
- Lots of Grinding
- Plumbing
- Water Wheel Axle
- Water Wheel Lift Mechanism
We are also considering adding another barrel for 2x water capacity.
http://img.youtube.com/vi/pcfBlHZqhGI/default.jpg http://img.youtube.com/vi/2liSUr8ZTw8/default.jpg http://img.youtube.com/vi/yOSPMLqozg8/default.jpg
http://img.youtube.com/vi/Colu1FynxQU/default.jpg http://img.youtube.com/vi/cS_mOMHhFD0/default.jpg http://img.youtube.com/vi/Y1YyX753Sfg/default.jpg http://img.youtube.com/vi/TTfgEkePOZU/default.jpg

