Jon Takacs Log: Difference between revisions
No edit summary |
No edit summary |
||
| Line 1: | Line 1: | ||
<html><iframe width="520" height="260" src="https://osedev.org/wiki/takacs"></iframe></html> | <html><iframe width="520" height="260" src="https://osedev.org/wiki/takacs"></iframe></html> | ||
=2/8/2018= | |||
Electrical: | |||
-Resoldered Servo connector for RAMPS board. | |||
-Hooked up all wiring to new RAMPS board | |||
Software: | |||
OSE marlin- I don't see this installed in the OSE linux image. The wiki seems to suggest it is in the OPT folder, but did not find it there or in home. | |||
Wiki also mentioned checking the Arduino Examples directories, but did not see it there either. | |||
for now, I'll get this printer rolling and learn marlin. Once I have a handle on navigating marlin, I'll load the latest and just adapt the mechanics for my printer; I'll need this one to print the D3D parts anyway. | |||
=2/7/2018= | =2/7/2018= | ||
| Line 8: | Line 20: | ||
Here is the new RAMPS board for my Air Wolf Prusa | Here is the new RAMPS board for my Air Wolf Prusa | ||
[[File:RAMPS upgrade.jpg|200x200px|border|My old printer]] | [[File:RAMPS upgrade.jpg|200x200px|border|My old printer]] | ||
Revision as of 03:00, 9 February 2018
2/8/2018
Electrical: -Resoldered Servo connector for RAMPS board. -Hooked up all wiring to new RAMPS board
Software: OSE marlin- I don't see this installed in the OSE linux image. The wiki seems to suggest it is in the OPT folder, but did not find it there or in home. Wiki also mentioned checking the Arduino Examples directories, but did not see it there either.
for now, I'll get this printer rolling and learn marlin. Once I have a handle on navigating marlin, I'll load the latest and just adapt the mechanics for my printer; I'll need this one to print the D3D parts anyway.
2/7/2018
Received my 3D printer kit from amazon! excited to convert my old printer tonight. I'll test the filament sensor if I can. And hopefully, start printing some components for the 3D3 Printer!
Here is the new RAMPS board for my Air Wolf Prusa
I pulled a wire out of one of the servo connectors, so need to resolder that!
So far, Firmware updated and ready to roll.
2/5/2018
Fillament Runout sensor setup notes
Software
-Downloaded a new copy of marlin firmware from [1] [Latest 1.1.8] -Identified area in firmware that needs updated before pushing to the RAMPS arduino ROM. You need to uncomment line 827 of configuration.h to enable the feature.
Hardware
To reiterate from prior logs, you need to use or jump SERVO3_PIN. For other boards you may need to define FIL_RUNOUT_PIN seperately, also in this config file. [You'd jump this if you do not have a filament sensor installed]
TODO: When I have a physical RAMPS provide nice pictures on what I am jumping and where that is on the hardware.
2/4/2018
Fillament runout sensor Notes
Electrical/Mechanical
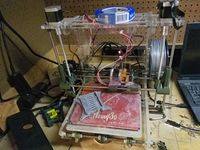
I've an older Airwolf 3d printer (Prusa I3 style ~2013) with a dated, proprietary control board. It doesn't appear to be directly marlin compatible and earlier attempts to load repetier firmware had failed.. As a RAMPS is cheap and I've been looking to replace for awhile, I'll go ahead and grab one on the amazon so my setup can look like the groups. Once I have this, I can quickly test the endstop concept in software.
I also am thinking how I might render this to our current 3D printer. http://opensourceecology.org/wiki/D3D
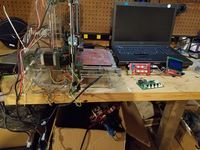
Here's what I have:
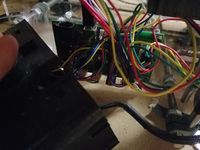
Here's the older control board:
because i found it, I'm putting the PVC version here: http://opensourceecology.org/wiki/D3D_PVC_pipe_8in_bed
Software
I'll be making the code change identified in my previous log to OSE linux and finding where the marlin firmware is.
2/2/2018
Filament run-out sensor notes 1
Mechanical
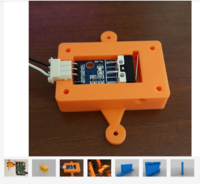
some interesting designs. Very simple! I like the first one I see - Printable, and uses just a simple whisker contact switch.
Electrical
From: [marlin FW site]
"RAMPS-based boards use SERVO3_PIN. For other boards you may need to define FIL_RUNOUT_PIN."
Software
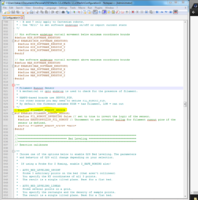
http://marlinfw.org/docs/configuration/configuration.html#filament-runout-sensor -Looks to be easy enough
//#define FILAMENT_RUNOUT_SENSOR
- if ENABLED(FILAMENT_RUNOUT_SENSOR)
 #define FIL_RUNOUT_INVERTING false // set to true to invert the logic of the sensor.
 #define ENDSTOPPULLUP_FIL_RUNOUT // Uncomment to use internal pullup for filament runout pins if the sensor is defined.
 #define FILAMENT_RUNOUT_SCRIPT "M600"
- endif
With this feature, a mechanical or opto endstop switch is used to check for the presence of filament in the feeder (usually the switch is closed when filament is present). If the filament runs out, Marlin will run the specified GCode script (by default “M600”). RAMPS-based boards use SERVO3_PIN. For other boards you may need to define FIL_RUNOUT_PIN.
So, That M600 G-CODE is just
http://marlinfw.org/docs/gcode/M600.html
"The M600 command initiates the filament change procedure. The basic procedure will move the print head away from the print, eject the filament, wait for new filament to be inserted and the user to confirm, load and prime the filament, and continue with the print. M600 may be initiated automatically if a filament runout sensor is installed.
Usage M600 [E<pos>] [L<pos>] [X<pos>] [Y<pos>] [Z<pos>] Argument Description [E<pos>] Retract before moving to change position (negative)
[L<pos>] Load/unload length, longer for bowden (negative)
[X<pos>] X position for filament change
[Y<pos>] Y position for filament change
[Z<pos>] Z relative lift for filament change position"
12 Week Plan
- Week 1-2 - open source the filament runout sensor - mechanical and electrical design that interfaces with preexisting Marlin Firmware. Clearly document this. Upload code to your log. Entries + Design Spec in Google Presentation embedded in your Log. FreeCAD modifying the existing extruder. Check out the Prusa i2 MK3. Point: just the runout, nothing else at this point - essential rationale is - not losing a long print when the filament runs out. Detects runout, it saves position, moves out of way and reload filamnet.
- Week 3-6 - Design PVC version - with a 12" print beds fully. Details of exact dimensions - so print bed gets you exactly
- Week 7 - generate a full BOM
- Week 8-10 - build 3D printer
- Week 11-12 - Join Large Extruder Team and replicate.
More
Found some interesting thermal batteries: https://www.sunamp.com/about/ Crystalline phase change materials for heat storage may be an OSE compatible device - just using salt to store heat would be super efficient and easy to replicate.
Notes
- Jon works at http://www.rovisys.com/ - good experience on automation
- Knows ROS + Gazebo
- Worked on steam turbine (4MW) controls at a wastewater plant incinerator
- Worked in water purification at a wastewater plant
- Knows hydraulic and other controls
- Has friends who do 3DP clay extrusion + kiln
1/30/2018
CAD test debrief SCORE 85%
Installing Linux 5 minutes
I had used virtual box to load the OSE linux image. This was a very familiar task for me I do often on the job.
Learning FreeCAD (Most Difficult) - 8 hours
- I had issues finding the "planer constraints". when I tried to rotate a part, I was locked in the x,y axis and did not know why; took some searching to find. - Otherwise, I found freecad accomplished many tasks differently than AutoCAD or Sketchup, with which I am most familiar. The use of separate 2d "sketches" and embedding them to faces was similar to certain aspects of AutoDesk.
Documenting your work - 2 hours
-I have used wiki's from time to time. Took a bit to re-learn the "red Text" concept that a new page is made as a link from a prior page. All content is linked.
-Had issues getting vokoscreen working, Resume functions did not work for that application. When I went to shorten my video, kdenlive was limited to 2000% speed increase, keeping my video at over 30 seconds.
File:TakacsOSECADTest TRY1.mp4
1/28/2017
Kdenlive dosn't allow speeding a video beyond 2000%. My capture was 30 minutes log, so I'm left with around a minute video. Either I find some creative way to speed up further, cut, or I need to redo the test with a "time limit"
Attached is the video I have so far, which is a minute or so long instead of the required 30 seconds.
Viewing the video, it also did not render properly. Checking this file I made from memory, I appear to of made some errors on the part layout. I'll redo the cube and shoot to do it in under 20 mins.
File:TakacsOSECADTest TRY1.mp4
1/27/2017
-Created this log entry and completed recording of the CAD test. This time, I was able to get vokoscreen to behave and successfully stored the video! now to learn how to edit it to the 30 second version and add the music track.
-Here is the YouTube Video of my full speed CAD test
https://www.youtube.com/watch?v=MvDN6mBj5Ic&feature=youtu.be
-Here is the file for the CAD test
1/12 to 1/26/2017
-Focused on installing OSE linux to a Virtual Box image to start working in freecad -Worked on learning freecad ~4days / 8 hours Initially, I had issues rotating objects until I learned how to use the planer constraint tool - I was locked to only a certain axis. I also took plenty of time understanding constraints and how to use them
-Created the cube several times. Vokoscreen would not start and stop correctly, so several recordings were lost
