CEB Press/Manufacturing Instructions/Soil loading drawer: Difference between revisions
| Line 35: | Line 35: | ||
*a) Lay the spacer tube(S24) on top of the press plate(S26), align the sides and make the back edge flush. | *a) Lay the spacer tube(S24) on top of the press plate(S26), align the sides and make the back edge flush. | ||
{{Warning|Ensure all edges are tight and squared; this piece is critical, it must be a uniform height throughout the entire item. Grind off any imperfections.}} | {{Warning|Ensure all edges are tight and squared; this piece is critical, it must be a uniform height throughout the entire item. Grind off any imperfections.}} | ||
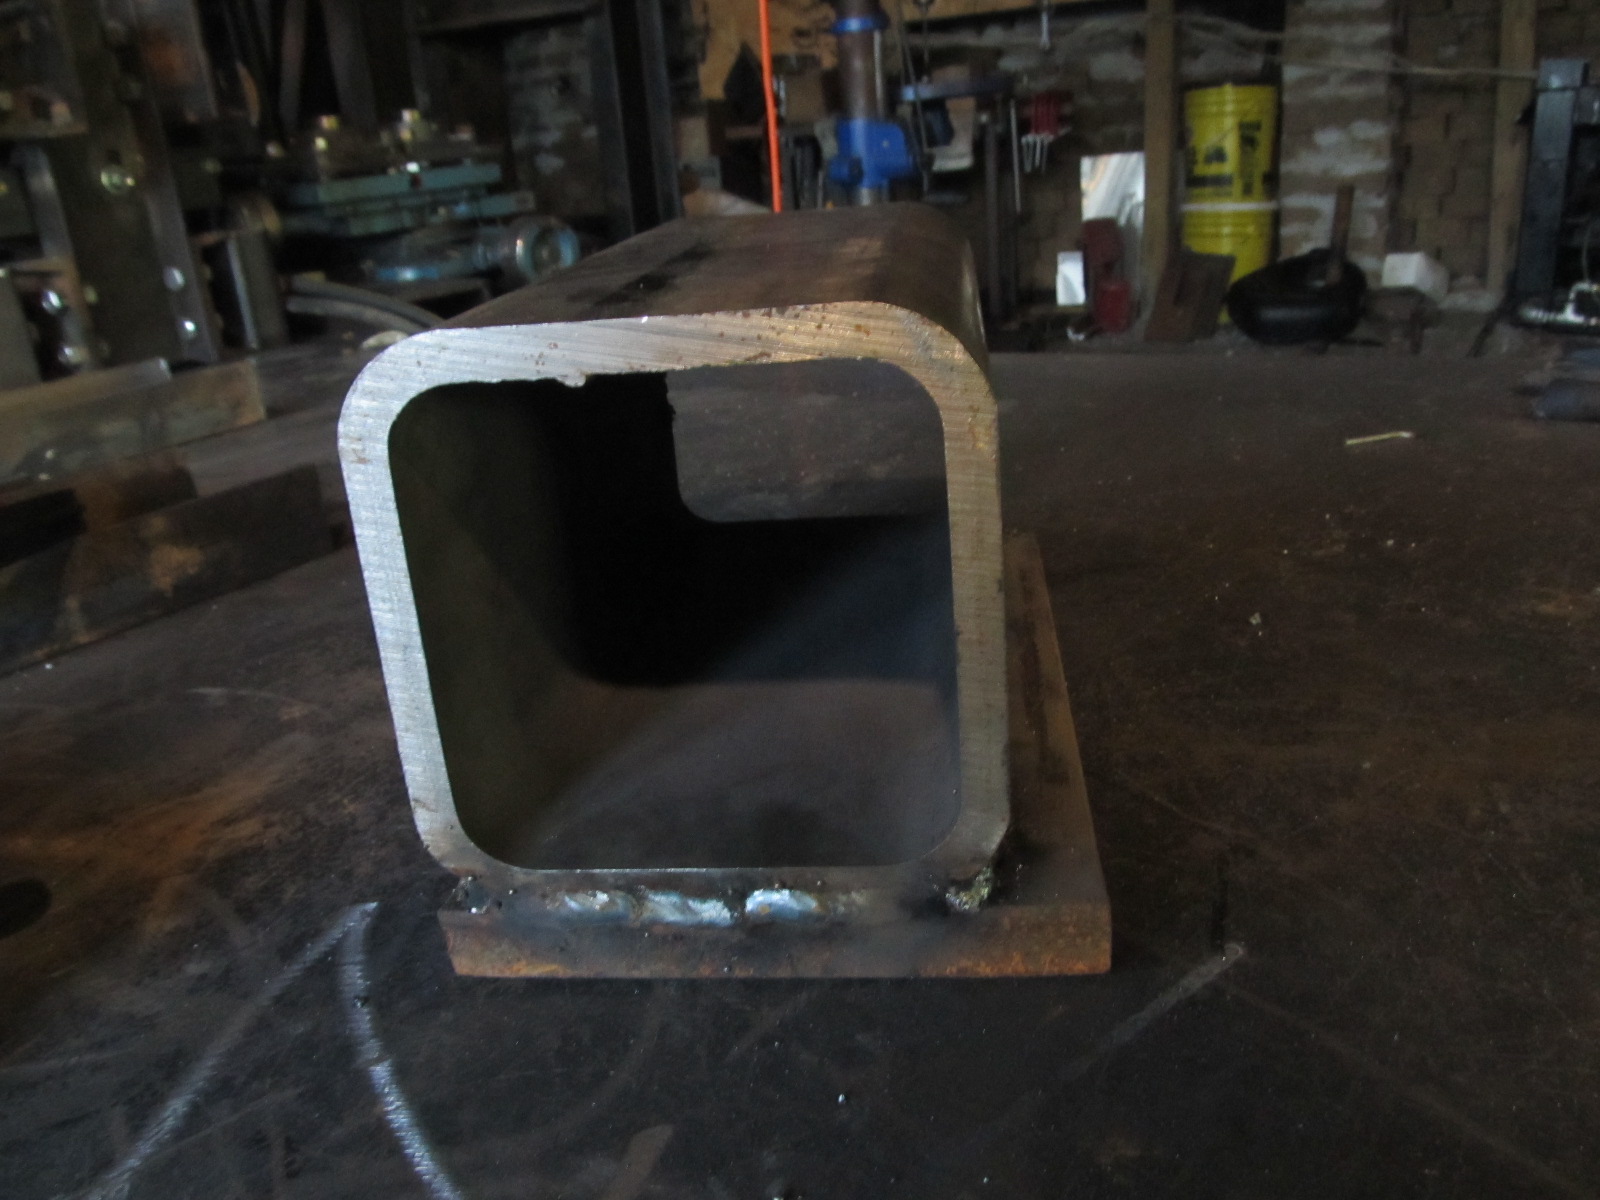
*b) Tack weld the two together in many places (at least 3 on each side) to ensure nothing will warp.[[Image: | *b) Tack weld the two together in many places (at least 3 on each side) to ensure nothing will warp.[[Image:Tubepress.jpg]] | ||
**Double check everything for squareness!! | **Double check everything for squareness!! | ||
*c) Weld the two together on all edges where they touch. | *c) Weld the two together on all edges where they touch. | ||
Revision as of 20:18, 21 August 2011
Main > Housing and construction > CEB Press > CEB press building instructions
Tools Required
Materials Required
| ID | Quant | Type | Length | Total | Name | Detail |
Diagrams
Drawer Parts

Drawer Assembly Step 1

Drawer Assembly Steps 2-4

Drawer Assembly Steps 5, 6

Drawer Assembly Step 11

Fabrication Steps
(note: part numbers refer to the recently-published parts list on the Bill of Materials page)
Step 1: Weld Press Plate and Spacer Assembly:
- a) Lay the spacer tube(S24) on top of the press plate(S26), align the sides and make the back edge flush.
![]() Warning: Ensure all edges are tight and squared; this piece is critical, it must be a uniform height throughout the entire item. Grind off any imperfections.
Warning: Ensure all edges are tight and squared; this piece is critical, it must be a uniform height throughout the entire item. Grind off any imperfections.
- b) Tack weld the two together in many places (at least 3 on each side) to ensure nothing will warp.
- Double check everything for squareness!!
- c) Weld the two together on all edges where they touch.

![]() Hint: It is a good idea to weld in 1” or 2” increments, skipping around to different places to prevent warpage.
Hint: It is a good idea to weld in 1” or 2” increments, skipping around to different places to prevent warpage.
- You will need to weld multiple layers where the tubing is rounded.
- d) Grind off any weld which prevents the vertical support(S31) from being square and flush with both the spacer tube and the press plate.
- e) Weld the vertical support to the press plate and spacer tube assembly.
- f) Grind down the welds on the open end of the tube so they are flush with the rest of the tube.
Step 2: Tack Sides
- a) Lay the spacer/press plate assembly down so the press plate is touching the table.
- b) Align side pieces(S29) with spacer and press plate assembly. Insure the two are square vertically and horizontally with the spacer, and that everything is touching the table.
![]() Hint: It might help to use angle iron tacked to your table and the sides, so it insures they are vertically square. This also makes it a bit easier to align everything else.
Hint: It might help to use angle iron tacked to your table and the sides, so it insures they are vertically square. This also makes it a bit easier to align everything else.
- Also, it may help to use paper shims between the sides and the tube to properly space them.
- c) Tack the sides to the tube on all sides in multiple places except where it is touching the table.
Step 3: Tack Roof, Inner Rails
- a) Place the roof(S25) and inner rails(S27) in their respective places. Insure inner rails are perfectly parallel (varying no more than a 16th of an inch) and square throughout the entire length.
- b) Tack them in multiple places except where they are touching the table.
Step 4: Tack outer rails (S28)
![]() Warning: Insure they are perfectly parallel, otherwise they will leave the roller guides. Insure it varies no more than 1/16" over the entire length.
Warning: Insure they are perfectly parallel, otherwise they will leave the roller guides. Insure it varies no more than 1/16" over the entire length.
![]() Hint: Use the paper shims for this.
Hint: Use the paper shims for this.
- Tack them in multiple places except where they are touching the table.
Step 5: Tack back
- a) Weld a few 1” or so long welds along each of the top seams on the previously assembled parts.
- b) Grind off any outstanding tacks on the top surface, so the entire surface is flush.
- c) Flip the drawer and place the back piece (S22).
- d) Tack the back piece in a few spots.
Step 6: Weld entire drawer
![]() Hint: Weld short lengths at a time and jump around a lot to minimize warping.
Hint: Weld short lengths at a time and jump around a lot to minimize warping.
- All the seams should be completely welded except the difficult to reach places between the inner and outer rails.
Step 7: Grind the entire drawer flush
![]() Warning: There cannot be any outstanding bumps or welds anywhere; the drawer will be sliding in and out of a tight spot and bumps will catch on the frame crossmembers.
Warning: There cannot be any outstanding bumps or welds anywhere; the drawer will be sliding in and out of a tight spot and bumps will catch on the frame crossmembers.
Step 8: Weld the tongue in place to the back of the drawer, insuring it is square and centered.


