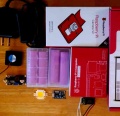
Part Library for the Raspberry Pi Tablet
Working Doc
Part Library


Tablet Final Assembly - FreeCAD -File:Raspiassy.fcstd
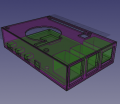
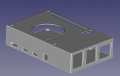
Raspberry Pi in case. - FreeCAD -File:Piincase.fcstd
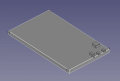
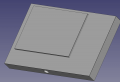
TouchScreenPrimitive - size:nullkb - FreeCAD -File:TouchScreenPrimitive.fcstd
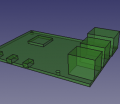
Raspberry Pi 4 Board - FreeCAD -File:Raspi.fcstd
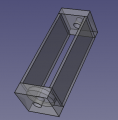
1 Battery Power Pack - FreeCAD -File:1batpack.fcstd
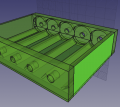
5 Battery Power Pack - FreeCAD -File:5batpack.fcstd. FreeCAD -File:5batpack.stl
PiTabletConcept - FreeCAD -File:PiTabPrimitive.fcstd
Pi Base + External Ports WIP - size:nullkb - FreeCAD -File:PiboardandMount.fcstd
Add-On Modules
- Cordless welder battery pack that also serves as a long-life battery add-on
Build
- Parts start - [1]
Software
Android options
Industrial Android on rPi: https://emteria.com/ Not sure it might be NC, or maybe that's just the service layer they are selling on top of what seems to be mostly a business use case
Keyboard options
>sudo apt-get install matchbox-keybaord This is an OK keyboard.. Functional, but always-on-top messes up the other windows. It looks like it would function better in portrait mode, but on Raspbian install, the touchscreen doesn't work in portrait.
Raspbian installation
Based on the NOOBS install: https://www.raspberrypi.org/downloads/noobs/
SD card must be FAT formatted, at least 8GB and preferably 16GB: https://www.raspberrypi.org/documentation/installation/noobs.md
It's handy to have a usb keyboard and mouse to navigate the install process once the prepared SD card is on the rPi.
Cura
I had issues trying to run Cura on the Raspbian, it kept crashing. It seems like someone has compiled a version and posted it in the ultimaker forums that will run on the RPi processor: https://community.ultimaker.com/topic/28746-experimental-cura-build-for-raspberry-pi-4-now-available/
Downloads: https://www.dropbox.com/sh/s43vqzmi4d2bqe2/AAADdYdSu9iwcKa0Knqgurm4a?dl=0
Install procedure:
Once the appimage file is downloaded (I used Cura-mb-master-armhf-20191209.AppImage), make the file executable
> chmod +x Cura-mb-master-armhf-20191209.AppImage
Then you just need to run the app image file:
> ./Cura-mb-master-armhf-20191209.AppImage
Camera
From https://projects.raspberrypi.org/en/projects/getting-started-with-picamera/3
Once it's plugged in, Camera just needs to be toggled on in the config -> "interfaces"
Once restarted, you can take a picture like this:
> raspistill -o Desktop/image.jpg
This will activate the camera module and show a view finder, until you hit "Enter" and it saves a picture to the specified location.