Terminal Block: Difference between revisions
(→Steps) |
(→Steps) |
||
| Line 30: | Line 30: | ||
[[File: HDPEPlate.jpg|100x100px]] | [[File: HDPEPlate.jpg|100x100px]] | ||
[[File: CutHDPEPlate.jpg|100x100px]] | [[File: CutHDPEPlate.jpg|100x100px]] | ||
[[File: DrilledHDPEPlate.jpg|100x100px]] | [[File: DrilledHDPEPlate.jpg|100x100px]] | ||
Revision as of 19:59, 9 October 2012
Introduction
Design Goals and Paths
The objective is a redeployable, fault-protective series of wire clamp pairs (each pair being electrically conductive).
Insulator Frame: HDPE
Conductive Bridge: Aluminum 6061T6 (abundant aluminum, easy to machine) (note: watch out for galvanic corrosion!)
Fastening Screw: Stainless Steel 304, socket head cap screw
Materials
Stainless Steel M5x0.8, 16mm Lg Socket Head Cap Screws
HDPE Natural White 0.06" x 12" x 24"
HDPE Natural White 1/2" x 12" x 24"
Aluminum 6061T6 1/8" x 1/2" x 72"
Steps
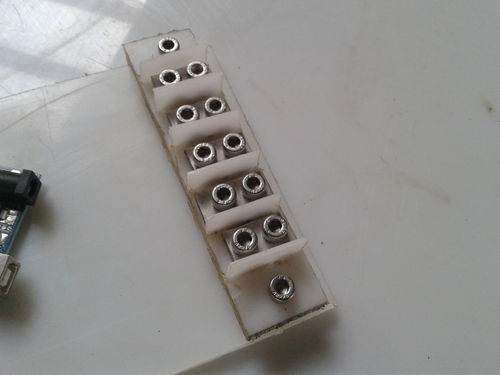
You'll want to cut the thick HDPE to size, ex. 1/2" x 1" x Length Now drill the thick HDPE piece with a 4.5mm diameter drill bit for the screw terminal holes and a 5.5mm diameter bit for the mounting holes Tap the screw terminal holes with an M5x0.8 tap
Also cut the thin HDPE to size, ex. 0.06" x 1/2" x Length (ex. 1")
Also cut the aluminum flat to drilling size, ex. 1/8" x 1/2" x mountable length (ex. 9") for mounting onto a vise while leaving space to mount onto a bandsaw for cutting out the small pieces Also drill the aluminum pieces with the 5.5mm diameter bit Cut the aluminum lengths to use size ex. 1/8" x 1/2" x Length (ex. 1") for each conductive pair
Mark the positions and and melt the thin HDPE onto the thick HDPE to divide each screw terminal pair
Screw on the aluminum pieces
Action Package
Contact Us
Yoonseo Kang - ykang404@gmail.com


