CEB Press/Manufacturing Instructions/Arms - secondary: Difference between revisions
Jump to navigation
Jump to search
No edit summary |
No edit summary |
||
| (36 intermediate revisions by 4 users not shown) | |||
| Line 1: | Line 1: | ||
{{Category=CEB press building instructions}} | {{Category=CEB press building instructions}} | ||
[[Image:Secondaryarms.jpg|400px]] | |||
<html> | |||
<iframe src="http://sketchup.google.com/3dwarehouse/mini?mid=4c317c20fdb7bac61211da1f85706ccd&etyp=sw&width=400&height=300" frameborder="0" scrolling="no" marginheight="0" marginwidth="0" width="400" height="300"></iframe> | |||
</html><br/> | |||
[[Image:2ndarmweldover.png|800px]] | |||
= | =Part Information= | ||
The secondary arms connect the primary arms to the legs to support the structure. | |||
=Tools Required= | |||
*Cutting Torch | |||
*Angle Grinder | |||
*Welder | |||
=Materials Required= | |||
*[2] Steel Angle 4" A x 6" B x 1/2" Thickness x 72" Length | |||
*Steel Plate 3" x 3" x 1/2" | |||
*[8] Leg Holders | |||
== Fabrication Steps == | == Fabrication Steps == | ||
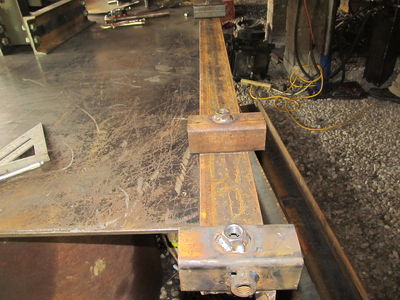
*Punch the holes in each arm. They are symmetrical. | |||
*Place the leg holders in their proper locations. | |||
*They go on the 4" side of the angle. | |||
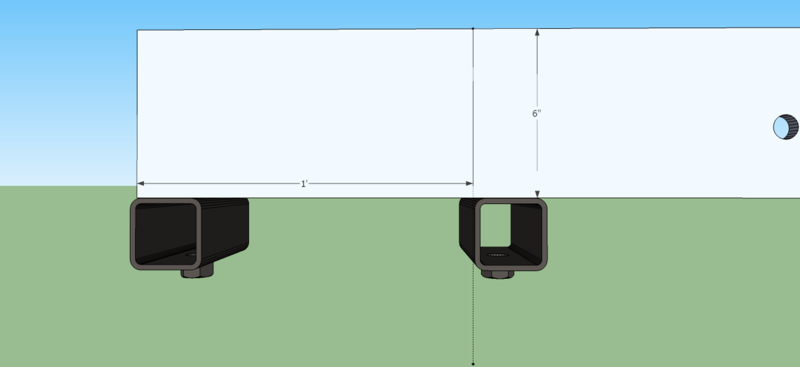
*They are symmetric. See Diagram for placement on each end. | |||
*Make sure they are square with the angle iron and centered vertically. | |||
*Weld them to the angle. | |||
Latest revision as of 00:59, 23 December 2011
Main > Housing and construction > CEB Press > CEB press building instructions
Part Information
The secondary arms connect the primary arms to the legs to support the structure.
Tools Required
- Cutting Torch
- Angle Grinder
- Welder
Materials Required
- [2] Steel Angle 4" A x 6" B x 1/2" Thickness x 72" Length
- Steel Plate 3" x 3" x 1/2"
- [8] Leg Holders
Fabrication Steps
- Punch the holes in each arm. They are symmetrical.
- Place the leg holders in their proper locations.
- They go on the 4" side of the angle.
- They are symmetric. See Diagram for placement on each end.
- Make sure they are square with the angle iron and centered vertically.
- Weld them to the angle.

