KiCAD Guide: Difference between revisions
Jump to navigation
Jump to search
(Add Table of Contents for KiCAD Guide) |
|||
| (3 intermediate revisions by one other user not shown) | |||
| Line 1: | Line 1: | ||
=Table Of Contents= | |||
#[[KiCAD_Guide|This Page]] | |||
#[[KiCAD_Guide2|Placing A Part]] | |||
#[[KiCAD_Guide3|Changing Colour, Background, and General Settings]] | |||
#[[KiCAD_Guide4|Creating Parts]] | |||
#[[KiCAD_Guide5|Saving Components into a New Library]] | |||
=Open KiCAD= | =Open KiCAD= | ||
| Line 10: | Line 17: | ||
=Create an Electronic Schematic= | =Create an Electronic Schematic= | ||
Click on the symbol for EESchema, the schematic editor: | |||
[[Image: KiCADSchema.png]] | |||
You should now see this: | |||
[[Image: KiCADSchema2.png]] | |||
=Next= | |||
http://opensourceecology.org/wiki/KiCAD_Guide2 | |||
Latest revision as of 14:23, 26 June 2012
Table Of Contents
- This Page
- Placing A Part
- Changing Colour, Background, and General Settings
- Creating Parts
- Saving Components into a New Library
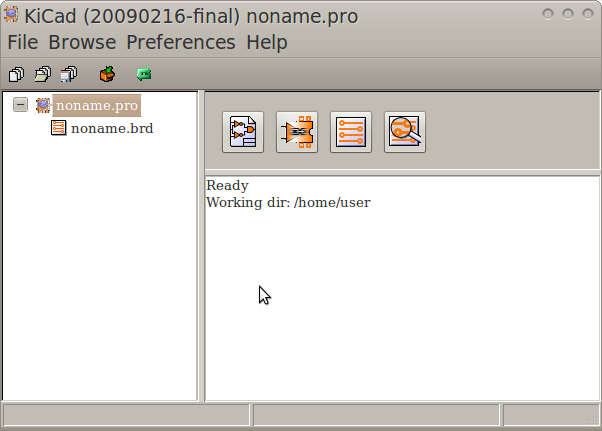
Open KiCAD
Refer to the end of the KiCAD download and install instructions:
http://opensourceecology.org/wiki/KiCAD
You should now see this:
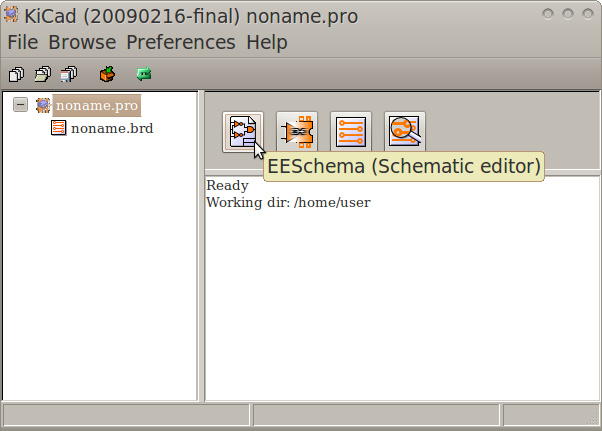
Create an Electronic Schematic
Click on the symbol for EESchema, the schematic editor:
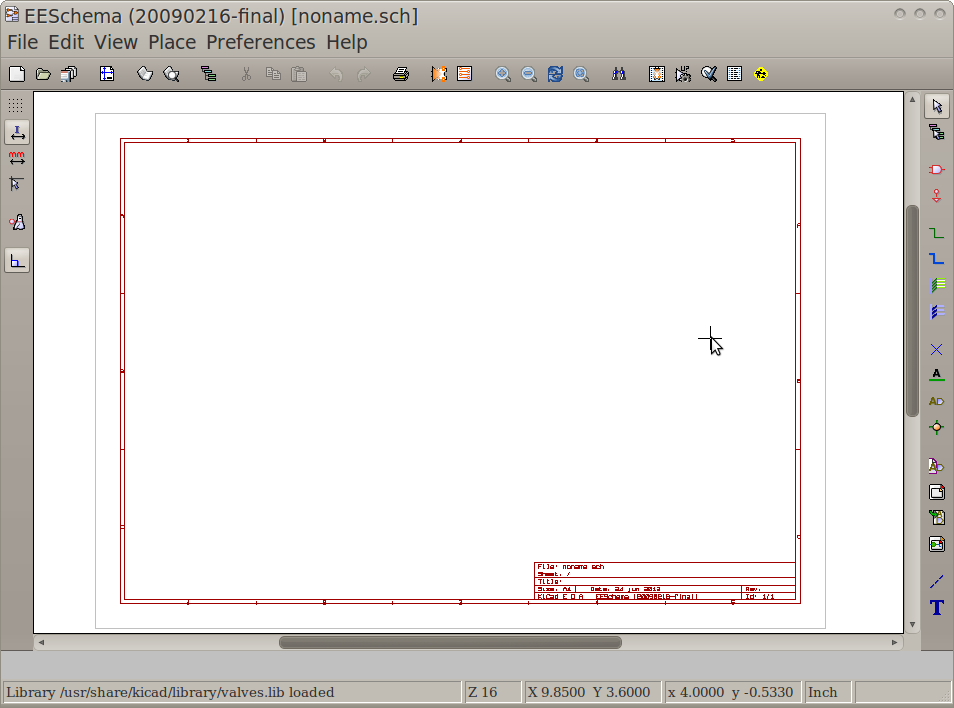
You should now see this:


