Negligiblek's Pyrolysis Empirical Model: Difference between revisions
Negligiblek (talk | contribs) |
Negligiblek (talk | contribs) |
||
| Line 5: | Line 5: | ||
=Unscaled Drawing of Model= | =Unscaled Drawing of Model= | ||
[[image:empiricalPyrolysisModel.png|200px]] | |||
=Photos of Manufacture and Assembly= | =Photos of Manufacture and Assembly= | ||
Revision as of 20:09, 1 April 2009
Model for Empirical Knowledge
I have zero experience with pyrolysis. Since Marcin asked me to lead this project, I realized I'd need to know what I was talking about when I attempted to lure and retain more experienced Pyrolysis Collaborators.
I did not study anything or look at many designs before I began. I simply wanted to build a model and see what issues arise which others have experienced but don't really list in their experimental findings. Nor did I do any calculations of any sort. I winged it. If it blows up on me, I'll do more homework (call me Sir Francis as in Bacon: hopefully not burnt bacon).
Unscaled Drawing of Model
Photos of Manufacture and Assembly
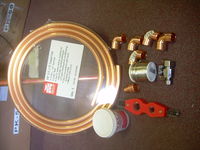
Partial Collection of Parts March 21st, 2009
Missing from the parts above are:
- 1' 2" dia copper pipe length;
- 2" Cap, 2" Screw Cap;
- Unknown copper pipe length for feed back loop
- Water basin
- Water basin lid
- Water basin lid gasket
Not shown in pictures is the MAPP gas canister and torch head.
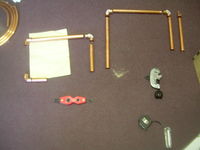
- The two right most vertical pipes will go through the water basin lid.
- The right most vertical pipe will be inside the water basin but not submerged in water and will have 10' of 1/2" copper tubing on the top end.
- The other end of the 1/2" copper tubing will terminate in the 1/4 turn shut off valve.
- On the far left side of the picture, one vertical pipe is missing; hence the hanging elbow.
- The next two left most (and present) vertical parts will connect into the missing 1' x 2" dia. copper pipe
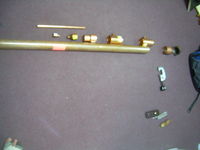
March 29th, 2009 Obtained the following parts:
- 36" of 2" dia copper pipe
- Two 2" to 3/4" tees
- 2" to 1.5" coupler
- 1.5" to 1/2" coupler
- 5' of 1/2" copper pipe
- 1/2" to 3/4" coupler
- 2" copper threaded end
- steel cap
- teflon tape
Obviously, these are not the parts I had intended. Being in a hurry, I made do with what the hardware store had in supply.
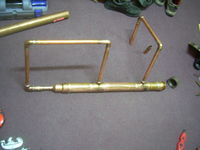
March 29th, 2009 Assembled All parts with the exception of:
- water basin
- water basin lid
- Did not solder cooling tube to outlet
- Did not crimp 1/4 turn valve on to cooling tube
No, the soldering doesn't look pretty and I didn't try to clean it up before I shot it either. It does hold air though. The hunt for a good water basin continues.


