Dairy Milker/Manufacturing Instructions: Difference between revisions
Jump to navigation
Jump to search
No edit summary |
No edit summary |
||
| Line 15: | Line 15: | ||
#Install barb coupler and seal with silicone | #Install barb coupler and seal with silicone | ||
<html><img src="https://docs.google.com/drawings/pub?id=10Pq42mA7_E7_kINm72rdTR_R2TufWdhMH4HVS2kDPLI&w= | <html><img src="https://docs.google.com/drawings/pub?id=10Pq42mA7_E7_kINm72rdTR_R2TufWdhMH4HVS2kDPLI&w=200&h=300"></html> | ||
[https://docs.google.com/drawings/pub?id=10Pq42mA7_E7_kINm72rdTR_R2TufWdhMH4HVS2kDPLI&w=960&h=720 edit drawing] | [https://docs.google.com/drawings/pub?id=10Pq42mA7_E7_kINm72rdTR_R2TufWdhMH4HVS2kDPLI&w=960&h=720 edit drawing] | ||
Revision as of 14:20, 20 December 2012
Fabrication Diagrams
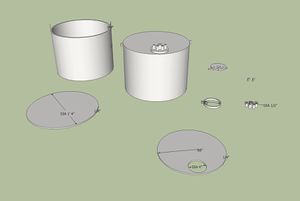
Milk Bucket
- Milk Bucket Fabrication Diagram:
- Fabricate milk bucket
- Install gaskets
- Install tubing, pulsator, check valve
Teat Cups If you bought them prefabricated, install inflations and connect to milk and vacuum tubes coming from the milk bucket.
If you are fabricating them:
- Remove plungers from 600 cc syringe
- Drill vacuum hole
- Install barb coupler and seal with silicone
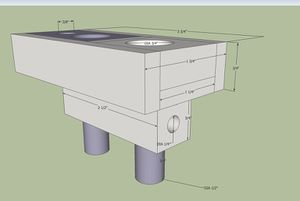
Pulsator
- Pulsator Fabrication Diagram:
- Fabricate pulsator body
- Install gasketry
- Assemble solenoids
- Connect tubing
Vacuum pump
- Install vacuum regulator (if necessary)
- Connect tubing to milk bucket

