Dairy Milker/Manufacturing Instructions: Difference between revisions
Jump to navigation
Jump to search
No edit summary |
No edit summary |
||
| Line 8: | Line 8: | ||
#Install tubing, pulsator, check valve | #Install tubing, pulsator, check valve | ||
'''Teat Cups''' | '''Teat Cups''' | ||
If you bought them prefabricated, install inflations and connect to milk and vacuum tubes coming from the milk bucket. | *If you bought them prefabricated, install inflations and connect to milk and vacuum tubes coming from the milk bucket. | ||
*If you are fabricating them: | |||
If you are fabricating them: | |||
#Remove plungers from 600 cc syringe | #Remove plungers from 600 cc syringe | ||
#Drill vacuum hole | #Drill vacuum hole | ||
Revision as of 16:06, 20 December 2012
Fabrication Diagrams
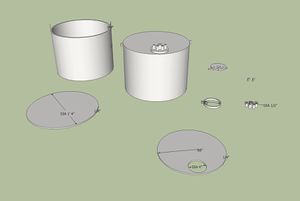
Milk Bucket
- Milk Bucket Fabrication Diagram:
- Fabricate milk bucket
- Install gaskets
- Install tubing, pulsator, check valve
Teat Cups
- If you bought them prefabricated, install inflations and connect to milk and vacuum tubes coming from the milk bucket.
- If you are fabricating them:
- Remove plungers from 600 cc syringe
- Drill vacuum hole
- Install barb coupler and seal with silicone
- Connect tubing
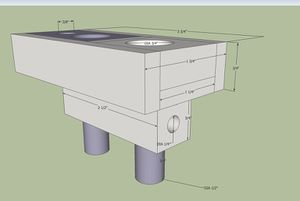
Pulsator
- Pulsator Fabrication Diagram:
- Fabricate pulsator body
- Install gasketry
- Assemble solenoids
- Connect tubing
Vacuum pump
- Install vacuum regulator (if necessary)
- Connect tubing to milk bucket

