Earth Plaster

Rough Earth Plaster for Cordwood Wall
by Travis Toon
Purpose
To give the walls a nearly smooth surface in preparation for final plaster. Final plaster does not perform well over gaps deeper than 1 inch or shallower than 1/4 inch.
Ingredients
(same ingredients as cob)
- 5 gallons of submerged mud from the duck pond

- 5 gallons of crushed limestone (same volume of sand could be substituted here)
- half a wheel barrell of straw (fluffed not compressed)
Making the Plaster
Chose a work area that was flat and shady Cleared work area of large rocks and sticks Spread tarp Dumped mud and lime on a tarp Stomped and rolled the mixture until it became homogenous
Stomped the crushed limestone and mud together

When the pile became flat like this, it was time to roll it over.

Rolled the pile by pulling the tarp

When the act of rolling produced a nice "burrito" shape, it seemed to coincide with the mixture being homogenous.

Added straw gradually as I continued to stomp and roll

Covered the plaster with the tarp to keep it fresh while I prepped the wall
Note: I kept the mixture as dry as possible. But at one point I had to add some water because it got so hard that I couldn't stomp it
Preparing the Wall
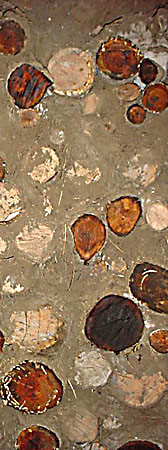
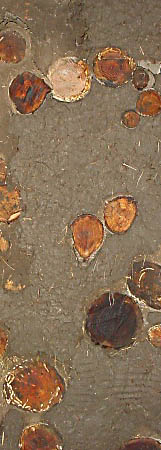
Determined which ends to keep visible (keepers) and which to bury
Scraped the keepers with a trowel 
Brushed the keepers with a wire brush 
Oiled the keepers with linseed oil 
Pre-soaked the wall heavily with a spray bottle (Critical - to allow plaster to stick)
Filled a five-gallon bucket half full with plaster and brought it over to the wall
Applying Rough Plaster
Objectives:
- To fill any gaps that were more than 1" deep
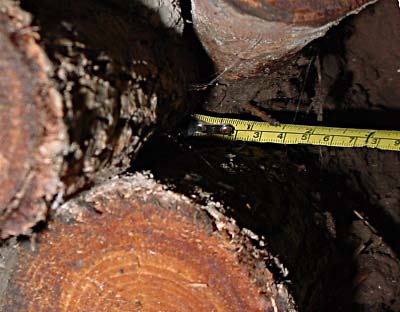

- To cover all the rounds except the keepers


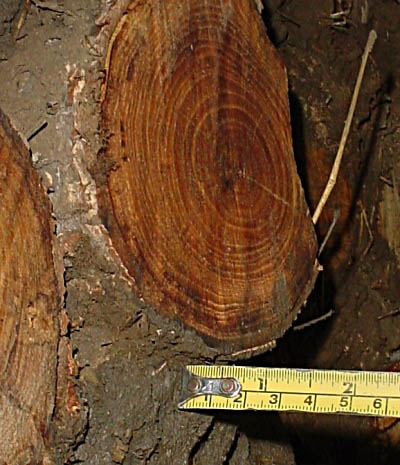
- To keep the rough plaster 1/2 inch back from the keepers' edges so that the final plaster will finish flush

My understanding is that the difference between "cob" and "rough plaster" is how they are used. When used structurally it is referred to as "cob" and when used cosmetically it is referred to as "rough plaster".
Most important factor: Spray as you go. In between each handful of plaster I re-soaked the wood and cob in the immediate area where that particular handful of plaster would be placed.
The motions necessary to work the plaster onto a vertical surface naturally leaves a smooth surface. I left dibbles in the surface of the plaster so that the final plaster will have plenty to grab onto. 
Recommendations / Suggestions / Ideas to try
Select keepers well in advance and finish them with lacquer before attempting any rough plastering. Lacquer is better than oil because it protects wood against boring beetles, does not have to be re-applied every six months, and provides a smooth surface which is easier to clean. Dirty keepers are hard to clean and often too difficult to clean completely. Choosing the keepers and lacquering them before plastering could help with these issues.
Ask lumber companies for the tarps that they throw away every day - these are great for stomping plaster
In general, choose keepers based on how far they stick out. Keepers that protrude farther than the surrounding rounds are the easiest to plaster around.
Insect Protection and Fungal Decay - for extra longevity and if moisture can seep in from bottom, Borax or some other fungicide/pesticide may be an optional ingredient.
Rita Gatti,a second generation, professional woodcarver, suggests using a "flap wheel" to clean the ends, followed by a quick pass with a blow torch to burn off any sawdust and splinters.
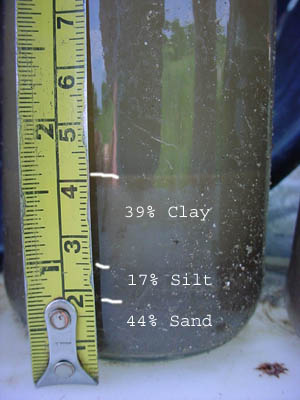
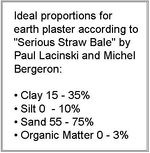
Here are the ideal proportions for earth plaster according to "Serious Straw Bale" by Paul Lacinski and Michel Bergeron:
- Clay 15 - 35%
- Silt 0 - 10%
- Sand 55 - 75%
- Organic Matter 0 - 3%
When doing research, keep in mind these terms which are all synonyms: cordwood, stackwood, stovewood, stackwall, log end.
Reading Suggestion: "Cordwood Building: The State of the Art" by Rob Roy, 2003.
Finish Earth Plaster to cover interior of cordwood / earthbag structure
Attempt 1
Ingredients

- 1500 ml sifted soil, hydrated to a gel/paste like consistency. Gathered subsoil (16 inches deep) from near the well. Hydrated the soil and sifted it using 1/8" screen.

- 200 ml fresh cow manure. So fresh there was still steam rising off the top. I am told freshness is not necessary, but that composted manure is worthless.
- 180 ml wheat paste. Added whole wheat flour and cold water in a pan. Stirred together well. Then heated until pasty. Add immediately. I ate the leftovers which were quite tasty.
- White flour is preferred (remove this from the global food supply, and perhaps replace it with whole flour for some nutrition?)
- Handful of micro straw. This particular grass was found above the tent site 10-15 ft short of the property line near the goat fence. Chopped into 1" lenghths. Did not include roots or seed stalks.
- Dry cattail fluff is the elite choice, if available
Procedure

- Mixed together above ingredients by hand until homogenous.
- Chose an area that was relatively smooth and void of large holes. Areas with holes much larger than 2" wide by 1" deep should probably be prepared with a rough plaster mix, i.e. cob.
- Pre-soaked (spray bottle) the area to be plastered. Waited 20 minutes for water to penetrate old cob.
- Made a slurry. Took 10% of the plaster and mixed it with water in a separate bowl so that it would go on very thin.
- Application of slurry makes following plaster application adhere to the wall much easier.
- Re-wet the area immediately before applying slurry.
- Applied (smeared) slurry with hand approximately 1/16" thick.
- Applied plaster about 1/2" thick by hand over the slurry. The plaster was very easy to work with.
- Troweled the area. The tool for this was improvised from a piece of 6" diameter PVC pipe fitted with a 1" PVC handle.

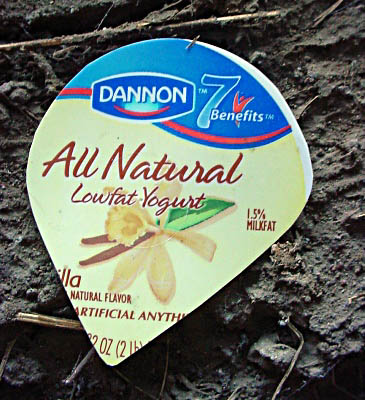
- 12 hours later smoothed out the trowel lines. The tool for this was a lid from a medium sized yogurt container. Used a pair of scissors to cut off the outer edge of the lid.
- Do this a considerable amount of time after applying plaster - but while the plaster is still moldable
- If the plaster is too wet it will stick to the smoothing tool

Results
Major cracking after 36 hours - do not use this plaster. The cracks could be the result of not enough sand, too much water, or both. 
Attempt 2
Ingredients
- 800 ml sifted soil. Gathered soil from edge of the duckpond. Since the soil was naturally hydrated, it was easy to sift using the 1/8" screen.


- 800 ml sifted sand. Used the same 1/8" screen for sifting.
- 1/8 inch screen is rather large, but there were no problems with the sand being too big (too rough) in the plaster
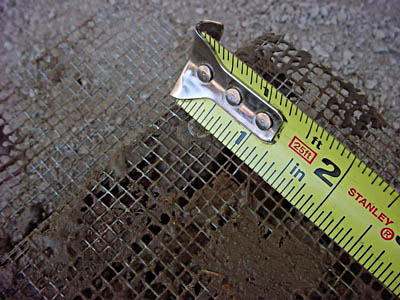
- 1/8 inch screen is rather large, but there were no problems with the sand being too big (too rough) in the plaster

- 200 ml fresh cow manure.
- 180 ml wheat paste. Added whole wheat flour and cold water in a pan. Stirred together well. Then heated until pasty. Add immediately.
- Two handfuls of micro straw. This particular grass was found above the tent site 10-15 ft short of the property line near the goat fence. Chopped into 1" lenghths. Did not include roots, but got lazy and let some seed stalks in.
Procedure
- Mixed together above ingredients by hand until homogenous.
- Chose an area that was relatively smooth and void of large holes. Areas with holes much larger than 2" wide by 1" deep should probably be prepared with a rough plaster mix, i.e. cob.
- Pre-soaked the area to be plastered. Waited 20 minutes for water to penetrate old cob.
- Made a slurry. Took 10% of the plaster and mixed it with water in a separate bowl so that it would go on very thin.
- Re-wet the area immediately before applying slurry.
- Applied (smeared) slurry with hand approximately 1/16" thick.
- Applied plaster about 1/2" thick by hand over the slurry. The plaster was very easy to work with.
- Troweled the area. The tool for this was improvised from a piece of 6" diameter PVC pipe fitted with a 1" PVC handle.
- Smoothed plaster to remove trowel lines after 18 hours. This tool is good for smoothing out trowel lines and other roughness. The point is good for getting in corners.

- Buffed plaster after 36 hours. Buffing is done by rubbing the disk in a circular pattern. If the plaster is too soft, the edge of the buffer will gouge the plaster. Buffing makes it shiny smooth.
- Buffing is done with the same tool as smoothing - just the usage technique is different
- Buffing is done with the same tool as smoothing - just the usage technique is different

Attempt 3
- Three variables in this attempt are 1) Top soil 2) Plastering over agricultural lime plaster (by outside of main earthbag home door), and 3) Very dry mix.
- I wanted to try the topsoil due to its lighter color.
- The third variable was unintentional. The plaster was so stiff that I had to "pat" it onto the walls instead of smearing it like normal.
- The most time consuming part of this attempt was sifting the mud. It would have been easier if I had made it wetter.
Ingredients
- 3200 ml of sifted topsoil. If you were to draw a line from the middle of the green house to the road, this topsoil was taken from the midpoint of that line. I had to let it soak for 48 hours before it was workable.

- 3400 ml of sifted sand.
- 640 ml of fresh manure.
- I didn't add wheat paste because I don't have white flour. White flour has a much higher gluten concentration I am told by several sources. I think using whole wheat flour may be a waste of time and food.
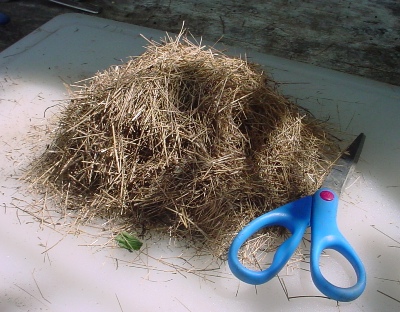
- A bunch of chopped micro-straw. I took a picture since it is difficult to measure micro-straw.

Procedure
Same as before. Small cracking after 12 hours. Aborted. Best results is Attempt #2.

Attempt 4
The two main objectives for this attempt were to find an even brighter colored plaster and to experiment with plastering around the ends of the cordwood.


Ingredients
- 1600 ml of sifted topsoil from the well site. This soil had to be soaked for 48 hours before it was workable.

- 1600 ml of sifted sand
- 320 ml of manure
- 320 ml of whole wheat paste