How to print your sketchup model in lulzbot Taz 3d printer
1- create your SketchUp model that you want to print
2- scale your model if it needs to be scaled
3- make sure that the part you want to print is grouped and is positioned in the manner you want the printer to print it. Incorrect positioning of your part will not enable you to print the part after you convert to gcode. For example: if you are printing a tube, the tube need to be standing up in SketchUp. See example : File:Tube with holes.skp
4- convert to stl format.
* You need to download a plugin to convert SketchUp files to stl format.
*The link for dowload can be found at Skp to stl export
After the file is downloaded: open SketchUp and click on the install extensions button. The button is found under Windows> Preferences > Extensions > Install Extension. Clicking this button will bring up a file browser window where you can can select skp_to_dxf.rbz from your harddrive, and SketchUp will then install it for you.
*To export your skp file to stl format
- Select the object you want to be 3d printed.
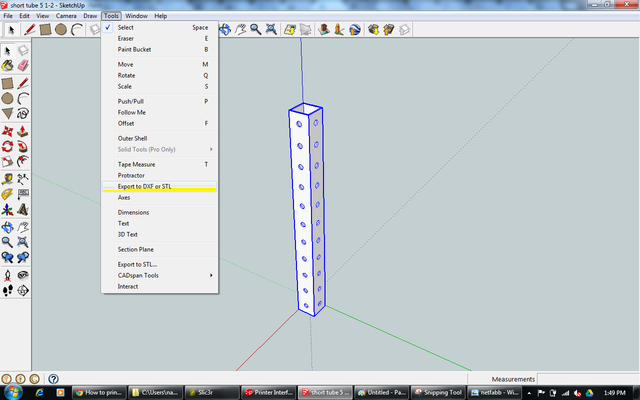
- Click on the drop down menu for “ Tools” and select “EXPORT TO DXF OR STL”
- Select you export unit, “inches” for example
- Select export format “stl”
- Select the desired location and name for your stl file. Note it may be necessary to type the extension “.stl” to the end of the name depending on what version you SketchUp you are using.
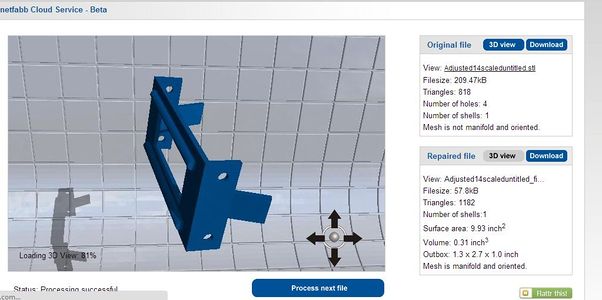
5- Most likely you will need to fix your stl file for a 3d print:
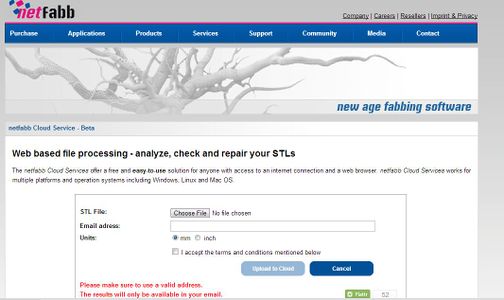
- Go to : netfabb stl files fix
- upload your file
- Make Sure you select the correct measurement "inches or mm"
- few seconds later you will receive an email with a link to your fixed stl file
- download your fixed stl file and save in your computer.
- or you can also download the netfabb application to fix your stl file stl fix
6- you will need to download the slic3r software that will enable you to export gcode files. The slice3r software can be downloaded from lulzbot.com slic 3r for windows
- after downloading the zipped file, unzip it to a desired location on your computer
- donwload all the configratios for slic 3r. slic 3r configurations
- Open slic3r, go to file > preference> select your mode as an expert
- Open slic3r and select the configration you want to use. For quick and simple print start with 35nzl_draft configuration. To load the configuration: Go to file > load configuration
- Go to fillament setting and change your extruder and bed temperature to 230, and 100 consecutively. Other option is to set both of them to zero, this way the print temperature will be whatever you set on the pronterface in the next step.
- after loading the configuration, open your fixed stl file by clicking add or dragging it.
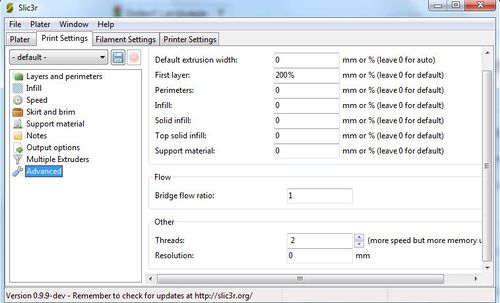
- To speed up the printing process, you can reduced the resolution of your 3d model. On slic3r, go to print setting>advanced> then scroll to the bottom of the page to change the resolution. it will perform a simplification on the XY plane after the model is sliced. You can set the resolution option to a value like 0.1mm. If you leave resolution to zero, no simplification will happen in Slic3r and the output G-code will reflect the full resolution of the original model.
- After loading the configuration and changing the resolution, you can click on "export gcode"
- Once you have your gcode file, you are ready to print.
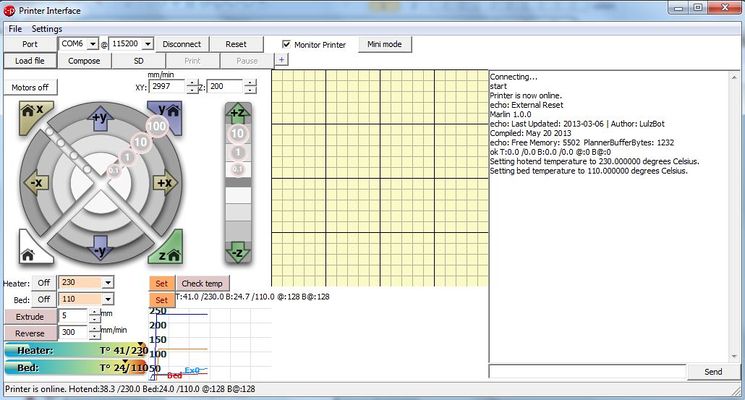
7- To print your model, you will need to download printrun. Printrun is a software that controls your 3d printer. printrun for windows.
- unzip your download printrun folder to a desired location and open pronterface.exe
- select your port. Once you plugin your printer, your computer will install it automatically in a specific port, and will let you know the port number. For example my port number was COM 6.
- connect to the printer by clicking on connect. Once you are coneected, pronterface will tell you that your printer is online.
- Set your bed and heater temperature.
- you can monitor your bed and heater temperature by clicking on "monitor printer"
- Load your gcode file by clicking on load file.
- Once your bed and heater reached the correct temperature, you are all set. Click on print and voila!
* for a quick guide see: 3d printing tutorial:
["https://www.youtube.com/embed//5JjRAlib2Tw" ]
 * for more infomration about printing with lulzbot Taz, please read:
File:Lulzbot taz user manual.pdf
