Temporary Hay House
Design
This little house is designed solely as a temporary shelter.
- It is quickly constructed.
- It uses components already on site.
- It is intended to be dismantled and its components incorporated in finishing another building project.
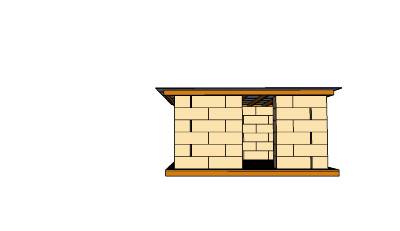
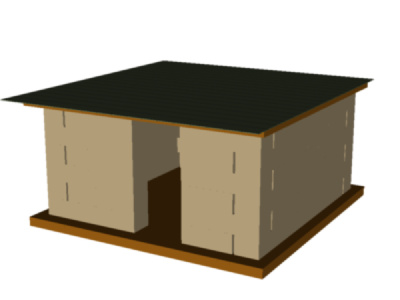
- The base is a 16'x16' prebuilt roof frame.
- The flooring is 2"x6"x16' dimensional lumber.
- The walls are stacked haybales.
- The roof is another 16'x16' roof frame covered with steel barn-roof panels
Components
- 3 16'x16' prebuilt roof frames. Building these modular roof frames is described in instructions for the Workshop and the Hab Lab.
- 37 2"x6"x16' beams. A stack of 2"x6"x16' lumber was here waiting for use in buildings.
- 115 hay bales (about 14"x18"x36"). Hay is cut and baled on the farm - in this case planned for use as wall insulation for the Hab Lab.
- 10 3'x17' barn roof panels. A stack of roof panels was on site already, in anticipation of their use to finish the Hab Lab and Workshop roofs.
Instructions
Gather needed supplies
- 3 16'x16' roof frame
- 37 2x6x16' boards
- 74 3'screws
- 115 (about) hay bales (about 14"x18"x36")
- 10 3'x17' steel barn roof panels
- 2 drivers
- 6 people
Floor
- Choose a level site. A slight slope to the back of the shelter would be good.
- Move a roof frame into position for the floor(takes about 6 people).
- Set the boards across the frame to make a platform .
- Hold the boards in place with one screw at each end of each board.
Walls
- Lay the first layer of hay bales about 4" inside the edge of the platform (Leave a door opening on the high side)
- Lay the second layer of hay bales on top in such a way that each bale covers half of the two bales below it
- Create half-bales for the door-way by removing half the hay and re-tying the baling twine with a square knot
- Continue to build the walls in alternating style until they are 5 layers high.
- Buttress walls on the inside with extra bales if they are getting unstable.
Roof
- Orient a roof frame so the cross beams run from side to side across the house.
- Place the frame on top of the shelter walls. Lift it into position with care - don't try to slide it on the hay bale walls! (Putting two people inside and four (tall ones) on the corners outside worked for us.)
- Lay the steel roofing perpendicular to the cross beams on the roof, overlapping one channel.
- Set the third roof frame carefully on top of the roof. (This secures the panels without putting holes in them.)
Budget and Time
No money need be budgeted for this temporary shelter as all of its components come from other building projects and will actually be returned to and used in those projects.
Time specific to this project includes only design, building, and demolition. The time for building the roof frames and cutting and baling the hay are accounted for in the other projects this one supports. Development of the design concept and drawing it out took one person a total of no more than 2 hours. When it came to building the shelter, there were seven of us on site (not all actively constructing all the time) and the building was completed in approximately 2 hours from beginning to end.

