Insulated Chimney: Difference between revisions
Jump to navigation
Jump to search
| Line 49: | Line 49: | ||
* As shown in the photo, the flashing boot must slide up under the ridge cap (or you can use a piece of sheet metal under the ridge that then overlaps the flat portion of the boot). | * As shown in the photo, the flashing boot must slide up under the ridge cap (or you can use a piece of sheet metal under the ridge that then overlaps the flat portion of the boot). | ||
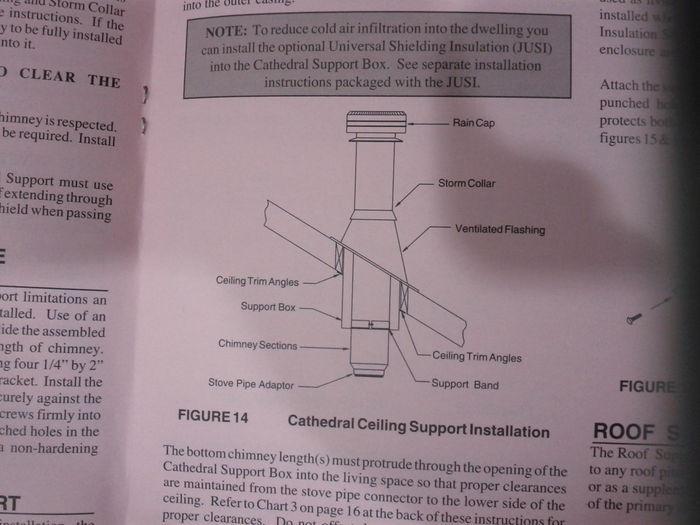
* What is not shown in the photo is that where the boot and the flue pipe come together (the intersection of the truncated cone with the cylinder) needs to have the flashing ring installed and caulked with the high-temp caulk. | * What is not shown in the photo is that where the boot and the flue pipe come together (the intersection of the truncated cone with the cylinder) needs to have the flashing ring installed and caulked with the high-temp caulk. The drawing at the bottom shows this - it's called the "storm collar" in the drawing. | ||
=Sample page from an install manual= | =Sample page from an install manual= | ||
[[Image:insulinstall.jpg|700px]] | [[Image:insulinstall.jpg|700px]] | ||
Revision as of 17:55, 19 February 2014
See insulated chimney components available from Menards in zip file: File:Insulchim.zip.
Chris' Sketches for HabLab Chimney-through-roof Installation
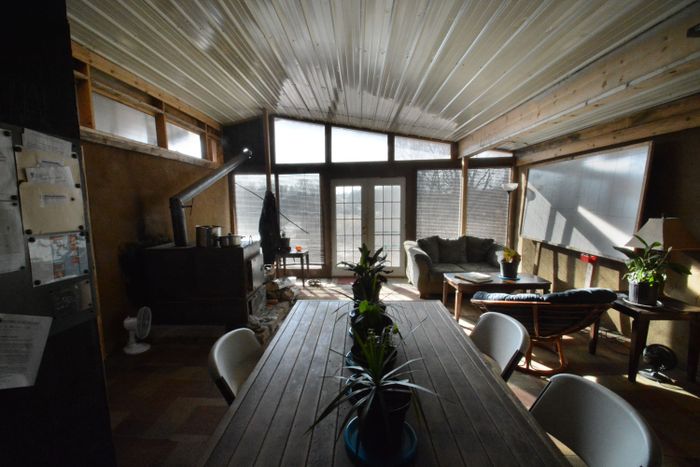
Photo of HabLab with current stove and chimney setup:
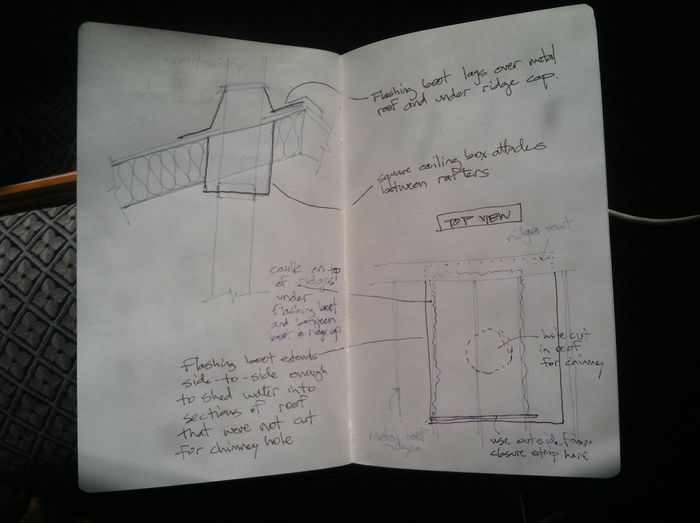
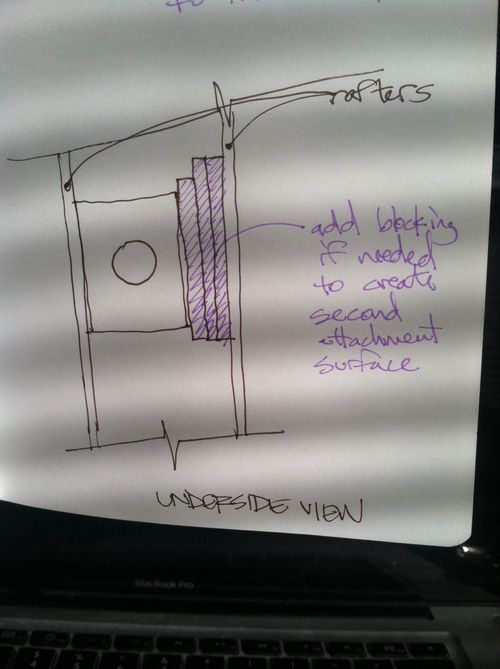
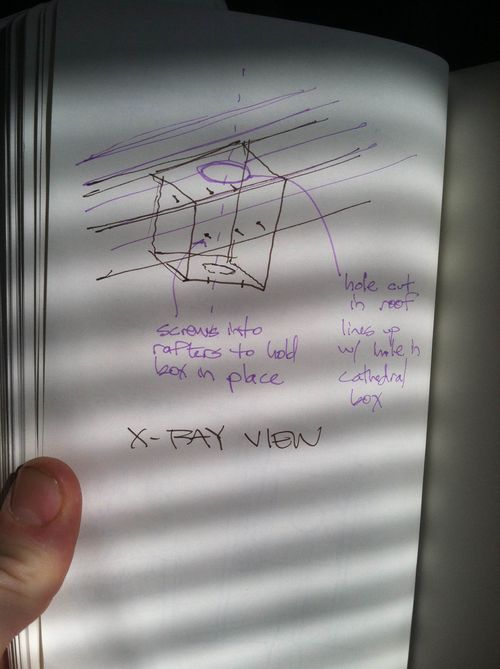
Chris' original sketch sent to Marcin (basically identical to drawing Marcin later found that is posted at the bottom of this page):
Step-by-Step w/ Sketches
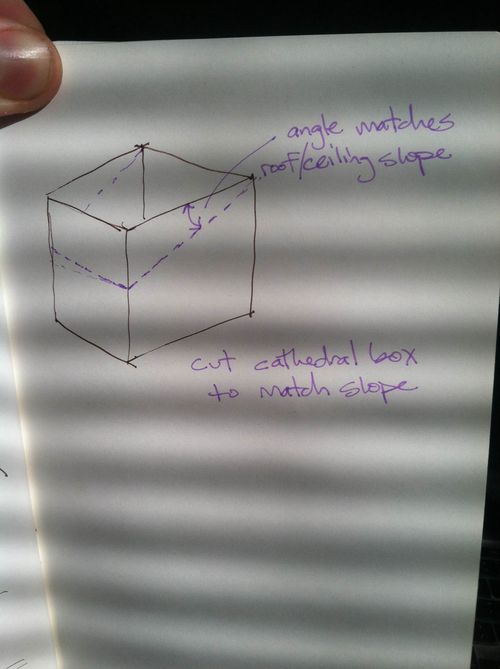
- Cut cathedral box to match ceiling slope.
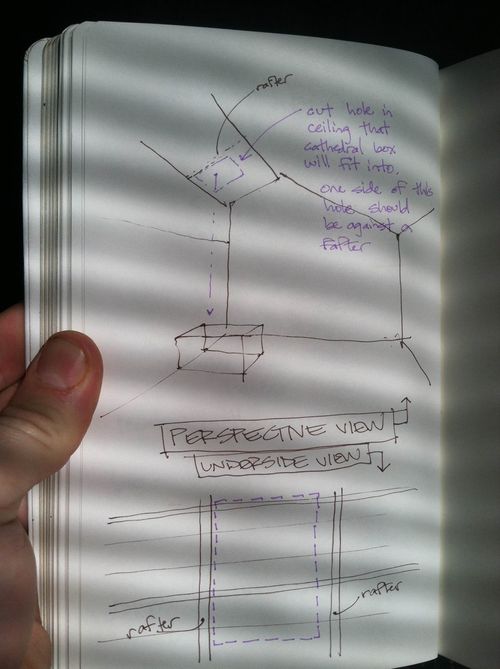
- Locate place in ceiling to cut hole. Using a plumb-bob is a good way to ensure that hole in ceiling will be above chimney outlet from stove.
- One edge of this rectangular hole cut in the ceiling needs to lie along a rafter.
- Use the cathedral box to mark the size of the hole to cut.
- Edges of ceiling cut need to accurate but not perfect. Cathedral boxes typically come with a "finishing ring" or "trim ring" that is placed around the box and over the edge of the ceiling cut to make it look nice. If the hole is cut larger than this trim ring, the trim will not cover it, and there will be weeping and gnashing of teeth.
- Slide the cathedral box into the hole and make sure it fits.
- Once you have the ceiling hole cut appropriately and know that the cathedral box fits into it well, take the box out and add blocking to create a second attachment surface for the box.
- Add 2x4 (or 2x whatever-you-have) blocking to create attachments on at least two sides of the cathedral box. If the rafter spacing is the same as the cathedral box, this is unnecessary. If the rafter spacing is larger than the box, then one side will have to get built out to create a second attachment surface.
- Note: the sample installation diagram at the bottom of the wiki page shows blocking added on the lower and upper sides of the box (perpendicular to the rafters). This can be done, but is not entirely necessary. If this blocking is put in, you can attach the box on all four sides, rather than just two. I think two is sufficient, though.
- I like to make the hole from the roof side much smaller, and also circular. Locating where exactly to cut this hole is a little tricker. Here's how I have done it.
- From the underside, eyeball where the chimney will penetrate through the roof and drill a hole through the roof large enough to begin cutting with metal shears.
- Install the cathedral box from the underside. This can be tricky. You have to slide the cathedral box up through the hole in the ceiling, hold it in place with one hand and then reach through the hole in the box with your other hand and use the screw-gun to screw it into the rafter that is along one side of it and the blocking (or rafter) on the other side of it.
- Once the cathedral box is screwed into place, climb up onto the roof and begin opening the hole with the metal shears. Use a section of the flue pipe to ensure that this hole is big enough and that it lines up with the hole in the cathedral box.
- The cathedral box that I have used before has a coupler built into it. The flue from the top slides down onto this coupler.
- Then, you can slide the flashing boot down over the top of the flue pipe and into place.
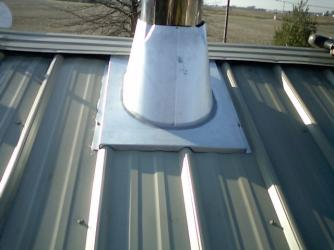
- Here is a photo of the best-practice for installation of the boot.
- As shown in the photo, the flashing boot must slide up under the ridge cap (or you can use a piece of sheet metal under the ridge that then overlaps the flat portion of the boot).
- What is not shown in the photo is that where the boot and the flue pipe come together (the intersection of the truncated cone with the cylinder) needs to have the flashing ring installed and caulked with the high-temp caulk. The drawing at the bottom shows this - it's called the "storm collar" in the drawing.
