Steam Engine Build/Cylinder Valve Seats: Difference between revisions
Jump to navigation
Jump to search
(Created page with "{{Category=Steam Engine}} Steam Engine Build Instructions =Description= The cylinder valve seat serves two purposes. It closes off the top end of the cylinder and it serve...") |
No edit summary |
||
| (3 intermediate revisions by the same user not shown) | |||
| Line 6: | Line 6: | ||
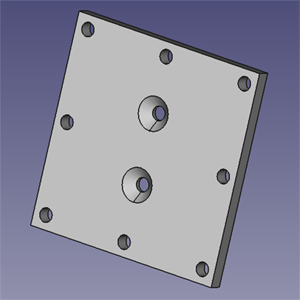
The cylinder valve seat serves two purposes. It closes off the top end of the cylinder and it serves as the valve seats for the valves. The valves press against the plate with a fair amount of pressure (160psi), so the plate needs to be strong enough to avoid bending or blowing out. It is fastened to the cylinder case flange with eight bolts. | The cylinder valve seat serves two purposes. It closes off the top end of the cylinder and it serves as the valve seats for the valves. The valves press against the plate with a fair amount of pressure (160psi), so the plate needs to be strong enough to avoid bending or blowing out. It is fastened to the cylinder case flange with eight bolts. | ||
=CAD= | |||
[[Image:cad-valve-seat.png]] | |||
=Drawing= | =Drawing= | ||
| Line 22: | Line 25: | ||
# Polish the valve seats to ensure a smooth surface | # Polish the valve seats to ensure a smooth surface | ||
[[Category:Steam Engine] | [[Category:Steam Engine]] | ||
Latest revision as of 22:50, 25 June 2011
Main > Energy > Steam Engine
Steam Engine Build Instructions
Description
The cylinder valve seat serves two purposes. It closes off the top end of the cylinder and it serves as the valve seats for the valves. The valves press against the plate with a fair amount of pressure (160psi), so the plate needs to be strong enough to avoid bending or blowing out. It is fastened to the cylinder case flange with eight bolts.
CAD
Drawing
Instructions
Using half inch cast iron plate:
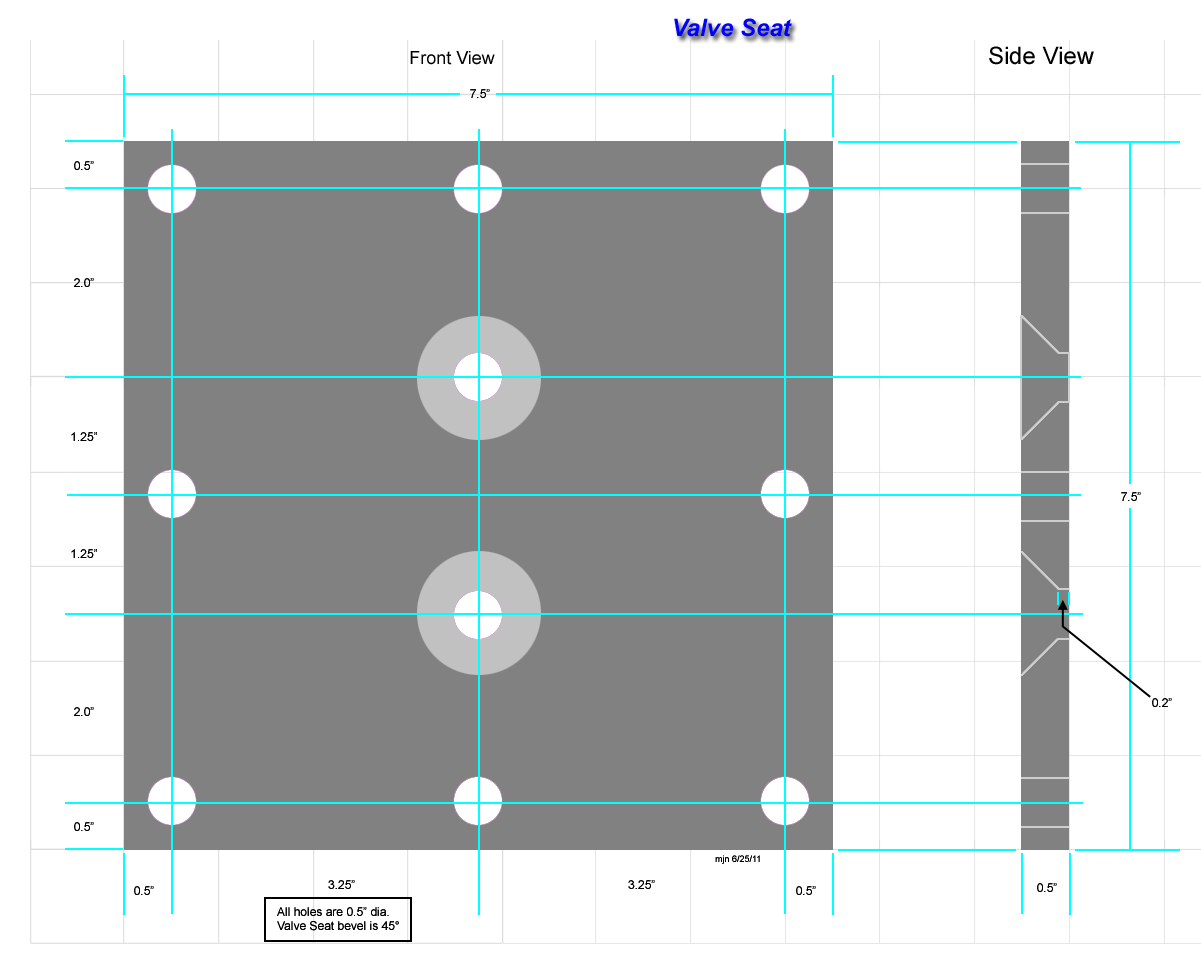
- Cut a square 7.5" on a side.
- Locate and drill eight bolt holes, each 0.5" dia.
- Locate and drill two holes, 0.5" dia offset from the center by 1.25" up and down.
- Using a 45 degree countersink, bevel the two holes to a depth of 0.3".
- Polish the valve seats to ensure a smooth surface

