Mike Hill Modular Wheel Units Order: Difference between revisions
Jump to navigation
Jump to search
No edit summary |
No edit summary |
||
| Line 1: | Line 1: | ||
<html><img src="https://docs.google.com/drawings/d/1V4tsbDBDGmTd_PJf5MTH9ptnxeMgqMD15aS5zBzw2VA/pub?w=700&h=500"></html> | <html><img src="https://docs.google.com/drawings/d/1V4tsbDBDGmTd_PJf5MTH9ptnxeMgqMD15aS5zBzw2VA/pub?w=700&h=500"></html> | ||
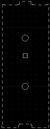
*[4] Part 1 - [[File:Wheel Mounts Part 1.dxf]] - [[Image:wheelpart1dxf.jpg]] | *[4] Part 1 - [[File:Wheel Mounts Part 1.dxf]] - [[Image:wheelpart1dxf.jpg|50px]] | ||
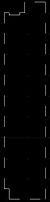
*[8] Part 2 - [[File:Wheel Mounts Part 2.dxf]] - [[Image:wheelpart2dxf.jpg]] | *[8] Part 2 - [[File:Wheel Mounts Part 2.dxf]] - [[Image:wheelpart2dxf.jpg|50px]] | ||
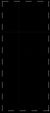
*[4] Part 3 - [[File:Wheel Mounts Part 3.dxf]] - [[Image:wheelpart3dxf.jpg]] | *[4] Part 3 - [[File:Wheel Mounts Part 3.dxf]] - [[Image:wheelpart3dxf.jpg|50px]] | ||
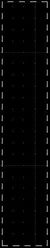
*[8] Part 4 - [[File:Wheel Mounts Part 4.dxf]] - [[Image:wheelpart4dxf.jpg]] | *[8] Part 4 - [[File:Wheel Mounts Part 4.dxf]] - [[Image:wheelpart4dxf.jpg|50px]] | ||
*[10] Part 5 - [[File:Wheel Mounts Part 5.dxf]] - [[Image:wheelpart5dxf.jpg]] | *[10] Part 5 - [[File:Wheel Mounts Part 5.dxf]] - [[Image:wheelpart5dxf.jpg|50px]] | ||
*[2] Part 6 - [[File:Wheel Mounts Part 6.dxf]] - [[Image:wheelpart6dxf.jpg]] | *[2] Part 6 - [[File:Wheel Mounts Part 6.dxf]] - [[Image:wheelpart6dxf.jpg|50px]] | ||
*[10] Part 7 - [[File:Wheel Mounts Part 7.dxf]] - [[Image:wheelpart7dxf.jpg]] | *[10] Part 7 - [[File:Wheel Mounts Part 7.dxf]] - [[Image:wheelpart7dxf.jpg|50px]] | ||
*[14] Part 8 - [[File:Wheel Mounts Part 8.dxf]] - [[Image:wheelpart8dxf.jpg]] | *[14] Part 8 - [[File:Wheel Mounts Part 8.dxf]] - [[Image:wheelpart8dxf.jpg|50px]] | ||
*[2] Part 9 - [[File:Wheel Mounts Part 9.dxf]] - [[Image:wheelpart9dxf.jpg]] | *[2] Part 9 - [[File:Wheel Mounts Part 9.dxf]] - [[Image:wheelpart9dxf.jpg|50px]] | ||
*[10] Part 10 - [[File:Wheel mounts Part 10.dxf]] - [[Image:wheelpart10dxf.jpg]] | *[10] Part 10 - [[File:Wheel mounts Part 10.dxf]] - [[Image:wheelpart10dxf.jpg|50px]] | ||
*[10] Part 11 - [[File:Wheel Mounts Part 11.dxf]] - [[Image:wheelpart11dxf.jpg]] | *[10] Part 11 - [[File:Wheel Mounts Part 11.dxf]] - [[Image:wheelpart11dxf.jpg|50px]] | ||
Revision as of 02:50, 20 June 2013
- [4] Part 1 - File:Wheel Mounts Part 1.dxf -

- [8] Part 2 - File:Wheel Mounts Part 2.dxf -

- [4] Part 3 - File:Wheel Mounts Part 3.dxf -

- [8] Part 4 - File:Wheel Mounts Part 4.dxf -

- [10] Part 5 - File:Wheel Mounts Part 5.dxf -

- [2] Part 6 - File:Wheel Mounts Part 6.dxf -
- [10] Part 7 - File:Wheel Mounts Part 7.dxf -

- [14] Part 8 - File:Wheel Mounts Part 8.dxf -

- [2] Part 9 - File:Wheel Mounts Part 9.dxf -
- [10] Part 10 - File:Wheel mounts Part 10.dxf -
- [10] Part 11 - File:Wheel Mounts Part 11.dxf -