Blender
Basics
- Blender is an open source multi platform 3d modeling program.
- Very capable and customizable, full movies mave been made in it (next gen on netflix, and if you count short films, the open films project)
- VERY clunky and hard to use...Unless you use the hotkeys.
- Keep a list like this general one , or this guide to video sequence editor hotkeys
Industry Standards
- There are hints that Blender outranks the industry standards in some features esp non-destructive, but overall Maya and 3DS studio Max are the industry standards. [1]. However, doesn't open source make it inevitable as a long-term winner once more people gain the option to use Blender due to its lower access barriers? [https://www.reddit.com/r/Maya/comments/15mknt9/do_you_think_maya_will_die_eventually_seeing_an/
Roadmap
2021
2020
WOW CUBED! Check out v2.8 features:
Specific Functions
Exploded Part Animations
Simple explanation - [2]
Best Overview Tutorial on Blender
- Blender 101 - summary of this video - [3] - learn to navigate. RMB selects. LMB deselects. MMB rotates. Shift MMB pans, and Ctrl MMB zooms. Left click on arrows to drag the object. Move-Rotate-Scale
 is used accordingly on each axis, but if you hit R or S on the keyboard, you will act on all 3 axes. G is the move key. N gets you the properties panel. T toggles the tools menu. Now here it gets interesting: you can go from object mode
  to edit mode, and you can select corners, edges, and faces to move! This now gets us to expose that the nature of Blender is manipulating polygons. Use CTRL-Tab to select between object, edge, and corner selection. You can move or rotate sides around edges. There's a Create tab
 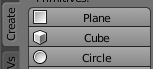 on the left hand side, and you can pump in primitive shapes. Hit X to delete various components, such as edges, faces, or vertices in edit mode. If you are in Object mode, X will delete the object. Hit Shift C to center view.
 - Hit Tab to toggle between edit and object mode. Powerful tool under Tools tab: extrude. Select a face, then extrude with E. Or scale with S. Or Rotate with R. Then there is Loop Cut and Slide. It draws a loop around an artifact, you can move it where you want, then this creates a new feature that you can manipulate.

Quicker Start Guide
Here is a quick procedure for using Blender in design work for Factor e Farm.
- Start by opening up 4 windows. First is the work window in Object Mode, in solid draw type:
 . The next 3 windows are in the x, y, z face views, with Object Mode, in wire frame draw type
  - so you can see how an object changes clearly along 3 axes.
 - Mouse roller to zoom in and out
- Press mouse roller to move image
- Right click to select object
- Control-z to undo an action
- Pan with shift-middle mouse button

Blender Interface
 Press middle mouse button to scroll menus/headers.

Manipulating Objects
Selecting objects:
- Right click to select an object.
- You select multiple elements down an axis with control and left click to drag a lasso around the area to be selected.
To move an object:
- Left click or right click, move and release. This will start to move objects. Left click to finish moving.
- Hold down control while moving to snap the object to the grid.
- CAUTION: The object's center is snapped relative to it's position to the grid. To align the object to the grid use the 'Transform Window' with the N key.
- Hold down control while moving to snap the object to the grid.
To rotate an object:
- Press the R key. Hold control to snap to 5 degree movements. Left click to finish.
To scale an object:
- Press the S key. Hold control to snap to tenths of a percent. Left click to finish.
More operations, like select, duplicate:

Object Mode and Mesh Edit Mode
Object mode allows you to select and move objects, in any way desired. Mesh edit allows you to work on only the selected object.
- Control-Tab in edit mode allows you to select vertex, edge, or face.

Useful Hotkeys
Extrude: E
Merge vertexes: ALT-M
Detach part of mesh: P
W: "Specials" in mesh editing
ctrl=L: Select contiguous vertexes in mesh edit
Ctrl-J: join two objects
P: Detach parts in mesh edit mode
Inserting Objects
Left mouse gets the pointer to where new objects will be inserted.
Go to add menu, in upper left, add mesh - start with cube.
Transform Window
Press N. You can center an object to the grid by setting the position to a whole number.
Displaying and using measurements in models
For making models to be used as reference for CNC manufacturing, precise dimensioning is important. Blender can be configured to display the measurements of a model, [4] explains how to do this.
Exam #1
- How do you select an object?
- Right click
- How do you move an object?
- Right or left click + drag + release
- Trick question: how do you insert an object?
- Go to add menu, in upper left, add mesh - start with cube
Questions
Say you have parts on a screen. How do you align them?
Day 2
Add a camera. Turn on the lights. Render.
To delete objects, use function-delete
Integrated Set of Actions
Take a u-channel profile. Duplicate it (shift D), scale it (N), rotate it (R), and then align it in the appropriate window. Add a camera. Add lights. Blender.
Result:

Copy Objects - Duplicate
Shift-D
Split a Window
MMB on border, and select Split. Good tutorial:
http://www.blender.org/education-help/tutorials/tutorial-folder/blender-user-interface-tutorial/
Exercise
Split a Blender window into 4 windows. First is a 3D view window, and the next 3 windows are the 3 other planes: xy, yz, xz - to view the object from 3 different sides. Draw a cube. turn the cube into a 12x1 unit object (extended cube). Then draw a cubic lattice of 12 unit sides.
After all these steps are done, set up lighting and Render.
Communications
Harris Kenny <kenny@alephobjects.com> Sep 28, 2016, 1:03 PM to me, ton
Hi Ton,
Thank you for being such a gracious host to both Ben and Josh, I spoke with Ben and he expressed how impressed they were with the Blender Institute and the projects you all are working on.
I want to introduce you to Marcin Jakubowski (Cc'ed here), a friend of Aleph Objects. Marcin is the founder of Open Source Ecology (http://opensourceecology.org/). Their organization has a large following, is like-minded, and could make great use of Blender (if they aren't already).
I hope this introduction is mutually beneficial. If either of you have difficulty connecting, please let me know.
Thank you both, Ton Roosendaal <ton@blender.org> Sep 29, 2016, 12:11 PM to Harris, me
Hi,
Ahh, that's such a coincidence. We had a meeting here last Monday with Aleph people and extensively discussed the "Blender 101" project and how much need there is for an open/free simple 3d tool for the masses.
Anyway. I am not available for webinars or work on helping educational initiatives myself. For that we have a huge community of volunteers who gather on blender.org and who want to be involved. Best I can do for you is to make sure you're connected to the right places.
I think it's best if you reach out to the educators mailing list first and see who responds? https://lists.blender.org/mailman/listinfo/bf-education
I would also like to point at our vaste collection of free (CC-BY) tutorials and examples online. Many of this you can find linked on blender.org already.
All the best,
Marcin Jakubowski
to me
Hi,
Yep I work full time on blender. I volunteer for the foundation, and I run the "institute" which provides currently 10 people an income to work on Blender projects (code & movies) https://www.blender.org/institute/
All work we do is cc-by and open source.
Animations
- See animation of tractor at Piotr Lugowski.
Internal Links
External Links
- Their Main Website
- Download
- Beginner Tutorial for Blender 2.8 Video (more pointed twards artistic use, so perhaps just do "level 1" which is more so general navigation and workflow.
- Blender exports well into the open source Godot game engine - [5]
- Blender 101 Project
- Blender Precision MOdelling
- Blender3D, Noob to Pro on Wikibooks