Incubator
Main > Food and Agriculture > Farm equipment
In order to provide eggs and chickens to Factor e Farm Dream Team 30, we will need to raise our chicken population from 24 to about 300 chickens in 2009. For this, we need to hatch the chickens in an incubator, as natural brooding does not do the trick. We are getting 8 eggs per day even now, and this should increase to about 20. At this rate, it would take us one month of hatching to increase our flock to the needed level. We should aim for an incubator with 48 egg capacity, and do about 5 hatching runs.
Design Rationale
Naturally, hens take care of the eggs by turning them often and sitting on them to maintain the necessary conditions for hatching. Most types of chickens have been bred for high egg production though, which means they have been bred to not "brood" as much, to not sit on eggs, because when they are brooding they won't lay any more eggs. Since most hens only brood under certain conditions then most of their eggs will never be warmed and protected until they hatch, and so an incubator is needed to hatch more eggs.
Some types of chickens are more broody, since some breeds have been bred for looks and not egg production they will brood on any eggs they are given. There are hundreds of different breeds in the bantam size, and any that have a large fowl counterpart tend to have the same traits. So there are breeds of bantams that are good broodies, and breeds that are not. There are also many breeds of large fowl that make excellent broodies. So a natural route for hatching chickens is to have an egg producing hen to lay eggs and a broodie hen to brood them.
An incubator keeps a large number of fertilized eggs safe and warm under ideal conditions until they hatch, in place of brooding hens.
Chickens may be propagated readily from fertile eggs - so freerange chickens can be maintained in a healthy population even in presence of heavy losses to predators. A simple incubator should be available on any diversified farm. Natural chicken birth rates typically happen too late and too infrequently in the season for the chicken population to become self-sustaining. Freerange chickens, which do not require supplemental feeding - could be a great part of a community local food strategy.
The important conditions under the hen are temperature, humidity, ventilation, and turning. The eggs need to be turned because the embryo will become stuck to one side of the egg otherwise.
- Incubating Eggs Factsheet on what is needed to hatch successfully
- http://pubs.ext.vt.edu/2902/2902-1090/2902-1090.pdf
- Incubating Eggs Factsheet
Research
- http://www.extension.umn.edu/distribution/livestocksystems/DI0631.html
- http://www.ogpbb.com/accessories/incubation-guide/hatching-a-chicken-egg.html - "The small end of the egg should be lower than the large end of the egg when set in the incubator. An embryo orients during incubation so that the head develops toward the large end of the egg where the air cell is located. A chick's head can orient away from the air cell of the egg if the small end is higher than the large end during incubation. An embryo oriented in the wrong direction will not hatch."
Natural hatching
Resource Map
General Info
- http://www.ext.vt.edu/pubs/poultry/factsheets/8.html
- http://www.associatedcontent.com/article/308949/how_to_hatch_your_own_chicks_from_eggs.html?cat=53
Links
- http://www.bantychicken.com/cgi-bin/bantychickenwiki.pl?Hatching
- http://windward.org/notes/notes69/opalyn6906.htm
Other Designs
- http://www.msstate.edu/dept/poultry/avianemb.htm
- Constructing a Plywood Incubator - Pictures and BOM. No description. Has an apparently manual egg turner. No motor or timer. Has thermostat with simple wiring diagram.
- http://msucares.com/poultry/reproductions/poultry_make_incubator.html
- http://www.extension.umn.edu/distribution/livestocksystems/DI0631.html
- http://www.backyardchickens.com/LC-howto.html
- http://www.motherearthnews.com/Do-It-Yourself/1982-03-01/Build-Your-Own-Incubator.aspx
Sketchup 3D Warehouse
- https://3dwarehouse.sketchup.com/model.html?id=d8fc20c1680d46c239753ca9ea638d2d
- https://3dwarehouse.sketchup.com/model.html?id=afef4c80a98b9e518ec5ef93a548cffb
- https://3dwarehouse.sketchup.com/model.html?id=ub290dcfb-6949-4a2f-9b68-ca2a11ffd505
Industry Standards
- http://www.fredsfinefowl.com/incubatordemonstrations.html
- http://www.epinions.com/review/GQF_1502_Sportsman_Incubator_epi/content_421826039428
- http://www.epinions.com/pets/sec_~dyn_nav/submitted_form_~ultrafinder/ultrafinder_submitted_~+Go+/search_vertical_~all/pp_~2?search_string=incubator#dyn_nav
- http://sciencekit.com/automatic-incubator/p/IG0021724/
- http://www.google.com/products?q=AUTOMATIC+INCUBATOR&hl=en
Brinsea Octagon
Materials
- foil backed rigid insulation board looks like what we want
- Celotex is a company that makes foil backed rigid insulation board in the UK
- http://building.dow.com/na/en/products/insulation/tuffr.htm TUFF-R
Past Work
See Open Source Chicken Incubator
- Critique of past work - manual turning of eggs at least 3 times per day becomes a chore for an integrated human.
Research Summary
- There is a lack of adequate design. University references have no automatic incubator designs. Mother Earth News is the only one with automatic turning, and the mechanism there is unnecessarily complex.
- Infuriated with such nonsense, Marcin proposes HexaHatch.
Design
Humidity and Temperature
- Humidity - $6 analog hygrometer at Amazon -1
- Temperature - two thermometers
- Thermostat and lightbulb for temperature control
Design Proposals
Cabinet
3 Shelf Tilt
Design with three shelves for trays with 36 eggs.
File:Ose-eggincubator-20160409-1.skp
Design 1 - HexaHatch Revolution
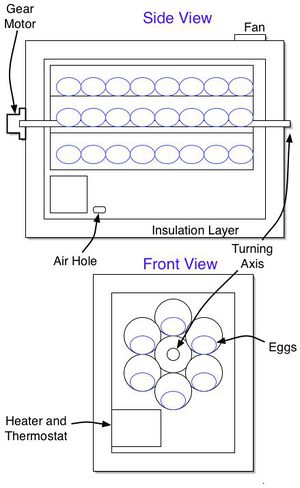
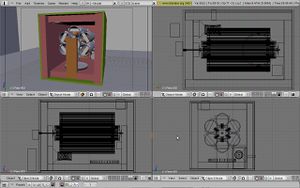
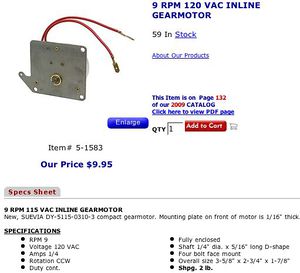
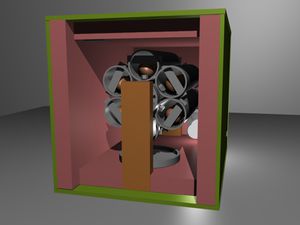
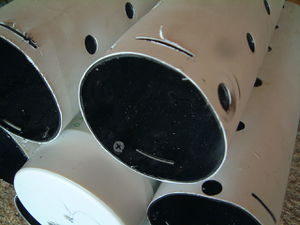
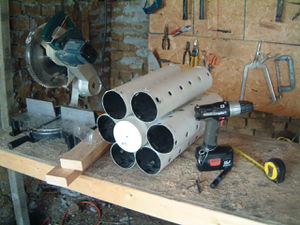
Hexahatch is a simple, compact, low cost, scalable design incubator with automatic turning via a $10 gear motor.
Design Rationale
- Uses simple on-off wall timer, set for 3 turning sessions per day, 15 minutes long
- Gear motor plugs in directly to timer
- Gear motor is coupled directly to turning shaft
- Symmetry is utilized for low turning torque requirement
- 3" PVC tube (schedule 20) is used for egg holding, arranged in hexagonal pattern
- Inner PVC tube holds turning axle
- Bearings hold axle at ends
- 48 egg capacity
- Thermostat operates a 15W light bulb for heat
- 2" styrofoam insulation is used around box
- OSB is used as a case
- Small fan removes temperature stratification along vertical direction
- Tub of water is found at bottom for humidity
- Incubator opens from the end
- Small air hole is found towards bottom
- Approximate 1x1.5x2 foot box
- Max 60 egg capacity
Design
Bill of Materials
- Wall timer, $8
- Motor with 1/4" shaft, $10
- 1/4" coupler $4
- 1/4" threaded rod $3
- 1/4" nuts, x 6
- 16" of 4", schedule 20 PVC pipe, x 6
- 18" of 4", schedule 20 PVC pipe
- $8
- 4" PVC caps, x 2 $5
- Thermostat, 90-130F range, $10
- Light socket and bulb, $5
- Spare power cords
- 2 metal bushings, $2
- fan
- 2x4" lumber, 7" long for light fixture, 13" for egg holder posts, 20" to support posts.
- 2" insulation, 14 square feet, $7
- 20x15" x 2 for front/back
- 20x27" x 2 for sides
- 23x15" x 2 for top/bottom
- OSB shell, $3
- 20x27", x 4 for top/bottom/sides
- 20x21", x 2 for front/back
- 3000 square inches out of 8x4' 4608 sq/in OSB sheet
Total: about $70
Implementation
- Assemble egg holders
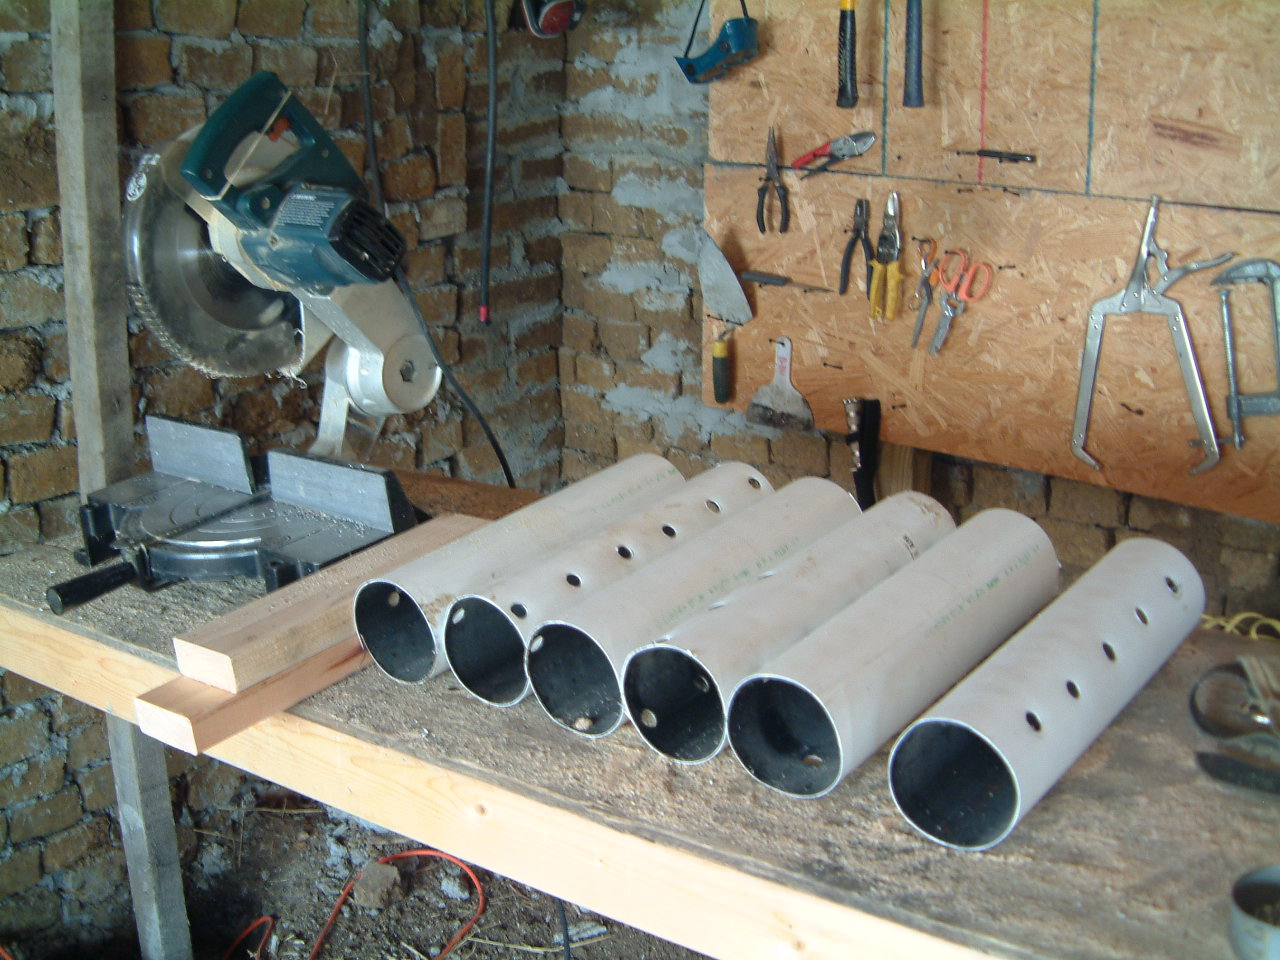 Wear safety goggles when cutting.
- Cut notches for stoppers. Drill 1/4" holes in middle of pipe caps.
- Attach 16" pipes to 18" pipe with bolts.
- Attach pipe caps to 18" pipe.
- Put threaded rod through pipe cap holes, put nuts on both ends loosely. Leave one end sticking out further.
- Cut out the insulation and OSB pieces.
- Assemble the bottom and back insulation and OSB. Pre-drill holes and attach with screws.
- Drill about 1" hole in the OSB and insulation for the motor on the back about 11-1/2" from the bottom and 10" from the sides.
- Wire and attach the light fixture to the 2x4.
- Attach the light fixture 2x4 post to the OSB.
- Attach the egg holders.
- Attach the bushings to the 2x4"s.
- Drill holes in the 13" long 2x4"s and metal bushings. The hole for the 1/4" threaded rod should be about 2-1/4" from the top.
- Attach the thermostat to the front 2x4".
- Put the long end of the egg holder shaft through the rear 2x4" bushing.
- Attach the coupler to the threaded rod end.
- Attach the coupler to the motor.
- Attach the motor to the back OSB.
- Attach the rear 2x4 post to the OSB.
- Adjust the nuts on the threaded rod to hold the pipe caps tightly, so that the egg holders turn with the rod.
- Put the front 2x4 post with the threaded rod through the bushing and attach the front 2x4 to the OSB. The motor should be able to turn the egg holders now.
- Wire the light to connect to the thermostat.
- Assemble the box.
- Assemble the rest of the insulation box.
- Assemble the OSB around the insulation. Attach with screws. Leave one end open.
- Drill holes in the side for the air intake and wires, and in the top for the fan.
- Attach the fan.
