Lulzbot TAZ Tractor Scale Model 3D Printing Tutorial: Difference between revisions
No edit summary |
|||
| (46 intermediate revisions by the same user not shown) | |||
| Line 1: | Line 1: | ||
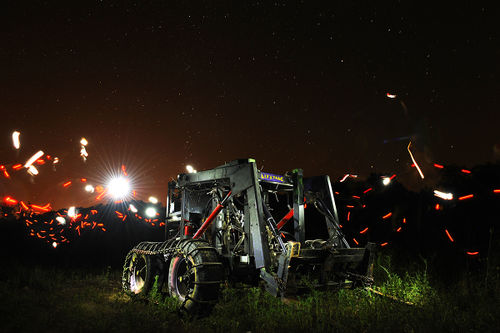
Start with an image of what we are trying to print - | |||
[[Image:DSC 3829small.jpg|500px]] | |||
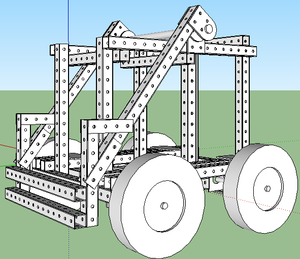
and new design-for-fabrication model of frame: | |||
[[Image:dfftractor.png|300px]] | |||
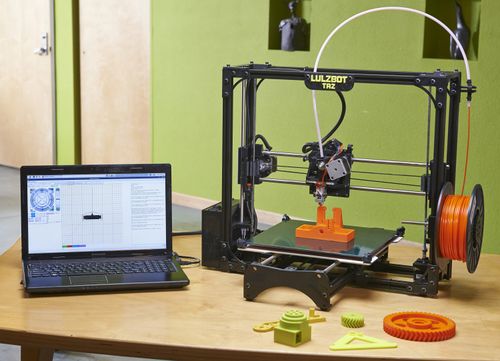
Let's take [[TAZ]] and prototype the above tractor as a scale model: | |||
[[Image:taz.jpg|500px]] | |||
=Tractor 3D Printing Files= | |||
We observed that simply scaling the 1/4"x4"x4" tubing of Lifetrac by 8x (to generate 1/2" tubing) resulted in a 1/16" wall thickness instead of 1/32". So scaling is not working. We need to draw these tubes manually. | |||
The tubes for 3D printing are 1/32" wall thickness x 1/2"x1/2" tubing. Draw these in sketchup by extruding a 1/2" square, then offsetting for a 1/32" face, to punch out the middle. Make sure that you offset for punching out the middle of the tube before extruding the holes. | |||
To draw the holes, draw the first hole at 1/4" away from the middle of the edge | |||
*[3x] 11 hole tube- tops transerse - | |||
*'''[2x] 17 hole tube- top parallels''' - | |||
*'''[4x] 13 hole tube- front verticals''' - | |||
*[5x] 15 hole tube- 2 rear verticals, 3 bottoms transverse | |||
*[4x] 19 hole tube- bottom parallels | |||
*[10x] pivot plates | |||
*[3x] hollow shaft | |||
Loader: | |||
*'''[2x] 8 hole tube - forearms''' | |||
*'''[2x] 16 hole tube - arms''' | |||
*'''[2x] 14 hole tube- attachment plate | |||
*'''[4x] 4 hole connector plate (4"x16" in real life)''' | |||
Wheels: | |||
*4" tall compared to 1/2" tubing | |||
Latest revision as of 06:26, 26 May 2013
Start with an image of what we are trying to print -
and new design-for-fabrication model of frame:
Let's take TAZ and prototype the above tractor as a scale model:
Tractor 3D Printing Files
We observed that simply scaling the 1/4"x4"x4" tubing of Lifetrac by 8x (to generate 1/2" tubing) resulted in a 1/16" wall thickness instead of 1/32". So scaling is not working. We need to draw these tubes manually.
The tubes for 3D printing are 1/32" wall thickness x 1/2"x1/2" tubing. Draw these in sketchup by extruding a 1/2" square, then offsetting for a 1/32" face, to punch out the middle. Make sure that you offset for punching out the middle of the tube before extruding the holes.
To draw the holes, draw the first hole at 1/4" away from the middle of the edge
- [3x] 11 hole tube- tops transerse -
- [2x] 17 hole tube- top parallels -
- [4x] 13 hole tube- front verticals -
- [5x] 15 hole tube- 2 rear verticals, 3 bottoms transverse
- [4x] 19 hole tube- bottom parallels
- [10x] pivot plates
- [3x] hollow shaft
Loader:
- [2x] 8 hole tube - forearms
- [2x] 16 hole tube - arms
- [2x] 14 hole tube- attachment plate
- [4x] 4 hole connector plate (4"x16" in real life)
Wheels:
- 4" tall compared to 1/2" tubing


