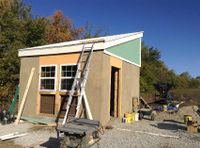
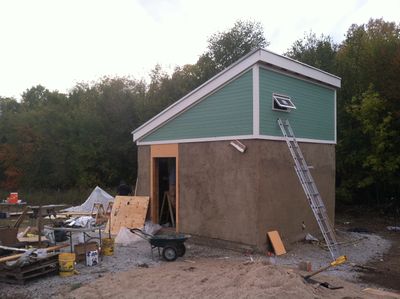
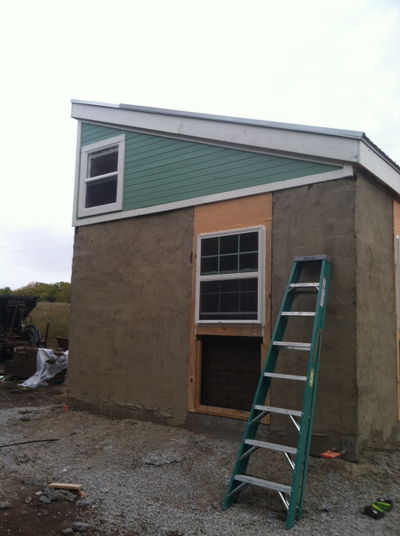
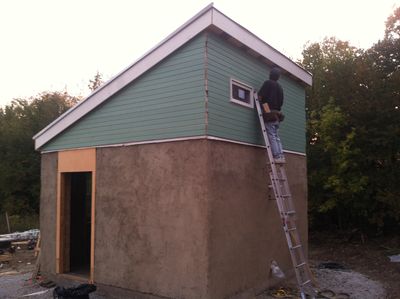
Chris Reinhart Log Archive
Notes
This page is the archive of my work previous to Thu November 21, 2013. To see my most recent work, please visit:
Thu Nov 21, 2013
Longwinded Debrief on FeF Procedures after November Visit: On-Boarding Ideas, Meeting Titles, and the Dinner Bell
There is an experience every time a new person comes to FeF of slowly, over the first few days or week, learning about their previous projects. This is the experience every time, and with many DPVs, their experience is so extensive that you are continuously learning about what else they do. While the understanding occurs naturally and is awesome when there is a lot of time together, sometimes, time is very short. I propose that we make a "getting to know you presentation" a formal part of the onboarding process. Everyone typically has pictures and video they normally want to show others of what they have done. Many have probably given presentations on their work before and a practiced doing it.
Agenda for 9am, the first business day after you arrive.
- introduce yourself
- presentation of your work (video/slides/drawings/anything!)
- limit to 10 minutes
- video it, and it becomes part of the person's log - if they don't have one already, it's the first entry
- everyone immediately understands something of the amazing breadth of skills of the person in front of them (OSE attracts awesome people!)
- people are immediately given clues about what they can potentially learn from the person standing in front of them
- good, healthy, rite of passage for people coming together in a working relationship
- if everyone has such a thing on their log, then new DPVs can learn about who will already be there when they arrive by watching their on-boarding presentation
Also, I think some of the challenge we encounter with the prototyping meetings is how they are named. We were covering radically different topics in a meeting with a title that relates to only one of them. My guess is that DPVs do not even know that these meetings are called "Prototyping Meetings." The only reason I know it is because I see it on the google calendar and get the invite for the video call. Anyway, we are dealing with all sorts of issues in a meeting that is supposed to - by its title - just be about the machine or process that we are prototyping. But that's not what we're doing. We're talking about everything from teaching people technology and installing apps to when we're cleaning, to what the schedule is, to what we did yesterday. These things all have to be talked about, but they're not prototyping.
The point of that meeting should be very clear. And it should have sections to it if it includes both prototyping and other issues. Prototyping should be a separate meeting.
Maybe this:
- 9:00 to 9:30 is just general business, important issues, etc. - or new DPV on-boarding activities.
- 9:30 - 10:00 (or whenever, on design-heavy days) is prototyping only. Those that need to go do other work, can.
Just some thoughts... many more to come. There's always a flow like this when I return home and decompress. I imagine everyone that sees the big picture and leaves OSE is exploding with thoughts.
I digress.
Stories told by individuals at morning meetings of what they did yesterday, part of the first half hour, should use personal logs as a mandate. I was poor about keeping up with my log during this visit and it is disappointing. Looking back at the extensive record of my earlier log is inspiring to me, because enough of the thinking and learning is captured that I can remember the rest. And for others, there is enough there to work with. Sam said he's involved with this in part because someone might possibly find something useful in some bit of work that he had done on a project and recorded. Exactly. That's what we're all doing and it's beautiful, but it only works if we all write it down.
If the log is the prop for everyone's update, it becomes a discipline that is self-reinforcing. We all like to pull our own weight. If everyone else is doing a log, then we will all keep up with it. I think it would be awesome if Marcin did this, too.
I also propose that we build log time into the schedule. For real. Every day. If the meeting is from 9 to 10 and DPVs are expected to work 8 hours, then that means quittin' time would be 5, depending on how you look at lunch. I think that when the whistle blows from work in the shop, there is a set aside time to add comments to the log, and links to Trovebox pictures, as well. Instead of just putting photos in the Trovebox gallery, we should be tagging them rigorously. Maybe you guys already are, I have not been tagging them at all, I just feel good about getting them uploaded in real-time at this point.
I was also imaging that something that would add a great vibe, as well as a consistency to the schedule, not to mention solving a logistics issue (drum roll...) farm bell outside the HabLab!!
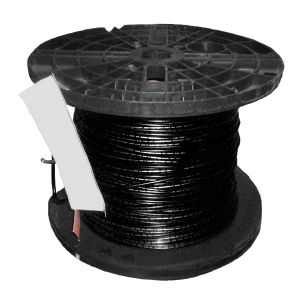
We could find one at a flea market or the image is from Sears. Someday, we'll 3d metal print one of our own. http://www.sears.com/shc/s/p_10153_12605_SPM7611075513P?ci_src=184425893&ci_sku=SPM7611075513&sid=IDx20130125xMPODLx020
The classic from the farm that tolls to call people in from the workshop, the MicroHouse or anywhere else on the property. No one has to leave another task to be the messenger and everyone knows exactly when the food is ready to go. AND, it adds the consistency needed for people to settle into a pleasant and productive routine. The bell is really awesome because it is such a welcome sound. It is beautiful, it adds structure to the day, it brings one's awareness to the present moment, and as Pavlov showed, we can make associations with it. Here, the amazing association that gets made quickly and reinforced constantly is one of food and camaraderie.
The bell would be out in front of the HabLab, and we would hang it on a simple but elegant frame made of the 4x4 tube steel. Hell, we could even run a design competition for it.
Okay, enough Chris.
Summary:
- regular schedule reinforced by happy associations with the lunch and dinner bell
- time built into schedule for log and log as required prop for morning stories - discipline of logging - links to tagged Trovebox photo albums at minimum with comments - must include at least one photo/video - this is where the DPV adds value to the entire world, not just FeF - it is essential
- on-boarding includes 10 min getting-to-know-you presentation that is recorded on first day for every DPV - added to their log - we learn more about each other faster allowing us to collaborate better
- morning meeting should be broken into general business first, then clear break into prototyping
Proposed Standard Weekly Schedule Based on Conversations with Marcin, Scott, and Sam
To create the productivity in a more stable environment, a standard schedule can be employed, with the enormous value adding of the lunch and dinner bell.
- coffee - whenever the first coffee drinker gets up - when Rob is around, about 6:00, I've seen earlier too
- 8:15am - 9:00am Breakfast
- 9:00am - 9:30am Morning Meeting/On-boarding presentations/etc.
- 9:30am - 10:00am Prototyping Meeting
- 10:00am - 1:00pm Morning Work
- 1:00pm - 2:00pm Lunch Break
- 2:00pm - 5:30pm Afternoon Work
- 5:30pm - 6:00pm Log Time
- 6:00pm - ?? Dinner/free time/social functions/individual projects/field trips
Wednesday morning off
- 12:00pm - 1:00pm Wednesday Meeting - Mid-week review and update of links to Project Development Board
- 1:00pm - 2:00pm Lunch
- 2:00pm - 5:30pm Afternoon Work
- 5:30pm - 6:00pm Log Time
- 6:00pm - ??
Saturday morning off
- repeat Wed. afternoon schedule
- 8:00 social event, either in-house or out in town
- (explore field trip opportunities for regional places of interest)
Sunday off
Mon Nov 18, 2013
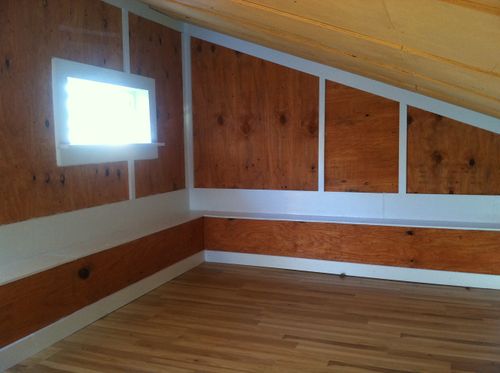
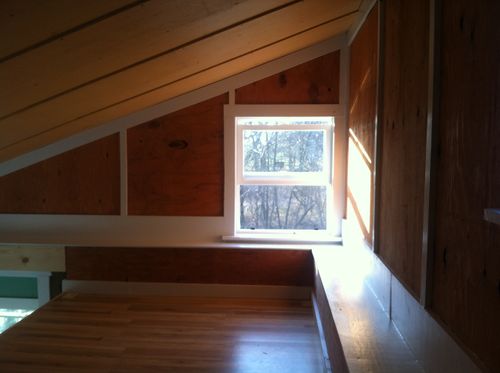
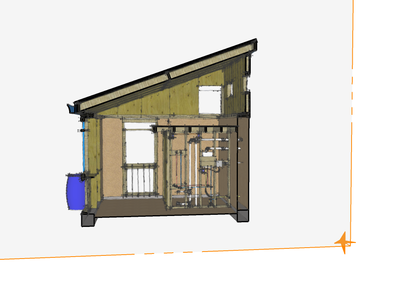
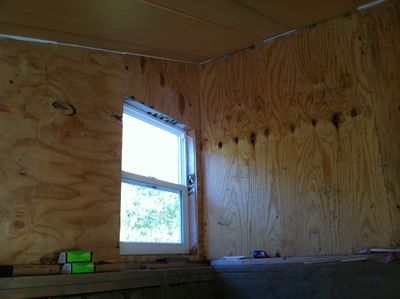
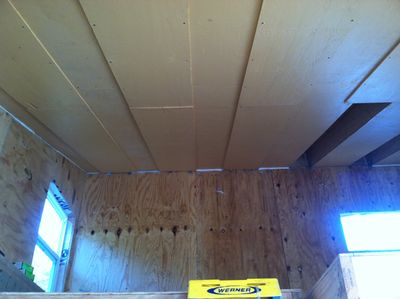
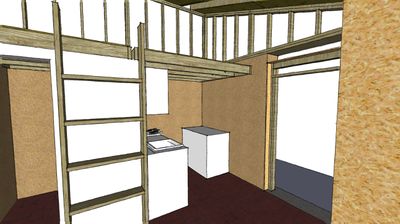
Interior Photos of MicroHouse
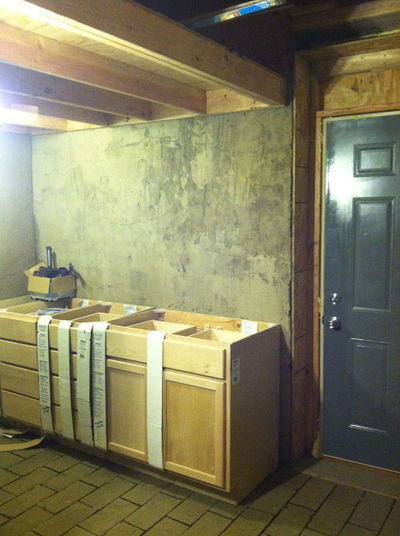
Work on the interior of the MicroHouse is wrapping up! Check out the inside :)
Sun Nov 17, 2013
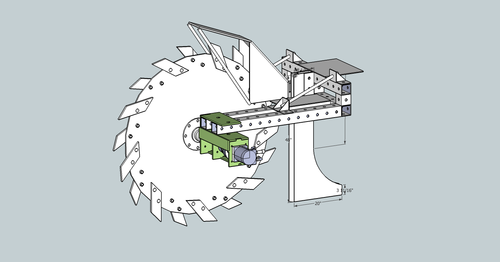
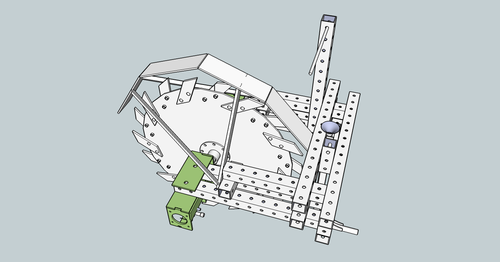
Trencher Design Review Complete
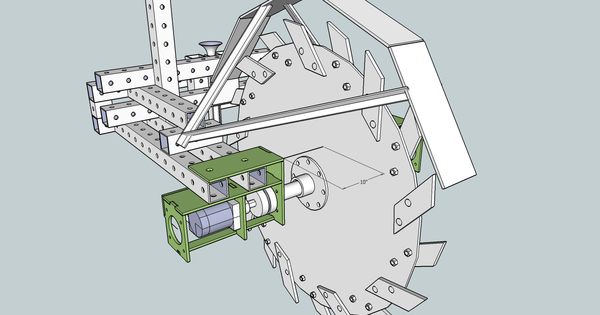
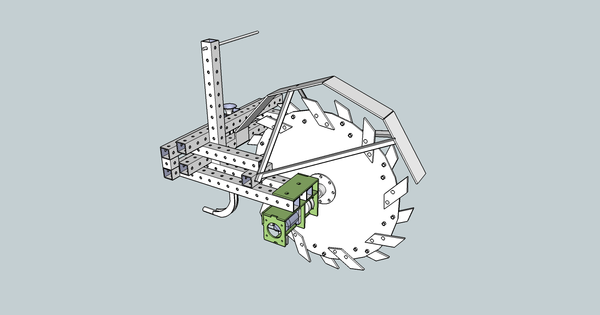
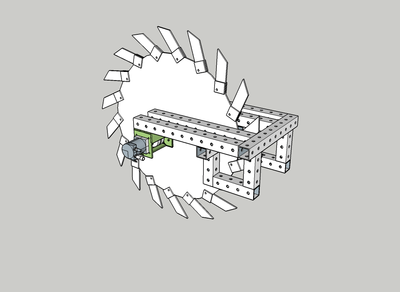
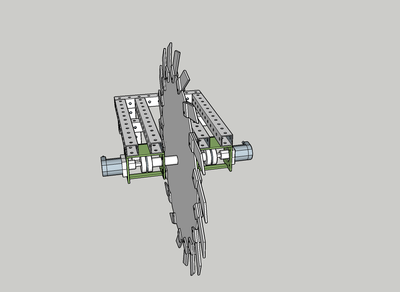
Finalized trencher review yesterday. Updated wheel unit to reflect transition to 3" shaft.
FINAL TRENCHER REVIEW FILE File:Final Trencher review sketchup v8.skp
Sat Nov 16, 2013
Trovebox Login Note
In order to log into to Trovebox - must log into opensourceecology.trovebox.com simply logging into trovebox.com does not allow one to get to the OSE images.
Wed Nov 13, 2013
Further comments:
- make the chute guard more wide so it can withstand larger forces. Make it 3/8"x4" or 3/8"x6" metal.
- Make the arms supported by a threaded rod coming off a vertical attachment - to support arms by tension
- Support the digger with 24" of span - can weld a vertical on the mount tubes
Trencher Details Discussion
- UPDATE: Trencher Model File:Trencher Pipe Feeder.skp
- UPDATE: Trencher Model File:Trencher review sketchup v8.skp
- Current Trencher Model File:Trencher refinements near final draft.skp
- Current Trencher Model for Sketchup version 8 File:Trencher refinements near final draft v8.skp
Narrow Guard
Get rid of Bobcat and leave a rectangular structure – assume that we hang with a long flat bar, foggedabout bobcat qa
Replace the spool bar with a 4x4
Use a single 4x4 for holding the spool
Guard narrowed to 8" Rectangular mount of tube - 12" h, as we discussed on the phone. I see what you mean about not much support. And regarding the welding of all pieces - that's how it looked to me in the sketches. Don't think spool bar can be 4x4 - need to be able to put a spool with a smaller hole, like for electric cable.
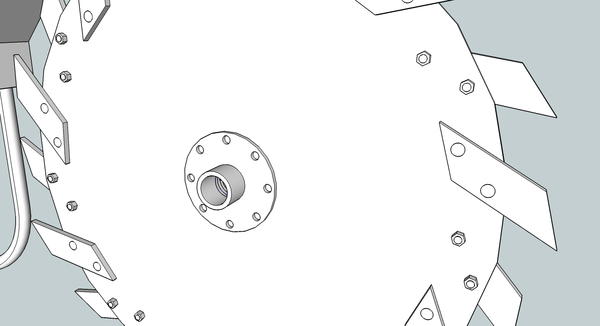
Wheel – 5' diameter – need 3.5” hole in center, and do the standard 8 bolt truck wheel pattern but use 1” bolt holes – really do 1-1/8 for the hub mounting
Yes.
For the teeth, do 3/4”+1/16” Yes. holes are 13/16"
Sandwich 2 sheets of 1/4” flats around the chute; chute needs to be lowerable
Trencher chute gets pinned between two short 4x4. Notch plate on side of chute to receive pin.
Make plane of the quick attach wheel about 10” away from the cutting wheel – to allow sleeve a
Not sure I have that one exactly right.
End the arms with the plate of the qa wheel
Holes on motor mount plate do not line up with holes on support arms. We can move these holes wherever we want, right?
The reinforcements neeed to be pointing up to achieve 3' dig depth
I changed the support arms to the top... don't think this is what you had in mind.
Search on wiki for
- http://opensourceecology.org/wiki/Mike_Hill_6_in_60_Metal_Order#Parts_Addendum
- Look at wiki for sketchup to DXF, generate both tooth file and wheel file, and hub file.
Thoughts: Add smooth flange at pipe ends to avoid damaging wire or flex pipe fed through it? Radius shown on chute is probably impossible to achieve through bending. I don't think we want the chute to extend further under the tractor, though. Maybe use long-sweep plumbing fittings?
Mon Nov 11, 2013
Words from the founder: Along the lines of Superfast Basic Build -
I think the way forward is to start with absolute basic shell that we can do in one day. I propose that we do a version on a treated lumber footer or stabilized brick footer - for a shed or similar - and see how we can fork from there to additional features - while allowing for a ONE DAY BUILD INCLUDING FOUNDATION + GRAVEL.
Can you draw up an hourly equivalent corresponding to http://opensourceecology.org/wiki/File:MH_Workshop_Schedule_Graphic_Final.jpg but for the 1 day build? I suggest that 7 AM gravel delivery is the start point.
Eventually, add a realtime limestone burn to generate our own mortar, like Frank Lloyd Wright (FLW). Eventually, strawboard manufactured in realtime - which we should have a prototype of by January if Chris sticks to his schedule of tech dev - which so far is on schedule with the trencher build.
What do you think? I think that could be radical.
I could see things like water heater, sink, etc, being mounted right on the brick wall - where we modularize via install onto "quick mounting plates" paralleling, for example, quick mounting plates for tractor hydraulic valves - where 1 bolt and quick couplers intall an item in 5 minutes - pending a quick mounting interface to the object of interest. What do you think of this?
So: say a water system module: sink on a mounting panel featuring quick connects. Water heater on a panel featuring quick connects. Shower module without drain but with small sump pump draining to a single sink drain. Universal Shit Muncher module for toilet - emptying graywater into the same drain. So 1 drain for entire house. Etc.
I think we can radically improve the speed AND approach a modern home standard at the same time. I just think we have to Think Diffferent. Further, we need to figure out how to end a house without having to do all the trim work as in the last one. That is killing us.
Sunday, Nov 10, 2013
Microhouse Development for 2014
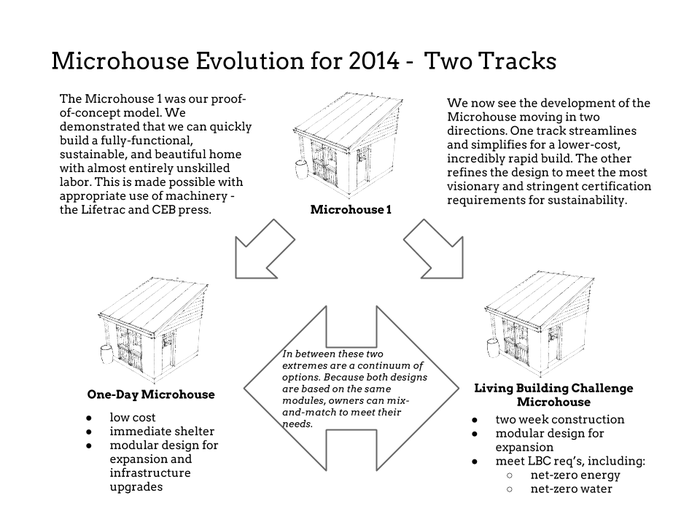
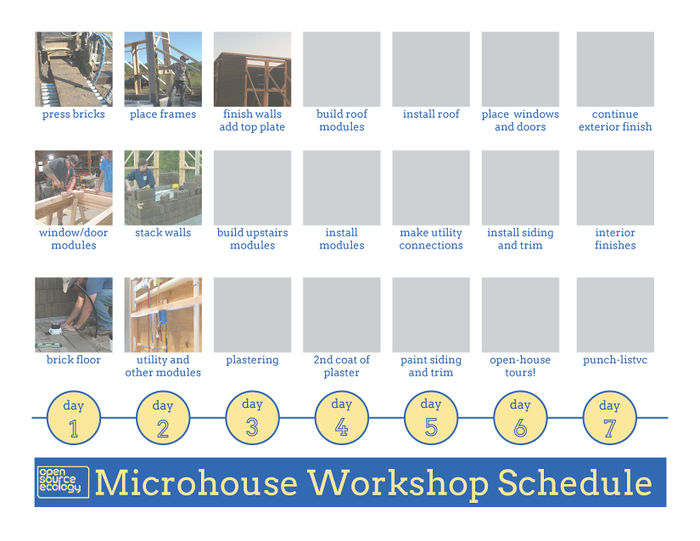
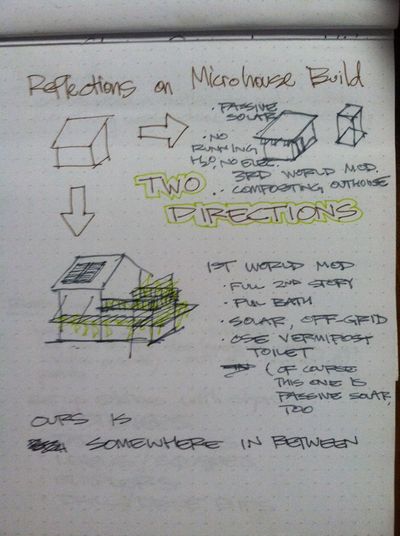
Marcin requested development of a One Day Microhouse... a great idea, and I think a better label for it than what we had been referring to as the "Third World Microhouse." They are essentially the same thing. To simplify development, there are two main tracks for evolution of the Microhouse, as displayed in this mock-up graphic. (Images for One Day and LBC Microhouses are just place holders.)
I would love to see a graphic like this flushed-out to be part of the Microhouse promotional materials. A question is raised by this: Do we format the graphics for slideshows (i.e. - widescreen) or for print? I think that the digital presentation version is the way to go, unless graphics are intended to be printed as construction documentation.
One Day Track
Thursday, Nov 7, 2013
Microhouse Commercial Work with Rob
Rob and I continued work today on the Microhouse commercial to attract both participants and hosts. A two-column script for video and audio was generated for a second pass. The first pass was posted in log a few days ago.
Continued Work on Trencher with Marcin, Dorkmo
Email from James, related to work below:
"minor thing, i think it need to be rotating so that the teeth are coming up out of the ground on the side that the cutter is traveling?
its looking great"
(contained the following image)
My response:
"I don't know! I've wondered this very thing :)
Like with a circular saw blade, the blade moves opposite the direction of travel so that the tool does not "get away from" the user. What I wonder is, with such a large device, is the idea the same?
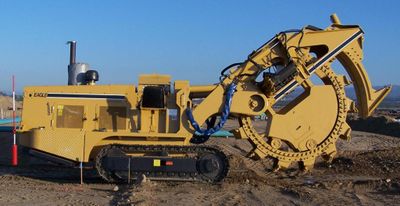
Looking at images of industry wheel trenchers, I get the impression that the machine travels in a backwards direction, and it looks to me from the teeth, that the wheel cuts opposite the direction of travel.
Does it look the same to you?
If so, I'll reverse the direction of the guard, the chute, and the spool, and change the direction of the cutting wheel, too.
-Chris"
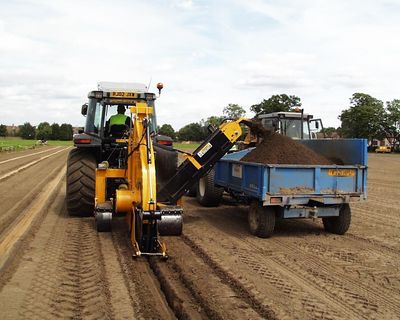
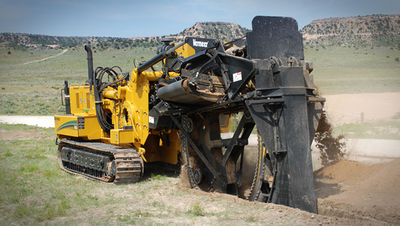
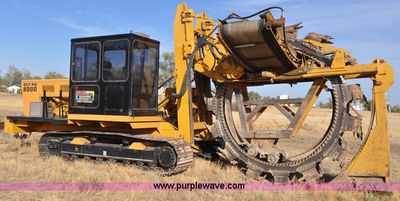
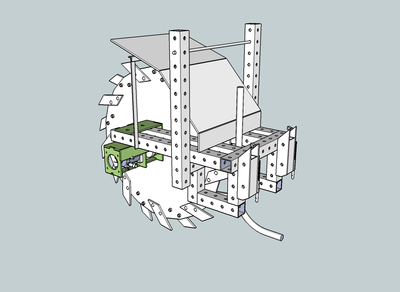
Here's a few of the images we are looking at:
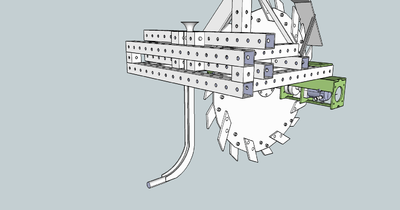
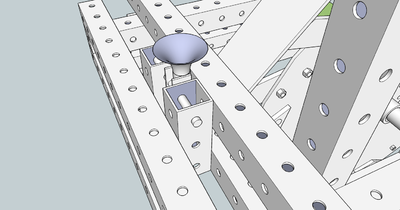
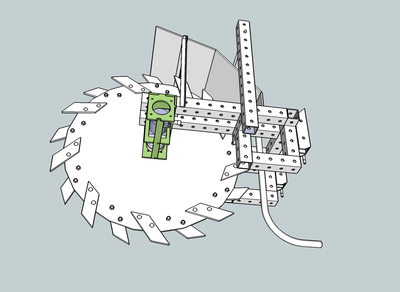
Mounted motors properly (I think - holes don't exactly line up with module of 4x4 tube). Added chute for wire. Added guard. Added support rod for spool. Added bobcat quick-connect.
File:Trencher add chute guard.skp
Trencher Details Discussion
Current Trencher Model File:Trencher refinements near final draft.skp
Narrow Guard
Get rid of Bobcat and leave a rectangular structure – assume that we hang with a long flat bar, foggedabout bobcat qa
Replace the spool bar with a 4x4
Use a single 4x4 for holding the spool
Guard narrowed to 8" Rectangular mount of tube - 12" h, as we discussed on the phone. I see what you mean about not much support. And regarding the welding of all pieces - that's how it looked to me in the sketches. Don't think spool bar can be 4x4 - need to be able to put a spool with a smaller hole, like for electric cable.
Wheel – 5' diameter – need 3.5” hole in center, and do the standard 8 bolt truck wheel pattern but use 1” bolt holes – really do 1-1/8 for the hub mounting
Yes.
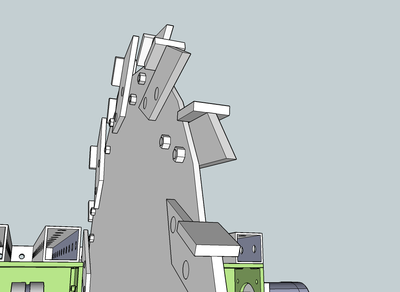
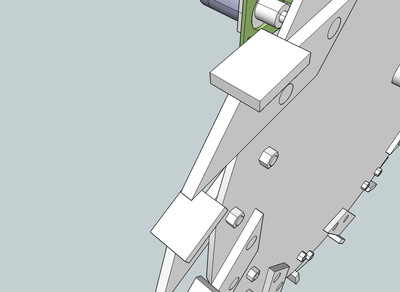
For the teeth, do 3/4”+1/16” Yes. holes are 13/16"
Sandwich 2 sheets of 1/4” flats around the chute; chute needs to be lowerable
Trencher chute gets pinned between two short 4x4. Notch plate on side of chute to receive pin.
Make plane of the quick attach wheel about 10” away from the cutting wheel – to allow sleeve a
Not sure I have that one exactly right.
End the arms with the plate of the qa wheel
Holes on motor mount plate do not line up with holes on support arms. We can move these holes wherever we want, right?
The reinforcements neeed to be pointing up to achieve 3' dig depth
I changed the support arms to the top... don't think this is what you had in mind.
Search on wiki for
- http://opensourceecology.org/wiki/Mike_Hill_6_in_60_Metal_Order#Parts_Addendum
- Look at wiki for sketchup to DXF, generate both tooth file and wheel file, and hub file.
Thoughts: Add smooth flange at pipe ends to avoid damaging wire or flex pipe fed through it? Radius shown on chute is probably impossible to achieve through bending. I don't think we want the chute to extend further under the tractor, though. Maybe use long-sweep plumbing fittings?
Wednesday, Nov 6, 2013
Dorkmo Updates + Trencher Tooth
dorkmo Log made changes to tooth attachment. I added a plate to the tooth to widen the trench slightly.
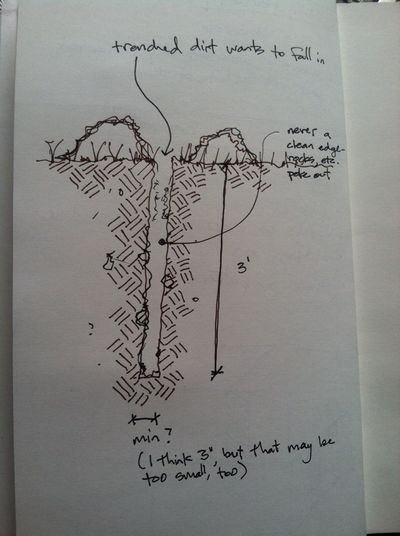
To me, this is the most important functional specification- what is the range of trench widths that this design can support and what is the minimum functional width at a depth of three feet? There is a obviously a maximum width, where the teeth can no longer cut through the soil. On the other end, there is a practical minimum width to the trench that I see to be 3". Especially at a three foot depth.
The walls of a trench, even in stable soil are never totally clean - rocks, roots, and loose soil often project from the walls. There is also the constant tendency of the loose soil that has been excavated to fall back into the trench. For these reasons, in incredibly narrow trench -- just the width of the disk and the narrow teeth (2" as currently drawn) is not functional. 3" may work, but I think 4" or 5" would be even better. There is also the need to clean the trench with a trenching spade, and the standard width of a trenching shovel is 4".
A little research into industry standards shows the relationship between width of trench and depth.
[Image:Width_Depth_Table.tiff|800px]]
Following the standards on this table would mean we would want our trencher to have the power to cut a 6" wide trench.
Using teeth 5.5" wide, with the 1/2" offset created by the disk (should this thickness be 1/2" or 3/4"?), gives a 6" wide trench.
[Image:TrencherDorkmo1+wideteeth5.5.png|600px]]
Tuesday, Nov 5, 2013
Trencher Draft
Based on Marcin's Sketches (http://opensourceecology.org/wiki/Trencher_Concept_Drawings), an initial 3d Sketchup model of the trencher is born:
Next step is to add the Bobcat stand quick-connect. Also, need to add another piece to the tooth component to create the desired width for the trench.
Meeting with Zach Dwiel
Sat down with Zach today for an hour to get an update on their CEB project and share our experience with the Microhouse. Fruitful conversation that covered topics of stabilized bricks, methods of wall construction, and especially figuring out ways to insulate CEB walls that don't require incredibly wide foundations (like Zach's). Also discussed ideas for a machine that could mix pulverized soil with small amounts of cement and/or lime to feed the brick press a homogenous mixture for stabilized CEBs.
I'm going to head out to Zach's this weekend to photograph his home and get some details of how the double wall construction worked and lessons learned. I will write this into a blog post that covers both the technical aspects of construction as well as touching on the human interest of a young couple building their own home with OSE's brick press.
Meeting with Jean-Baptiste
I had a google hang-out with Jean during which we discussed next steps for the Microhouse infographics. We talked about the following changes to the main Microhouse graphic:
- showing the plaster cutaway so that it looks more like a cutaway and does not stop at the same point as the brick - showing siding and wood trim on upper modules, cutaway in the same fashion as the plaster - showing bricks for trombe wall on inside of window modules - showing the as-built stacking pattern - showing bricks near the door frame "stacked up" the same way they are displayed by the utility module - showing utility module penetrations through wall - showing CEB walls extending above the loft to reflect actual construction
I provided Jean with a copy of the Sketchup model for his reference. We also discussed another infographic sheet that details the passive solar functioning of the building. It will be a combination of a simple sketch I poster earlier on the log (Windows and Door Modules complete) and the section cut through the Sketchup model:
Monday Nov 4, 2013
Reaching Out
Connection formed with Molly Reichert at U of M
Conversations have begun with Molly Reichert, an architecture professor at the University of Minnesota. Their school has a hands-on maker focus that is in alignment with OSE. Sounds very promising. Molly is interested in bringing Marcin, myself, or both of us there to speak, attend a review/critique, and potentially run a workshop. Here is a description of the class she will be teaching in the spring.
"FarmTECH: A course that builds on the Farm Hack movement, Open Source Ecology, and addresses issues surrounding self-sustaining communities and local food systems. This course fits within the emerging field of urban agriculture and DIY tool building practices. Students will research current farming practices through site visits and workshops with local farmers. Coursework will address unmet needs of the industry through designing and building tools. Tools could range from climactic sensors, to farming implements, to food processing equipment."
Molly is also interested in the combination of Wiki House and Microhouse ideas, and she asked for my input on her development of a course for fall '14 based around this idea and incorporated into the Microhouse Competition.
Initial Responses from Udall Network
Sent out the Microhouse flyer with an introduction to the Udall network. Received three responses in short order regarding finding a workshop host in the south:
1 -------------------------- Hi Chris,
It's not my area of expertise, but here in Austin Texas seems like a good place to try it. Poke around, and good luck,
Oliver
2--------------------------- I am just moving to Quebec from TX. I know you're looking for a southern host but do you have any openings in the spring or summer to do a workshop in QC? I'd be very interested in hosting one?
Molly
++ Molly Schriber
earthstudies.ca Udall Scholar 2010 Periclean Scholar 2011
3--------------------------- Hi Chris, Sounds like a great workshop. Here are a few ideas off the top of my head.
I'm on the board of the Highlander Research and Education Center located just east of Knoxville, TN with an amazing view of the Smoky Mountains, and if you're interested, then I'd be willing to work with you to try to set up something at Highlander. http://www.highlandercenter.org/
If you're looking for something more urban, then green building and sustainability non-profit Southface in Atlanta might work http://www.southface.org/
If you're looking for something more off-the-grid, then you could check out the intentional community/learning center near Chattanooga, TN: Sequatchie Valley Institute http://svionline.org/about-svi/
Best, Liz
Will follow up with these individuals and organizations later today. For the moment, beginning work on trencher sketchup.
Saturday Nov 2, 2013
Final Flyer and Schedule Promotionals Created
Posted to FeF blog entry regarding host search for Southern U.S.A. http://blog.opensourceecology.org/2013/10/seeking-microhouse-client-in-the-southern-usa/
Friday Nov 1, 2013
The search for the Microhouse client is on. Over the past few days, we have been in-house editing the requirements for the workshop hosts and the nature of the agreement between OSE and the hosts. Several documents reflect worked-through but not-quite-final drafts:
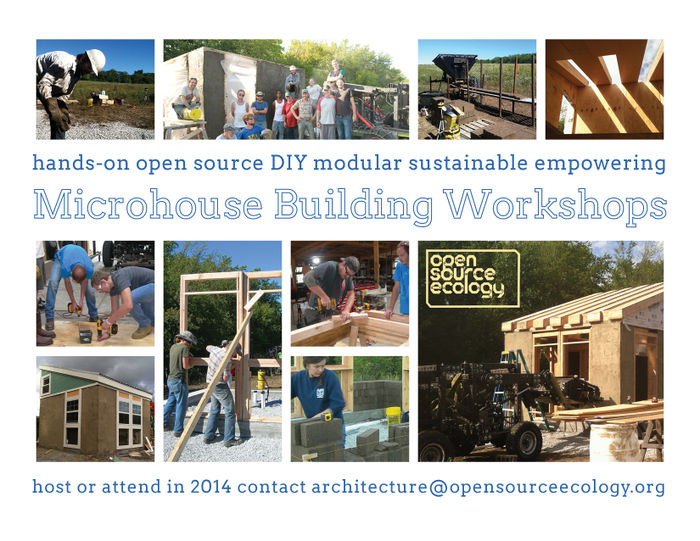
I think the best way for potential hosts to become interested is through some kind of media contact - either an image or a video that they see on the internet, or in the case of an image, possibly in print. I wrote a rough script for Rob to make a rough cut of a commercial, and I made a workshop flyer for distribution on the web, and as part of a grass-roots campaign to get our friends and fans everywhere to print it out and hang it up where they think like-minded people may see it.
Flyer for Microhouse Building Workshops 2014
Rob Makes Rough Cut for Workshop Commercial
Sample Schedule Graphic for Microhouse Building Workshops 2014
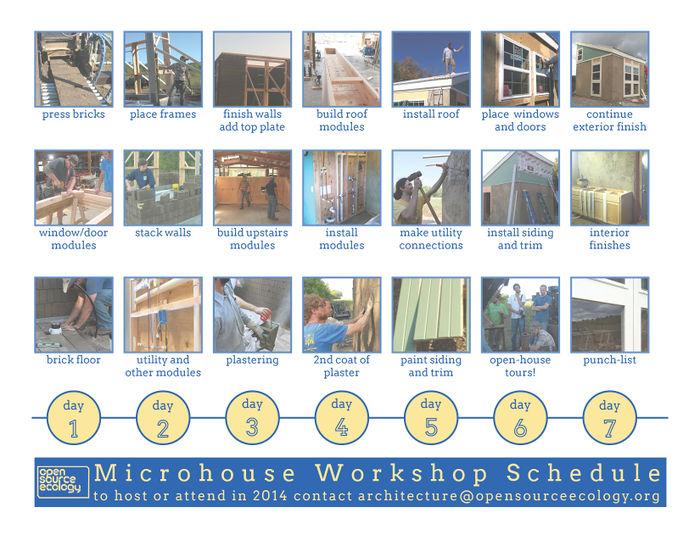
To help potential participants and hosts understand what happens at a Microhouse workshop, Rob suggested we publish the schedule for the week. Here is my mock up of an inforgraphic schedule to use promotionally.
Thu Oct 31, 2013
Microhouse requirements - [3]
Fri Oct 25, 2013
Presentation at Ball State Alumni Symposium 2013
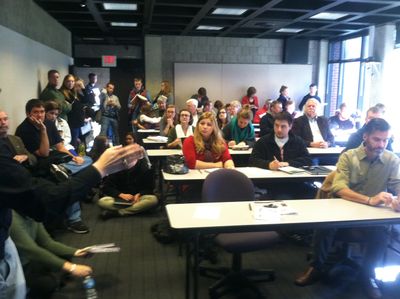
The presentation today went very well. Had a standing room only crowd of roughly 50 in a small room. Who knows how many there could have been. People kept coming just inside the door and then leaving because there was no room left. By the end of it, there were people standing in the hallway and watching, as well as sitting on the floor.
There were seven or eight students that expressed interest to me after the talk about OSE's work and the Microhouse. They were all looking for opportunities here, though, and it makes me think that developing a special workshop just for design students is a solid plan. It would basically be a very similar workshop build like we have done for the Microhouse, but it would include nightly design charrettes, where the students get engage their drawing and creativity in addition to developing their hands-on skills. I would like to try one of these in Bloomington in the '14 building season on my property to give those students from Ball State that are not able to travel the opportunity. We could also try one at FeF and market it to local and regional architecture schools.
John was there, and I promoted his LA471 class as another opportunity to become involved. He and I did not have much time to talk after the presentation, but I will catch up with him soon. I plan to be doing a small but regular amount of my remote work from here in Muncie, to have access to the resources of the University - the architecture library, the professors, and the students - also the laser cutter and the CNC router. If we need to get more items laser cut, I could do them during my time in Muncie and the only cost would be the material that gets cut and the shipping.
I counted about 7-8 professors - I knew four of them: George Elvin (who is working on the Post-Petroluem book with the Microhouse as a case study - I recommended again that in addition to the Microhouse interview, he talk to you, Marcin, about the rest of the GVCS and how it relates to a post-petroleum future. He was excited by that.) Walter Grondzik (who donated some free engineering consultation on Microhouse 1.0), Andrea Schwartz (a professor of structures and studio), and John Motloch. This is great. I feel that over time, "recruiting" professors is an even better plan than recruiting students, because the professors then become recruiters themselves, hand-picking the types of students we want and encouraging them to work with us. I have heard John talk about playing this role successful for Pliny Fisk. In fact, my mentor, Dan Overbey, was connected to Pliny through John and the LA471 class. This is a reminder of what a boon it is that John is making the master plan the focus of his class.
Overall, great response from the presentation. Look forward to doing more. Having the log here on the wiki and the other documentation like the Sketchup model and the instruction manual is great for presentations because I can show people the documents we used to make this happen. Most of the information has already been captured.
Thur Oct 24, 2013
Long-Term Goal
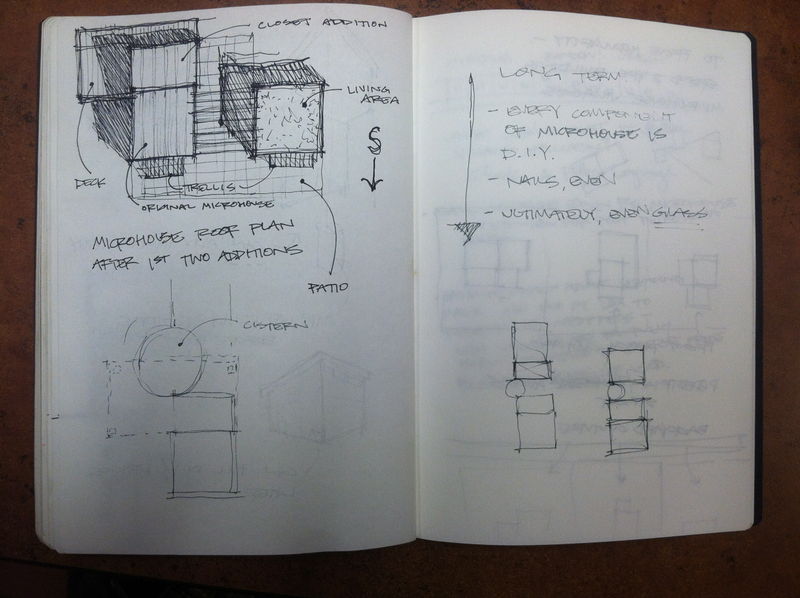
The long-term goal for the Microhouse project should be that individuals could create every single component of the home themselves, including the insulation material, the nails and screws, the pipes, and even the glass. Microhouse 1.0 is a proof-of-concept learning model, but the ultimate concept is NOT for people to have to go to the building supply store to buy the products needed. People need access to the knowledge and machines to create building components themselves.
Thought for Immediate Expansion
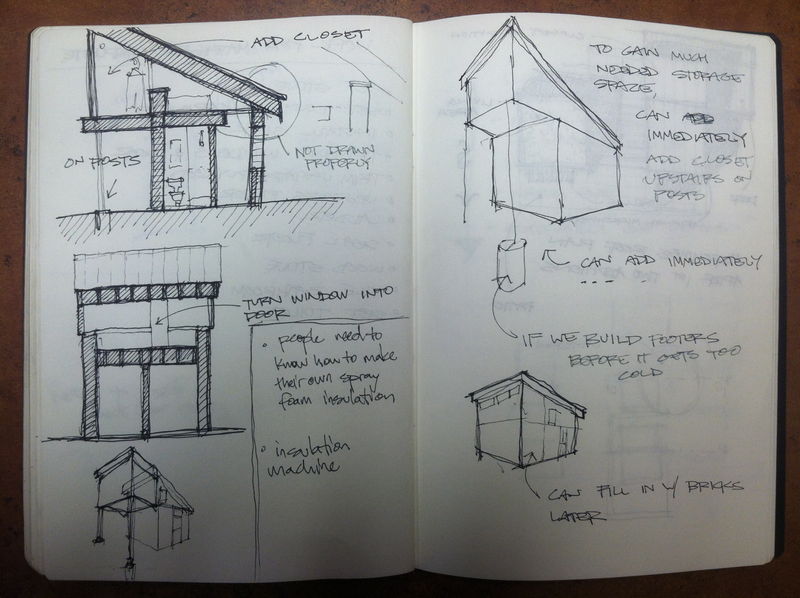
One challenge with such a tiny home is finding space to store stuff - not the multitudes of junk that consumer culture pushes on people, but the necessities, like clothing. Here is a thought for how to add a small closet space to the upstairs of the Microhouse and later fill in underneath it.
The underneath portion could become a low-tech "ice box" or root cellar. If we shade if from direct sunlight (perhaps with an upstairs deck that could be accessed from loft bedroom), and couple it to the thermal mass of a cistern, I think we could maintain a low enough temperature for it to be functional for food storage.
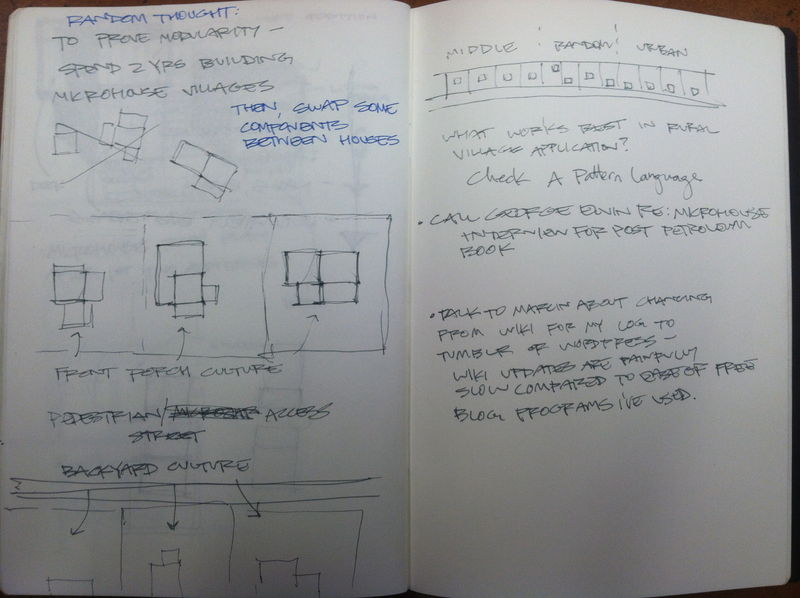
Also have begun thinking about how we might create village clusters of Microhouses at both Factor e Farm and other locations. Basing this information off of traditional neighborhood development wisdom coupled with passive solar ideas. More ideas on this to come... this is just a brainstorm starting point.
Energy Modeling
Marcin,
Another project I plan to work on during the cooler months, when we are designing and planning for workshops, is to do energy modeling on the microhouse using sketchup and some other available plug-ins.
My mentor for the Internship Development Program, Daniel Overbey, is an expert in these matters and can give me guidance. This guy is awesome. He worked for Pliny Fisk for a while - here's a brief bio:
Daniel is recognized for his work in the area of environmental design and building systems analysis. Daniel brings a unique research and design background to Browning Day Mullins Dierdorf Architects. Prior to joining the firm in 2008, Daniel worked for a non-profit education, demonstration, and research organization in Austin, Texas, an architectural research lab in Las Vegas, Nevada, and served as an environmental design specialist for an architecture firm in Las Vegas, Nevada. Currently, Daniel provides research, design, and building systems analysis services to various projects. Before earning a Master of Architecture degree from the University of Nevada, Las Vegas in 2007, Daniel earned a Bachelor of Architecture and a Bachelor of Science (Environmental Design) degree from the Ball State University College of Architecture and Planning in 2005.
What it doesn't say is that he publishes articles constantly and is very well connected in the national sustainability movement. He's also the president of the Indiana Chapter of the US Green Building Council. Recently helped move graywater legislation through the state house, too.
Anyway - if we sensor the hell out of the Microhouse and compare the actual data with the energy modeling, we'll get a great sense for how accurate the energy models are. This will help us use the modeling tools on future design/builds, at the same time providing valuable research to the world at-large on how accurate energy modeling is - especially to earthen structures.
-Chris
Tues Oct 22, 2013
Indirect Solar Heater Doubles as Truth Window
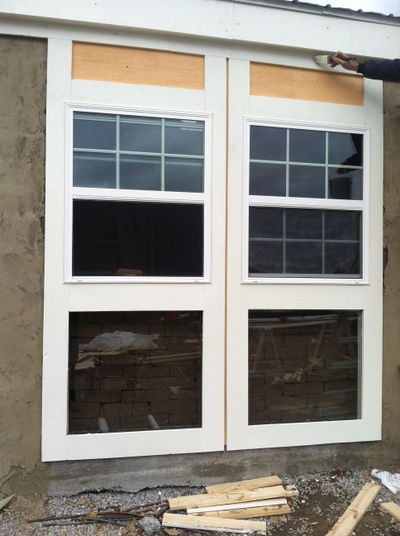
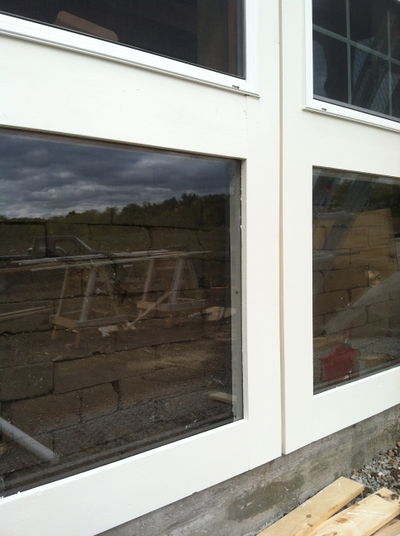
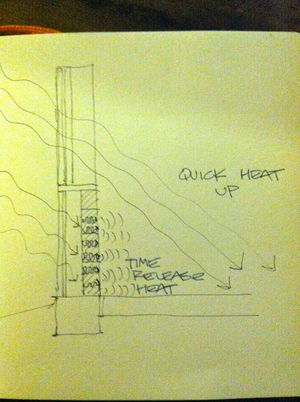
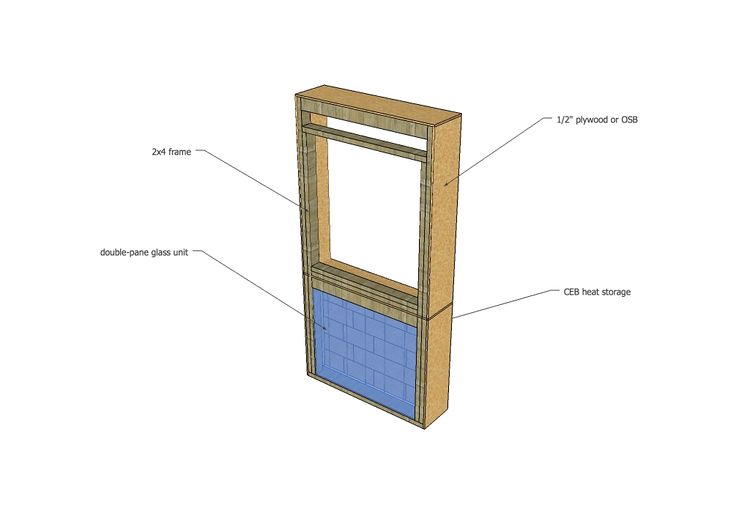
It is quite common in the natural building world to install "truth windows" - a window that let's one see what the wall inside is actually made of. In our case, the truth window doubles as an indirect solar heater. The sun's rays shine through the double-paned glass, warming the earth blocks. The heat energy slowly moves through the blocks and is released into the interior space.
I think these large truth windows turned out beautifully!
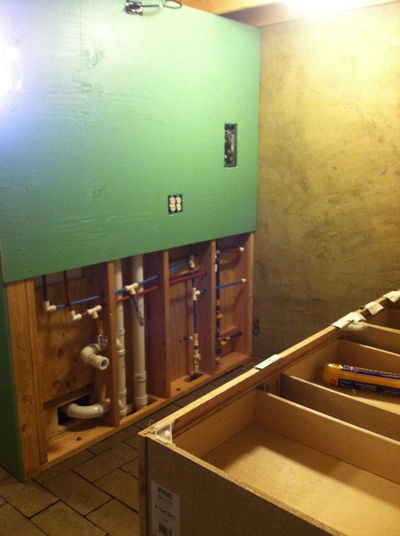
Interior Finish Work Moving Along, Electrical System Tested
We finished all the utility module connections today.
We also tested the majority of the electrical system and began installing the kitchen cabinetry.
All Exterior Finish Work Complete
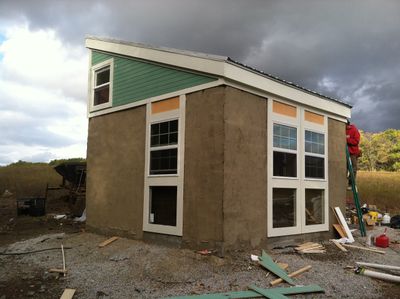
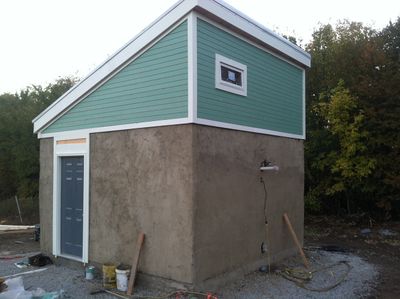
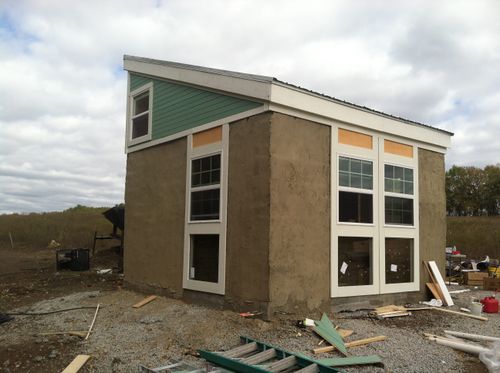
Today we wrapped up the exterior finish work on the Microhouse, and it's looking sweet.
Window Trim Complete
Mon Oct 21, 2013
Sun Oct 20, 2013
Trimmed Out Upper Level
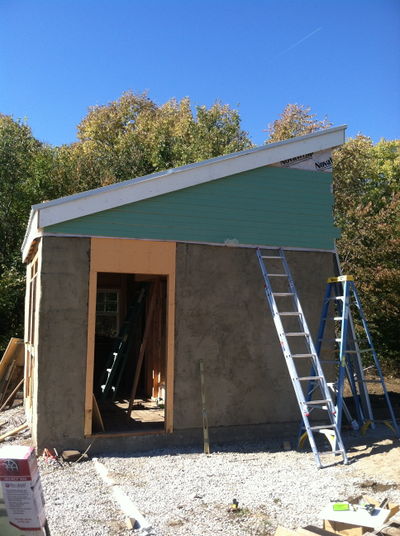
Today saw the siding get finished and the upper level all trimmed out. Really starting to look finished now!
We also finished the interior plaster, set upstairs "kickboard" panels, and made 90% of the utility module stub hookups. We also positioned the instant H20 heater.
Sat Oct 19, 2013
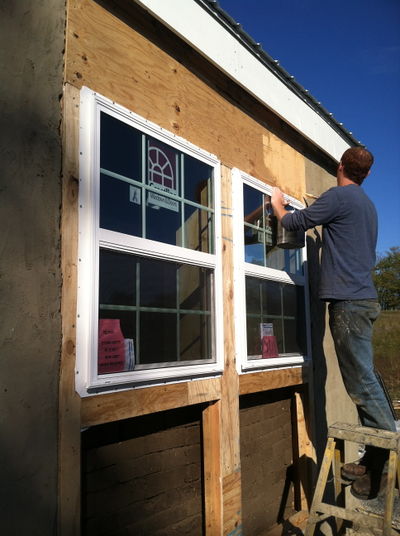
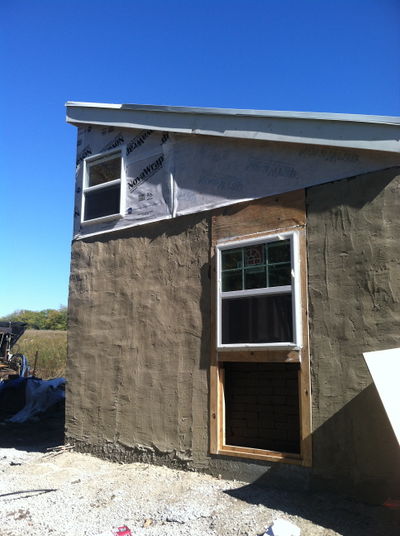
Siding Complete on Two Sides, All Windows In
We were able to get the siding up on the east and north sides - it is wonderful to see the color next to the earth plaster! It is really going to pop once the bottom, top, corner, and window trim goes on.
We were also able to get all the windows in. This is always a wonderful moment in home-building... where it really starts to feel like a house.
We were also able to get quite a bit of interior finish work done, but by dusk it was too dark to get photos of the work. More interior shots coming tomorrow!
Siding and Windows Going In
Some of the details are becoming apparent - really starting to come together.
Microhouse Finish Work Gets Underway
Arrived mid-day yesterday and immediately got to work with Rob, Cody, and Mark on the Microhouse 1.0 finish work. Mark trimmed the metal roof and added the edge trim in addition to finishing screwing down all the panels.
Cody and I added the majority of the interior ceiling panels and installed the upstairs window.
We also began the caulking and foaming to tighten up the building envelope. Today we continue with more window installation, adding the exterior siding, and beginning wood trim.
Wed Oct 9, 2013
Roof video time lapse documentation (edited by Rob):
Mon Oct 7, 2013
Have any of you guys seen this book?
http://www.amazon.com/Tiny-Homes-Shelter-Lloyd-Kahn/dp/0936070528
A book all about tiny (less than 500 sf) homes, by the well-known builder/author Lloyd Kahn (his first big hit was the highly influential book on DIY housing, Shelter).
Here's a little 2:00 minute video trailer for the book.
http://www.youtube.com/watch?v=u-2fsYypJoo
I mention this because I am going to contact him with the intent of getting the Microhouse in his upcoming book Tiny Homes 2. He and I have some mutual friends in the natural building world, so I think I'll be able to reach him without any difficulty.
-Chris
Sat Oct 5, 2013
Next Microhouse Iterations Move in Two Directions
More details to come, but I think the next versions of the Microhouse should move in two different directions - one is the simple, very inexpensive, "third world" version. The other, a more refined, "first world" version. The Dwell magazine, version. Microhouse 1.0 is somewhere in between, but closer to the full-blown first world model.
Infographics!!
I love the beginning of the Utility Module inforgraphic that Jean-Baptiste is working on. It looks fantastic!! Way to go, Jean!
I've got some various graphics in the works myself ;)
Obviously it's a mock-up. The graphic in the middle doesn't match the element logos for the modules, but I think you get the idea. A simple exploded diagram in the middle (on a white background, not gray), with leader lines extending to element logos for the different modules. Next to the modules, we place a photograph of the actual module. Short descriptions could be added, too. Need to finish element logos for all the modules.
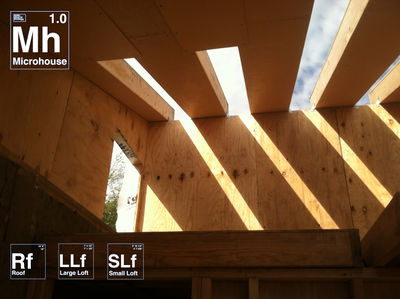
Here's another mock-up - the idea here will be more like the periodic table. A simple arrangement of the element logos of the Microhouse.
And here's one more... this one is an aesthetically compelling photograph of the construction process showing which modules are used.
I think if we took well-composed (artsy, even) shots of construction, we could make a series of explanatory images showing how the modules come together during the construction process.
Fri Oct 4, 2013
Roof panels time lapse (unedited by Marcin):
Infographic in progress:
Thu Oct 3, 2013
Yesterday's exterior plaster:
As I prepare to leave OSE headquarters and the Microhouse build I feel a mix of emotions.
I am elated at our progress and impressed with the quality and quantity of work that we have put out in the past 6 days. Building projects require the convergence of a multitude of inputs, and this one has gone more smoothly than many do. As a professional designer and builder, I am no stranger to solving problems on the fly and dealing with the unknown, but this project has been full-speed ahead from day 1, with no need to bring things to a halt and make a new game plan, the result of a robust design and planning process and many conversations between Marcin and I... and a very accurate and detailed sketchup model!
In addition to my happiness with how well the Microhouse has been coming along, I am sad that I cannot stay until the last screw has been driven. The house has taken its shape, but it is the detailing of home that really brings it to life, and I really wish that I could be here to make it sing. I have no doubt that I am leaving it in good hands, though, and that one of OSE's very talented DPVs will step up and carry this through.
Wed Morn, Oct 2, 2013
Plastering:
Walls Fully Stacked, Top Plate On
Yesterday, the crew succeeded in stacking the full height of the wall and attaching the top plate. The final form of the house is becoming apparent.
Also, made a run to Menard's last night to purchase some long metal tie-down straps, some "power-lags," another drill, and some 3" screws.
Tues Noon, Oct 1, 2013
Work on stacking up the walls is really coming along. 11 courses completed at lunch time. Just 5 to go!
Carpentry has been moving forward today, as well. First roof panel box is built up, and members are cut for the next 6. This evening, we will insulate them and put on the ceiling side.
Tues Morn, Oct 1, 2013
I got the first peek at the CEB floor this morning. The guys laid the last bricks in the dark last night, by the light of the film-maker's camera. I was anxious to see how it looked, so as soon as I woke up I ran up to the site before the day's work started and spent a few minutes alone with the Microhouse.
Mon Sep 30, 2013
Enormous Output of Work Today
We began the day with four courses of bricks stacked...
We started the day with laying the brick floor. We changed our plan about sand to use last minute, and local hauler Larry McPhee was a hero for bringing us a load of sand first thing. I woke the guy up this morning with my phone call, and at first he said he didn't think he could get us fit in. But when I told him where the delivery was going, he said, "The guys that build the tractors?" He showed up 90 minutes later with our sand. Thanks, Larry, for starting this great day off right.
Here is a great overview of the day's activities:
Sun Eve, Sep 29, 2013
Build Timelapse 1: Foundation liberation to brick pressing:
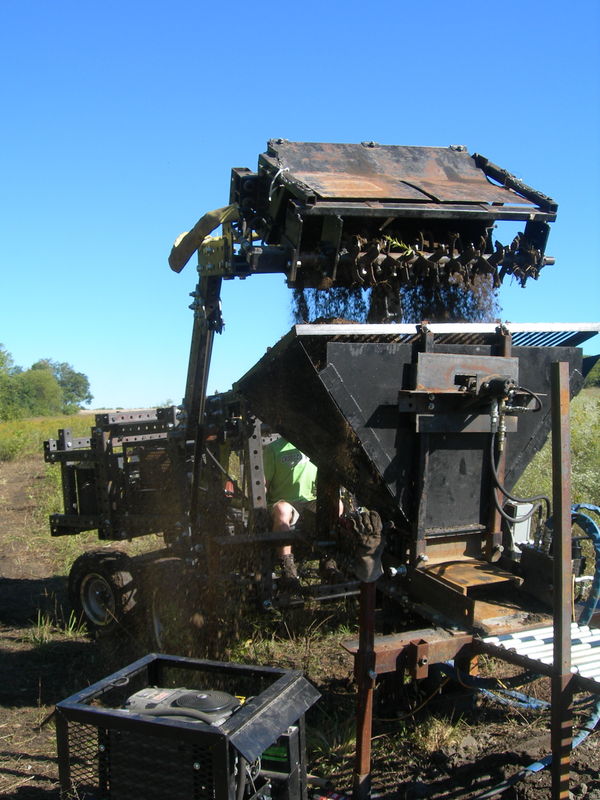
Soil Pulverizer Annihilates Soil Handling Limits. Pulverizer Timelapse:
Progress at brick laying and soil pulverizer closeup:
Window and Door Modules Placed
Before stacking the bricks, we installed the window and door frame modules, plumbed them, and braced them.
4 Courses of Bricks Stacked
We started stacking blocks late afternoon, and managed to get four courses stacked before nightfall!
The quick speed of laying up the brick is made possible by the tractor, the pulverizer/bucket, and the brick press.
Utility Module Complete
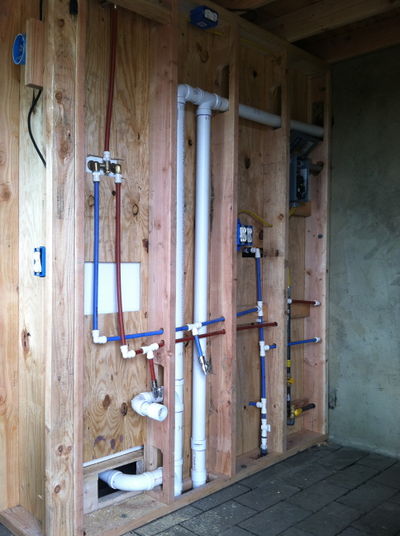
Today we finished the Microhouse Utility Module - the heart of the Microhouse and the most complex component to assemble.
File:Utility module complete.jpg
Door Loft Module Built
The final interior module was completed this morning.
The next carpentry steps will be to create the exterior walls for the upstairs level.
Sun Mid-Day, Sep 29, 2013
CEBs Made
Hot off the press!! Bricks getting made and stacked. The Microhouse is about to get vertical!
Sun Morn, Sep 29, 2013
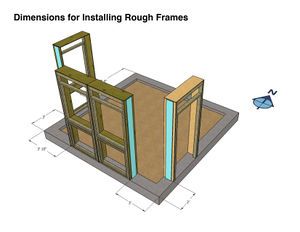
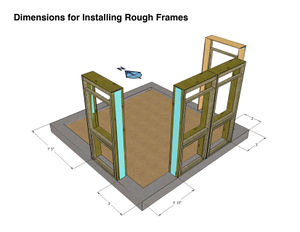
Rough Frames to be Erected on Foundation
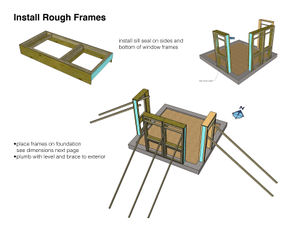
Today we will place the rough window and door frames on the foundation.
Once the frames are in place, we will begin stacking the compressed earth bricks (CEBs)!!!
Sat Eve, Sep 28, 2013
Utility Module 92% Complete
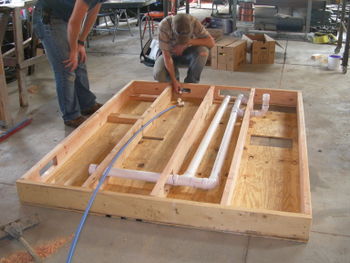
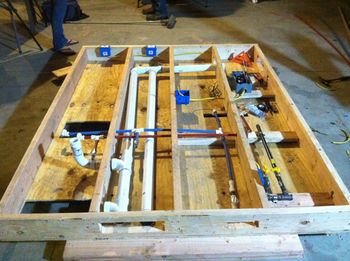
Work began today on the utility module - the heart of the Microhouse and the module with the greatest complexity. It contains all the plumbing and the majority of the electrical systems, and is design to "plug in" to the stubs roughed in on the building site.
The process was quite smooth, with a few hitches: not being able to find a small length of 1 1/2" pipe (it was plastic-wrapped to the underside of a long 2" pipe and three of us overlooked it at first), dead batteries on cameras and photo data-dumping necessitating some stoppages (what we're doing is only valuable if others can access the information). These were minor, though, and the end of the day found the utility module nearly complete!
Window Frames Constructed
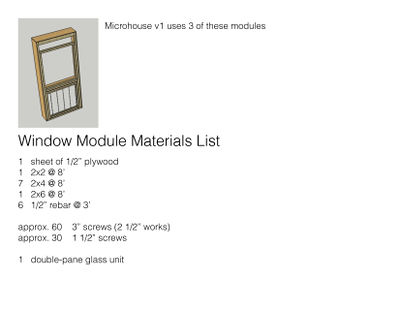
The window frame is more elegant than it actually appears. It is both a direct gain passive solar heater on the top, which quickly heats a space, and an indirect gain solar heater on the bottom, which heats a trombe wall which will store heat and release it into the space later.
The crew today finished three of these modules.
Loft Modules Constructed
The Microhouse loft is composed of two modules. One is sized for a king-size bed, the other is intended as a small hang-out space or for storage. Both have minor electrical components of lights for the spaces below them, the kitchen light for the large module and bathroom light for the small. The small module also contains two outlets to bring power into the loft.
Door Frame Re-Work Done
On my first visit to Factor e Farm a month ago, I built a door frame with their intern Lucas. I called out the wrong dimensions for the opening, though. A couple weeks later, I had a moment where the first thing I thought of when I woke up in the morning was, "OMG, I think I messed up those dimensions!!" Sure enough, upon returning, I measured the frame and found the rough opening 2" too short in each direction. Today, the door module re-work was done. Thanks for redoing my work, Seth, so I could focus on the utility module!
Many Volunteers On-Hand
We were blessed with many hands today... Seth Jenkins helped run crews. John Motloch helped build and document the processes. Catherine Austin Fitts helped organize time tracking of the utility module. James Wise helped Lucas Warner, one of OSE's Dedicated Project Visitors (DPVs), and Marcin modify the tractor. Emmett McGregor, a DPV focusing on documentation, shot video, stills, and time-lapses of the day's work. Cody Harrison and Rob Beddingfield did a little of everything. Thomas and Noah Devick came mid-day and jumped right in. Rob Kirk, OSEs documenter, arrived mid-afternoon and started shooting along with Emmett. Many hands make for lighter work, and this group is a joy to work with!!
Sat Morn, Sep 28, 2013
Parts laid out for utility module
Getting materials laid out to be easily accessible when building is key to a successful workflow. Having a large table really helps! Materials are laid out in sections: DWV and supply plumbing, LP gas plumbing, and electrical.
Fri Eve, Sep 27, 2013
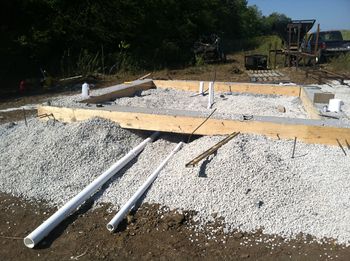
Drain Pipe and Chase Installed
Installed the drain pipes, the water inlet and the chase to enable thermal hydronics to connect to a future module.
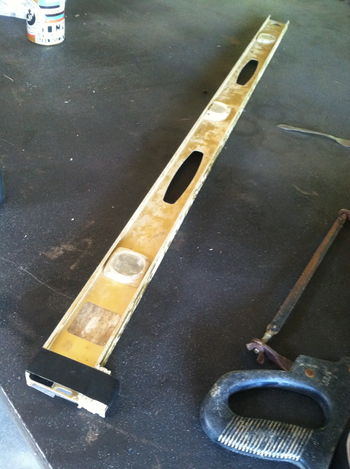
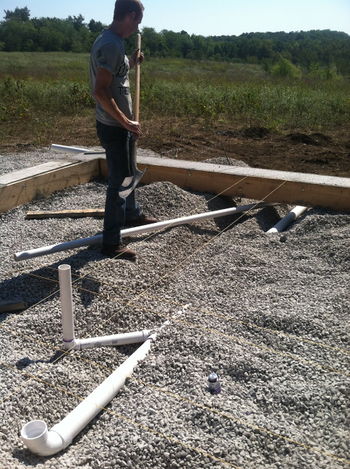
In order to facilitate measuring the fall on drain pipes at 1/4" per 1', a small 1" jig is taped to the end of a 4' level.
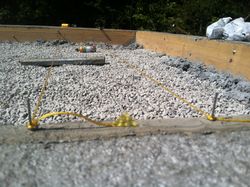
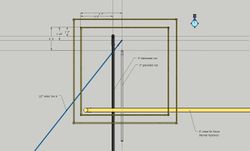
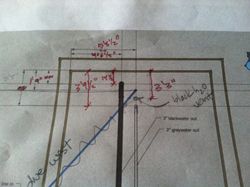
Strings were attached to the foundation form boards; intersections show where pipes come through floor. Final dimensions shown on marked up sheet to make any adjustments needed to utility module.
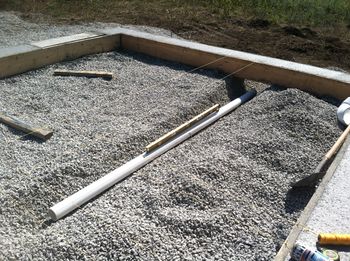
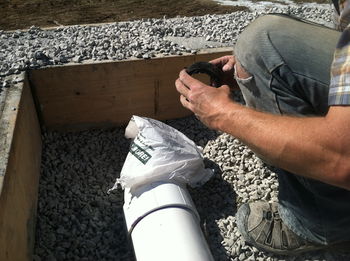
3" blackwater pipe was installed first. Gravel was dug out, pipe was put in place and checked for proper fall. "Shit runs downhill," the old plumber's golden rule says, but it runs downhill best if it sloped at 1/4" per 1'. Too much fall, and liquids can outrun solids.
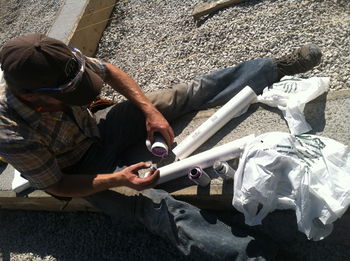
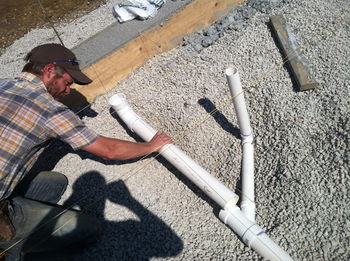
Always prime pipe before gluing to ensure a good bond. The vent pipe for the blackwater outlet (not shown in original drawing) penetrates the floor to come into the utility module. String intersections were used as guides and pieces were held in place to determine pipe lengths for cutting.
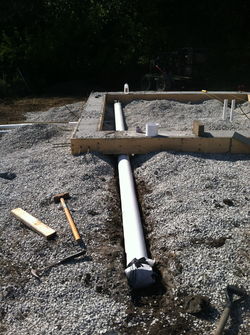
Once the 3" pipe was in place, a similar trench was dug out for the 2" line using the string as a guide. Here, the 2" and 3" lines are shown exiting the building. Both were kept low enough that the 6" line can go above them.
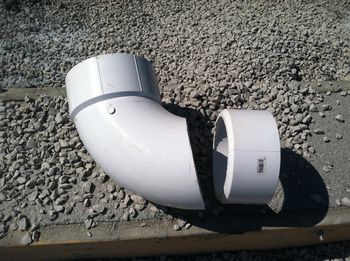
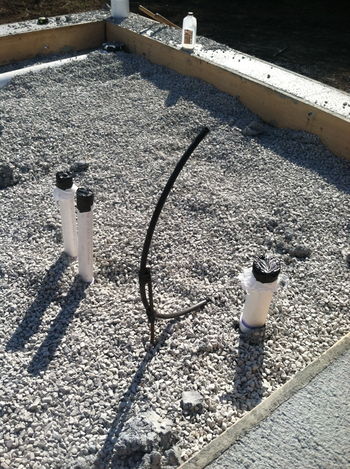
The last pipe to go in was the 6" chase that will eventually contain insulated PEX pipes to carry thermal energy to a future module. The 90 was too tall, so one of the bell-ends was cut off of it. Once the pipes were installed, the ends were capped with plastic bags and duct tape to avoid debris getting inside them before use.
The end result... pipe stubs right where we want them to be!
Fri Morn, Sep 27, 2013
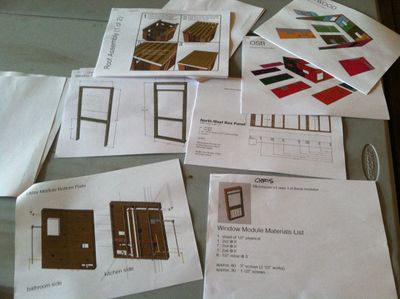
Arrived at Factor e Farm late last night. Finished printing instruction sheets this morning.
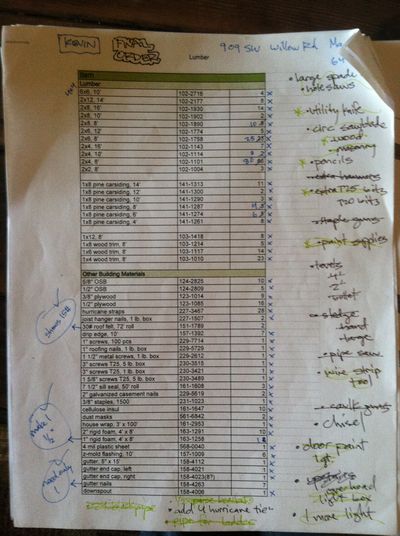
Spent much time on the phone with Menards on Wednesday evening making substitutions for items that were damaged/out of stock. Also made a final list of items to acquire before leaving
Thu Sep 26, 2013
Moved Brick Press 1 into place:
[[
OSE MicroHouse Update September 26 from E McG on Vimeo.
Wed Sep 25, 2013
Microhouse Final Bill of Materials
Microhouse Foundation pour - Time Lapse
LifeTrac 6 First Drive (basic walkthrough + soundtrack):
Tue Sep 24, 2013
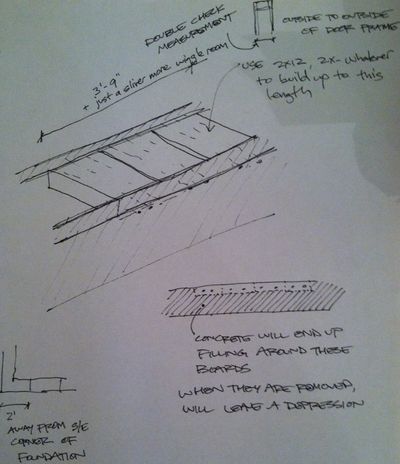
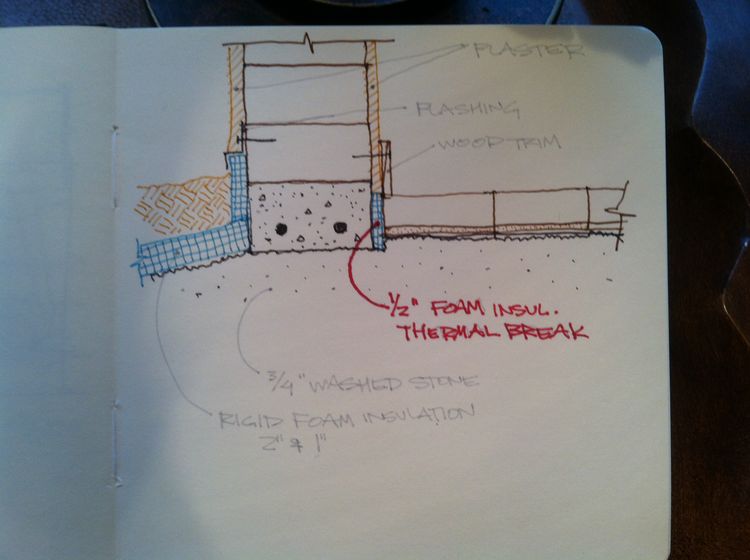
Door frame recess in concrete foundation detail sketch:
Mon Sep 23, 2013
Sun Sep 22, 2013
Chris Discussion
- Use Materials Requisition Form template - critical to track Ordered/Shipped/Tracking #/Received/Accepted chain - Material,_RFQ,_and_Work_Requisition
- Sensors - for hard data, $500
- Surface mount sensors - Open Source Temperature Sensors, illuminance, relative humidity, temperature reading, Open Source Infrared Camera from Public Lab
- 2 rebars per side - 16' from 20' section, 1 foot stub out
- Pay fuel costs only for travel
- Kitchen - 2 outlets -
- Extend loft over kitchen by 1.5 feet
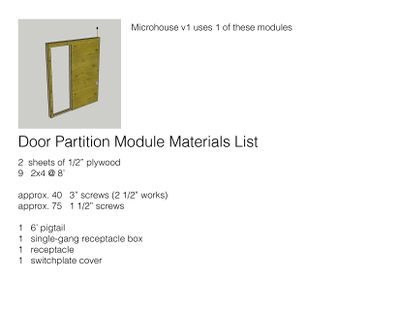
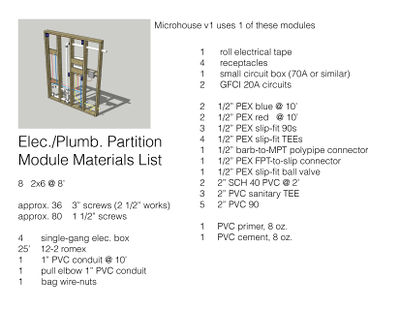
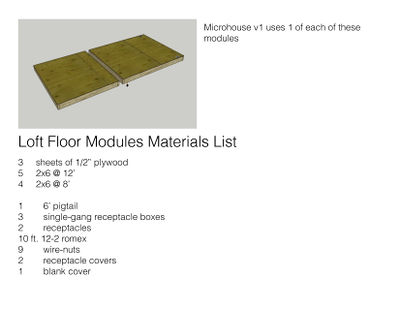
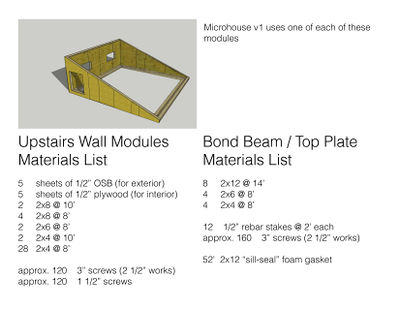
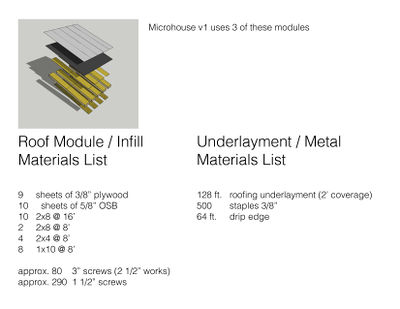
Materials Lists per Module
for final Microhouse v1 documentation, add sheets for materials already ordered (door frame, foundation)
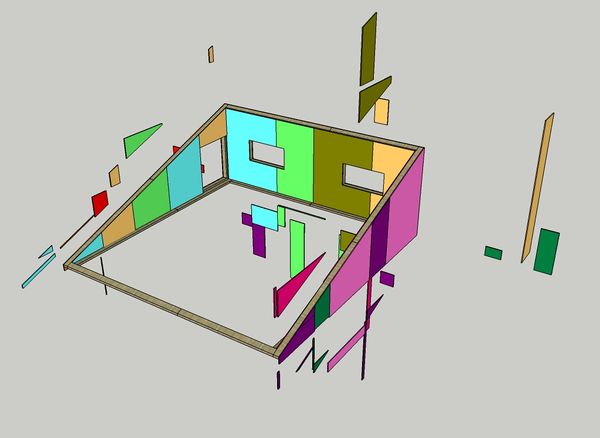
Plywood and OSB Counts Determined for Minimal Waste
In order to ensure maximum efficiency with cutting sheet material, sketchup model was sheathed with different colored 4x8 sheets to track number of pieces needed. Totals for upstairs wall carpentry is 5 interior sheets (3/8" plywood in this case) and 5 exterior sheets (5/8" OSB).
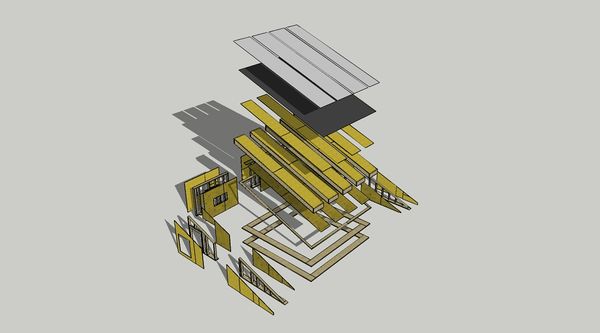
Exploded Assembly Diagram for Final Animation In Process
Fri Sep 20, 2013
Meeting with Walter Grondzik, PE
Walter Grondzik is the author of Mechanical and Electrical Equipment for Buildings, the "bible" on building MEP systems and passive design, as well as The Green Studio Handbook, a reference for incorporating sustainability into schematic design. This afternoon, he graciously donated an hour and half of his time to the project. We talked about small design details regarding thermal performance, as well as ways of gathering some solid data on building performance.
Here's a video of Walter discussing the uses and rationale for adding sensors to a building - then we'll look at some details that were discussed.
Walter gets excited about building science. I wish I had captured on video our conversation about the different types of data collection he recommends. Here is the list:
   1. Sensors, like the ones recommended in the video for ambient temperature, relative humidity, and illuminance.
      Plug-ins to the sensors that are thermal probes.
   2. Infrared (IR) Camera study
   3. Blower door test.
Ball State has this equipment, but it needs to be looked into if it could be brought to the site at a later date during building operation.
One item we discussed was getting the best performance from the direct solar gain heating system (heating of the CEB floor by sun shining through windows). Walter highly recommended putting in a thermal break between the floor and the foundation. Without this break, there heat will travel easily from the floor to the foundation. He suggested a 1" thick piece of foam, but he agreed that a 1/2" piece would be acceptable. Even at 1", the plaster and a trim board would cover it.
Walter reviewed the window design including the indirect gain solar heating system, and thought it was an idea that would work well. He also felt that the amount of glazing to floor area seemed appropriate.
This modular system - combining both direct and indirect gain systems - balances the quick warming felt with a direct gain system and the time-lag heat release experienced with an indirect gain system.
We spoke quite a bit about air sealing the building - a critical component when maximizes passive gains. He liked the idea of using a foam gasket (referred to often as "sill seal," in the field) between the window and door frames and the blocks stacking up next to them. Also, between the block wall and the top plate.
(More to come soon...)
Mon Sep 16, 2013
Utility Module Design
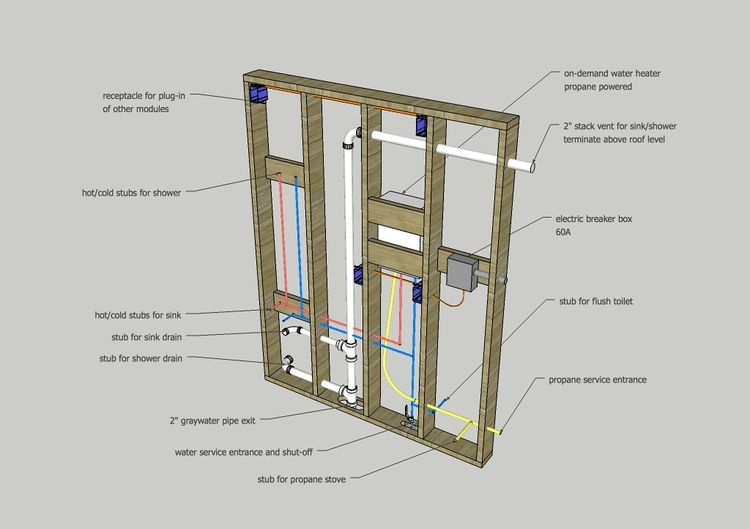
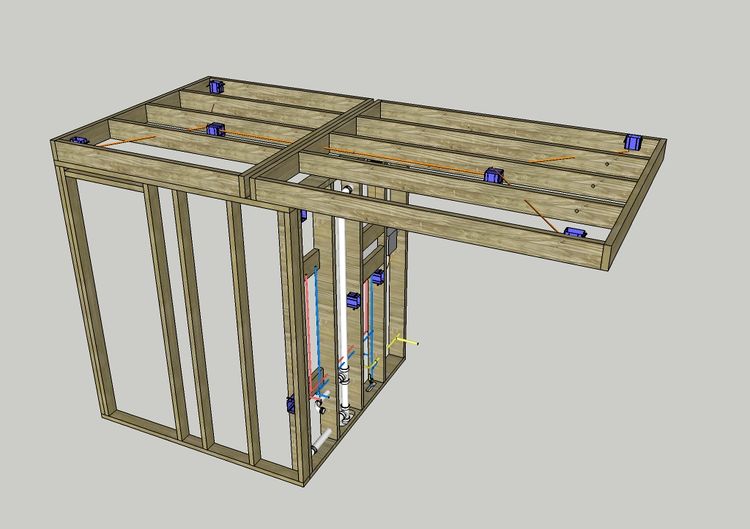
The utility module contains all the connections for the electrical and plumbing, and doubles as a partition wall separating the kitchen from the bathroom. This particular location allow all the plumbing connections to be inside a single wall.
Interior Partitions and Loft
Chris - remove power outlets above kitchen?
Extend section above kitchen about 1-2 feet to expand loft size / fit king-sized bed?
Interior partition walls and loft panels shown with sheathing/decking removed to view electrical and plumbing.
Sun Sep 15, 2013
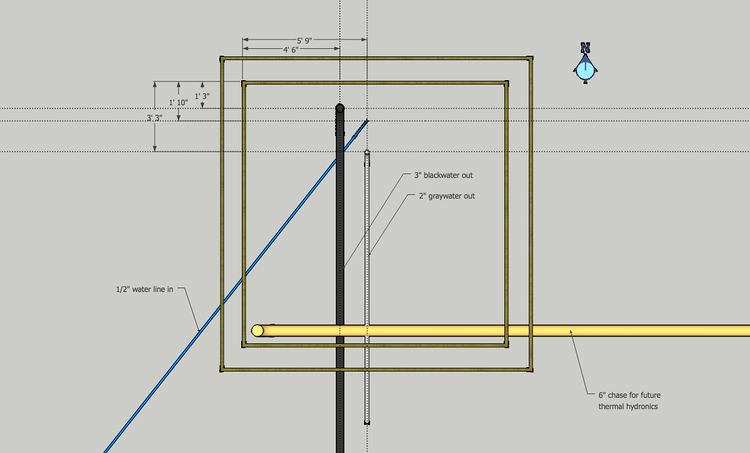
Precise dimensions for pipe layouts
Notes:
  1. Measure and mark opposing interior form boards with dimensions listed.
       1a. Measure from outside of inner form board (in other words, from what will be inside of concrete).
  2. Put small nail into form top at location of mark - string between similar mark on opposing form board.
  3. Run designated pipes under foundation formwork and make sure vertical pipe is directly under
     proper intersecting strings.
  4. 6" chase for future hydronics does not need to be at any slope.
  5. 2" graywater and 3" blackwater lines MUST BE AT 1/4" slope per 1' of length.
     This is required for proper drainage, otherwise liquids will outrun solids.
  6. Pipe layout shows 6" chase running over 2" and 3" lines, however, it is typical to conserve as much
     elevation as possible when exiting graywater pipes... best practice will be to run 2" and 3" pipe
     out just below bottom of foundation formwork. 6" pipe will most likely run beneath level of 2" and 3" pipes.
  7. Run pipes past foundation forms by roughly 5' and cap with cardboard/duct tape or old rag, etc.
     Leave vertical pipes at a length of 1' taller than foundation forms. Cap this end, as well.
     Staking the vertical pipe in place with rebar will prevent it from getting disturbed.
Pipe Elevations:
Sat Sep 14, 2013
Microhouse site cleared:
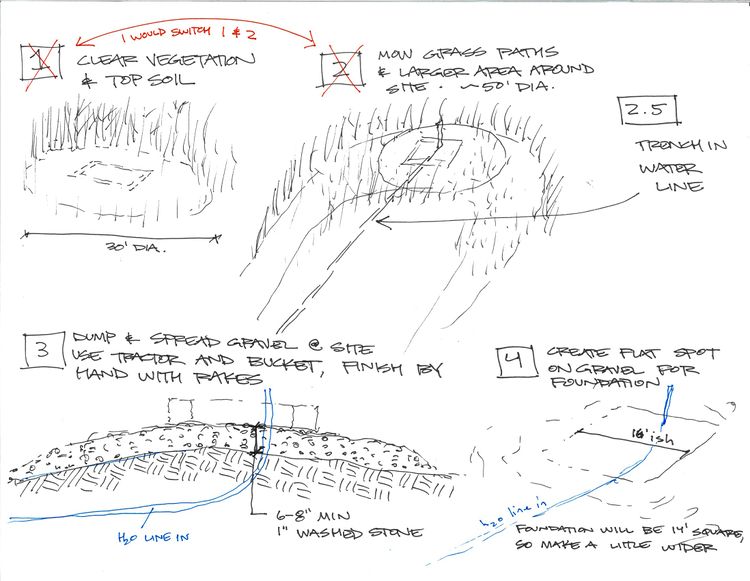
Total Labor Hours: 1 hour mowing with string trimmer and metal blade; 1.5 hr leveling with tractor including removing former goat fence on west side.
Fri, Sept 13, 2013
Revised pipe and chase diagram - future thermal hydronics only going to east module because west module will be sharing a wall. Also, proposed North Utility Line.
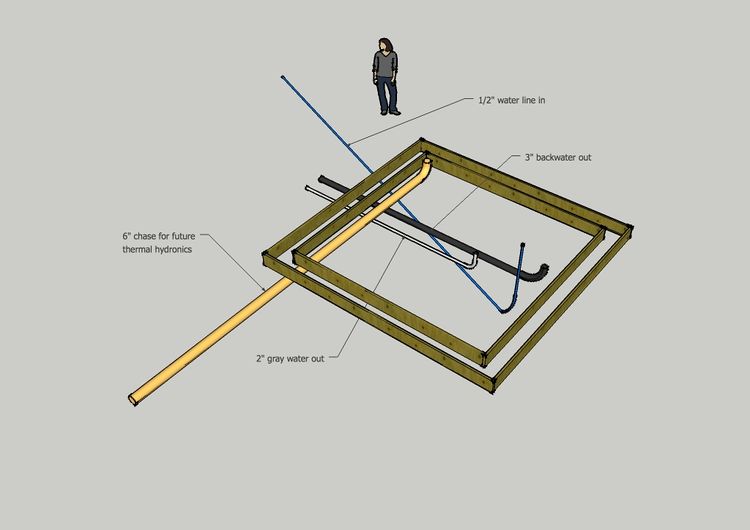
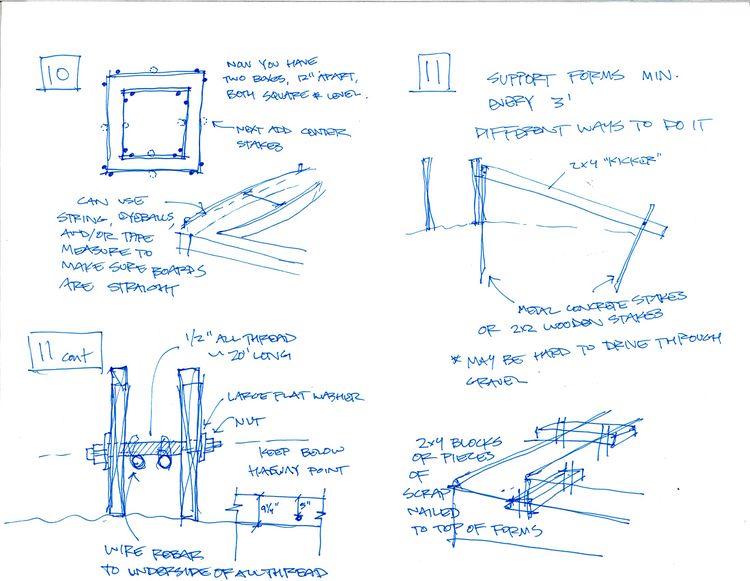
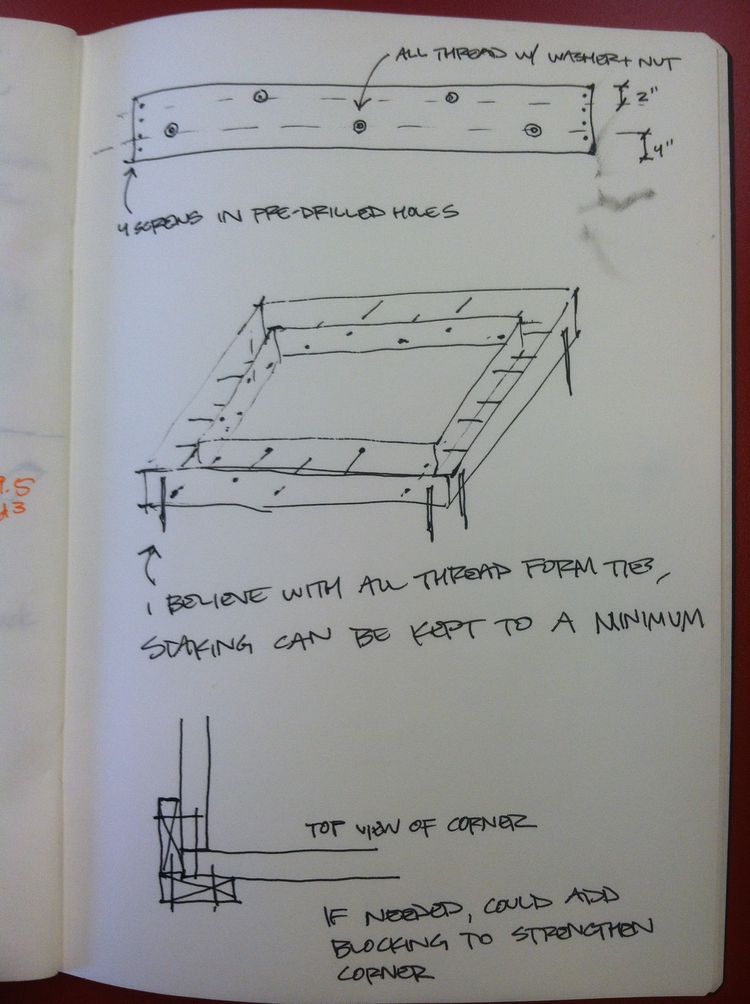
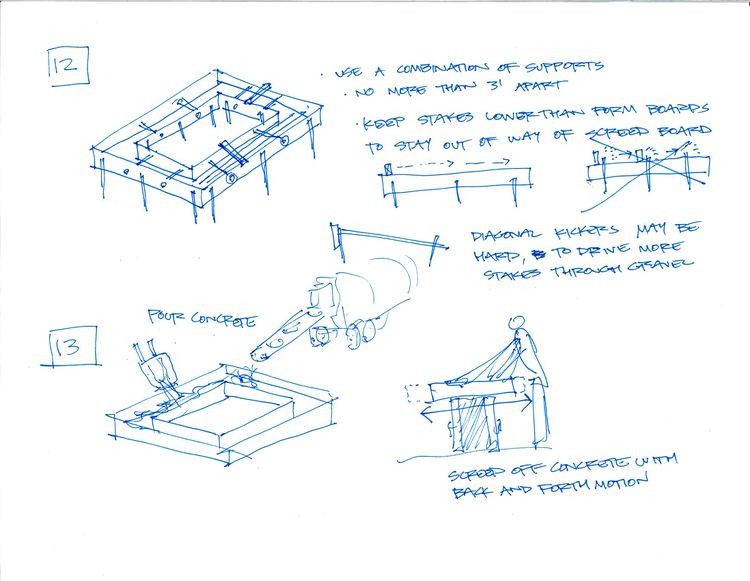
Updated bracing for concrete forms. Almost all bracing will occur with threaded rod, placed through holes drilled in the forms, and secured with a washer and a nut. Pattern for installation is shown in below photo. Staking can be kept to a minimum... 2 stakes per corner... just to keep forms square and in place.
Thurs, Sept 12, 2013
And, let's trench some water lines - see Trencher Prototype 1 Video
Open Source Trencher. from Open Source Ecology on Vimeo.
Foundation formwork with pipe and chase diagram
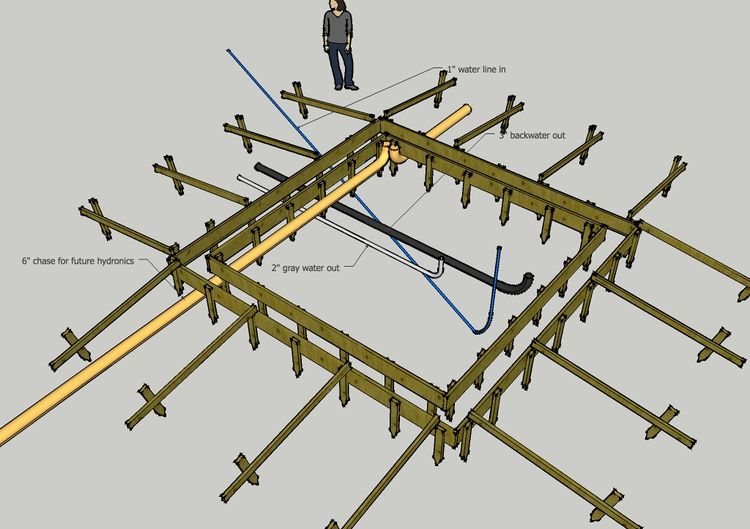
Instructions for foundation build...
For allthread, do 2 at corners and 2 in middel - 4 per side. For blowout, do 2 of them per side - 1/3 way each. Rebar ends up at bottom 1/3 of boundation. Allthread about 5 inches down from top.
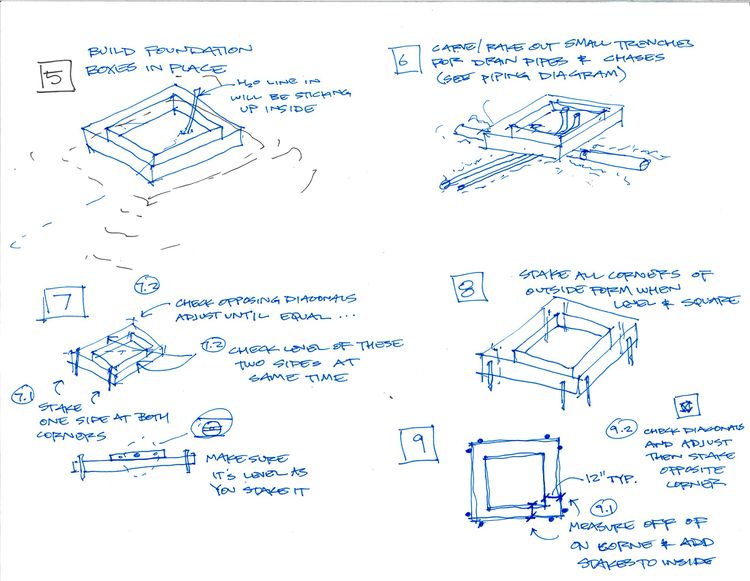
Stub out 8-12" of rebar.
Do 4 pieces of allthred per side -
Foundation BOM
https://docs.google.com/spreadsheet/ccc?key=0ArpE5Y9PpJCXdC1KNG80OWRmdk85TlBQTVA3YWhRbEE#gid=5
Wed Sep 11, 2013
Planning spreadsheet -
Saturday, September 7, 2013
Specific Parts Sourced Plumbing and Electrical Modules
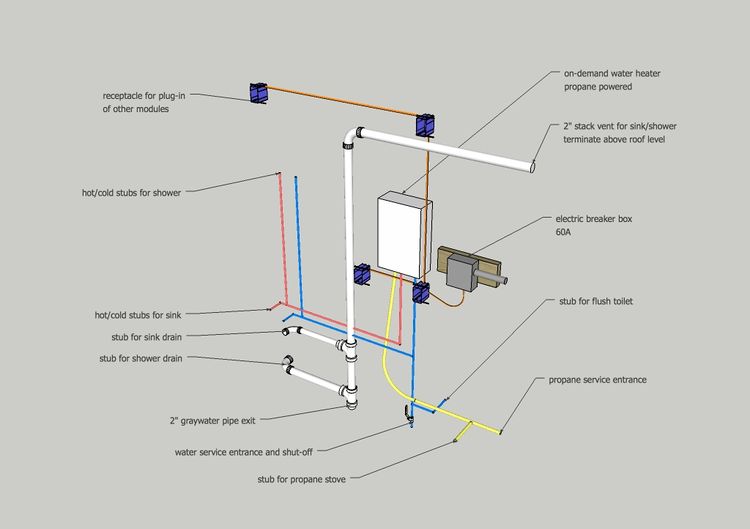
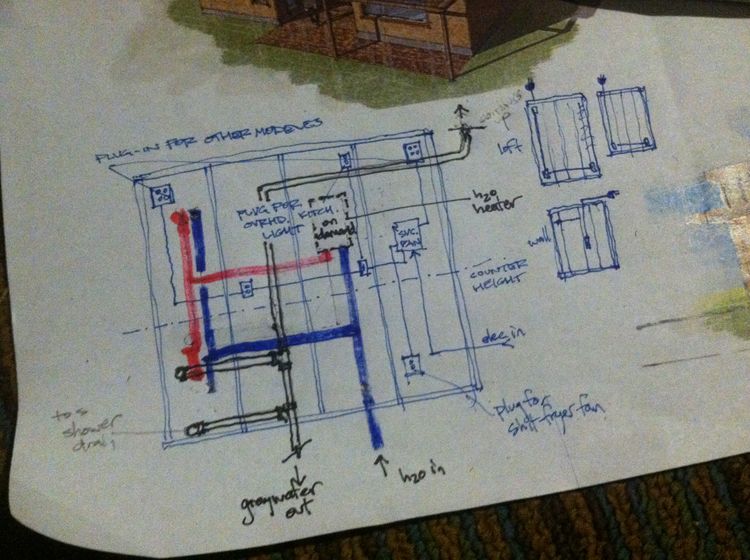
I spent 90 minutes today at the hardware store sourcing the components that we will use for the plumbing and electrical module. Here is a schematic drawing of the partition-wall-utilities-module:
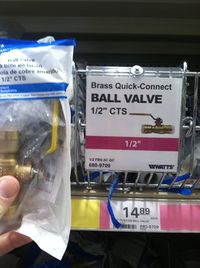
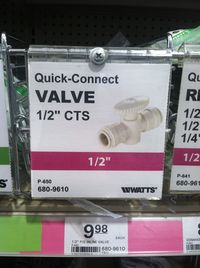
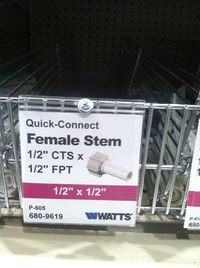
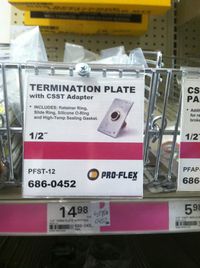
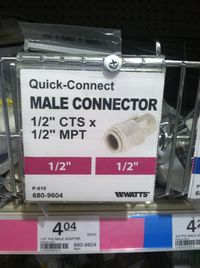 Plumbing fittings for incoming water supply and for shower connection.
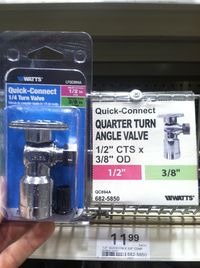
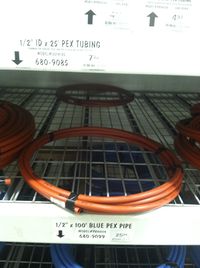
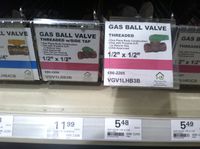
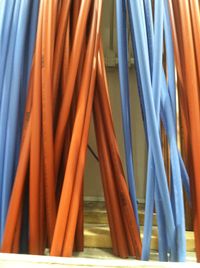 Pex pipe and shut-offs for sink connection and flush toilet connection.
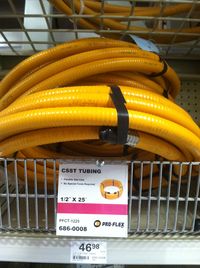
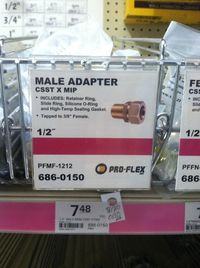
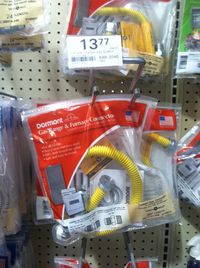 Propane tube and connecting fittings.
Thursday, September 5, 2013
Flyer Created and Distributed in BSU CAP
This flyer is being placed in the hands of key professors and students in order to recruit talent for our first Microhouse build. I have no doubt that we will be able to fill a van with bright young designers to help us execute this project.
Speaking Engagement Booked
I have been given a time slot during Ball State College of Architecture and Planning's Alumni Symposium to present the Microhouse project. During my last presentation at the CAP student symposium, I spoke to a standing-room-only crowd of over 200 students and faculty. I expect this time will be no different. The timing is perfect, too, as it comes just a month after we will finish the build of Microhouse 1.
Profile in Book on Post-Petroleum Design
I have arranged a profile to be included in Dr. George Elvin's upcoming book on post-petroleum design that will feature the Microhouse. George and I became friends during my time as a student at Ball State, and he had been planning to include a profile of my other natural building work in his book. When we crossed paths this morning at a Muncie coffee shop, he was working on the book and reminded me that we need to schedule an interview. I suggested we focus the profile on the Microhouse and do the interview after I return from the build week. I'm very excited about the exposure this can bring to the project!
Tuesday, September 3, 2013
Current Microhouse Design and Overview of Build Week
During the last few days of September and the first week of October we will be constructing a prototype house, using prototype machines, and using a prototype process: swarming construction. Numerous volunteers, with various skill levels, will be refining a method of parallel processing to construct modular components of a house that can be quickly assembled to create a beautiful, durable, and sustainable dwelling for a couple: the Microhouse.
The build processes will proceed from an instruction manual, currently being designed, that will open the doors of creating one’s own shelter to almost anyone.
Every step of the process will be rigorously documented. As components are built, the instruction manual will be marked up with times for each step and notes for how both the process and the manual can be improved. At the end of each work day, debriefing sessions will capture lessons learned to refine the process. As the next day’s work proceeds, while some volunteers are building in the field, others will be revising the manual to reflect the lessons learned the day before. In this way, the learning will be captured as it happens. At the end of the build week, the product we will deliver is far more than a house, it is a process that makes building more accessible to everyone.
Sunday, September 1, 2013
Update on Prep Weekend for Microhouse Build
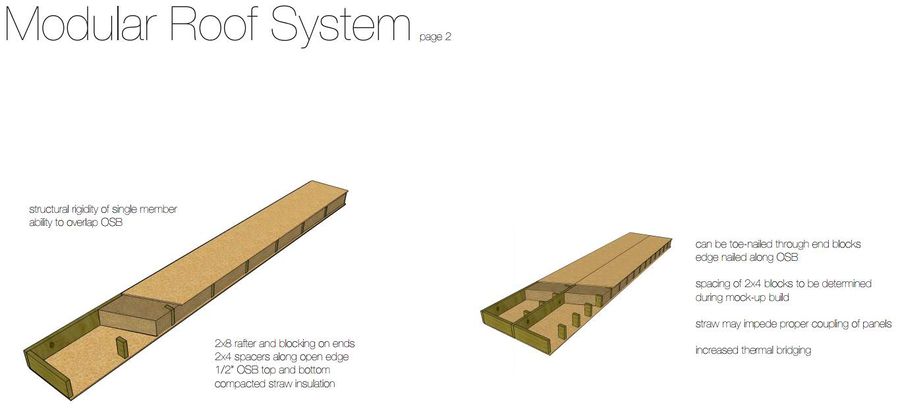
Over the past two days, Marcin and myself have refined numerous details of the Microhouse design. We have settled in on a roof panel module that we believe will be quick to assemble in the field by removing the tight tolerances necessary if panels mate tightly with one another. In this system, panels will be spaced apart roughly 14" or 15", eliminating the need for precision. 2' wide sheets of plywood will be screwed into place from the bottom to contain insulation, and once insulated, 2' wide sheets of OSB will be screwed onto the top.
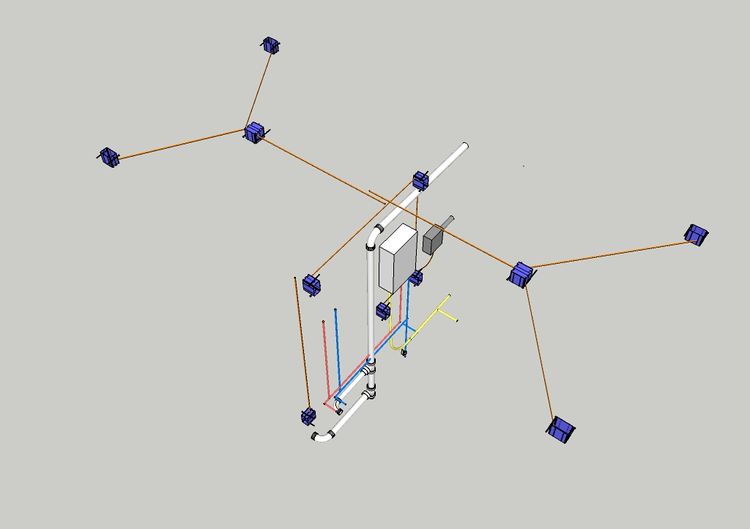
The idea of the modular components for the mechanical and electrical system has evolved into the module being one of the partition walls in the building itself. This wall will contain the electrical and plumbing connections of the sink, shower, toilet, stove, and electrical receptacles. The partition wall will also support the loft panels. Loft panels will be pre-wired for electrical connections, and will plug in to receptacles on the electrical module-wall.
Layout for the interior of the Microhouse was determined.
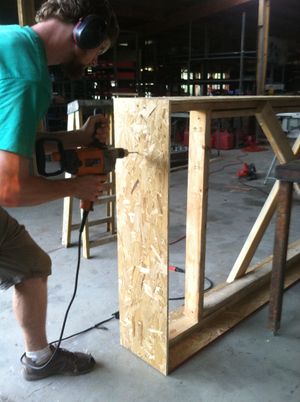
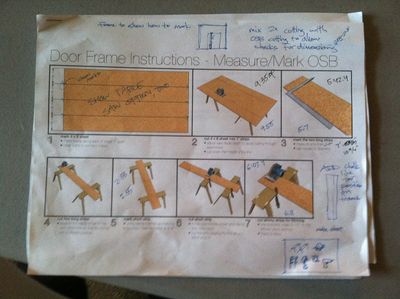
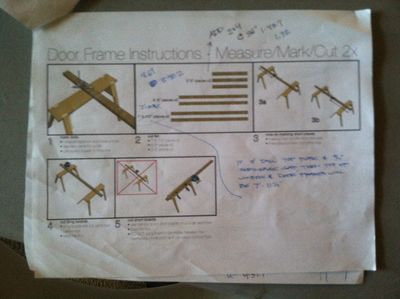
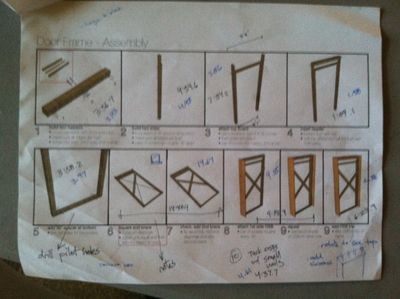
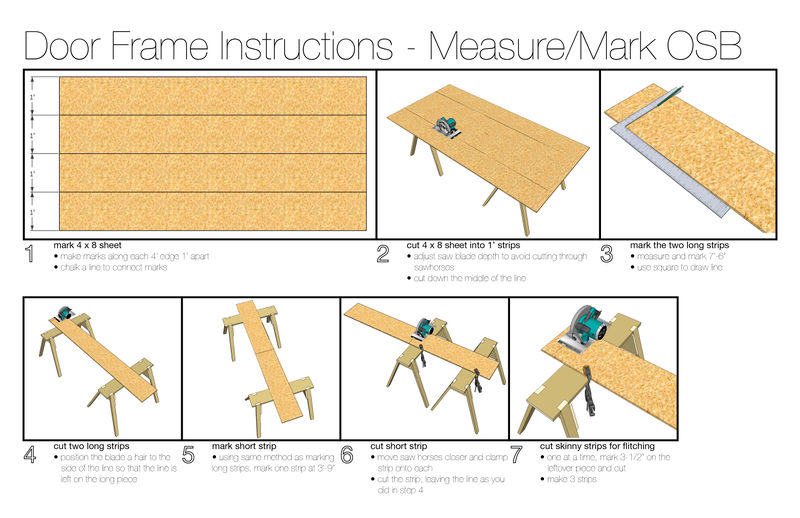
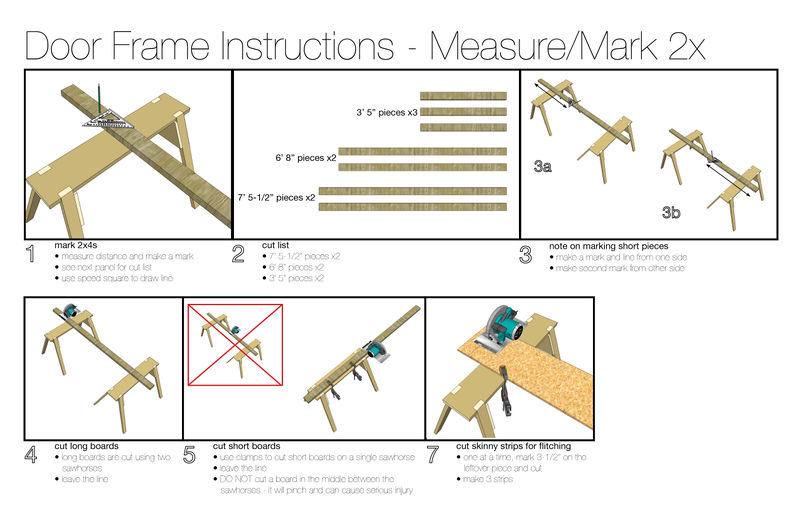
An intern at OSE, Lucas, and I built the rough door frame from the instructions I had created. We timed each step of the process, and also marked up the instruction sheet for the second iteration. All pictures can be found on trovebox under the tag "microhouse."
Thurs Aug 22, 2013
Bill of Materials
Sample Construction
File:Detailed model first pass.skp
Discussion: Materials necssary for build of microhouse windows and roof panels. Saturday & Sunday - 4 people total needed. 3 teams of 2 - the best amount of people. Goal: how fast can inexperienced people build the house?
- Constructed Wetland - alternative to septic. Peter Bane, Brian Art Ludwig ($150/hr) - all the greywater books.
Next steps: BOM for sample framing and roof sections: Monday; build procedure - by wednesday.
Make sure all blades are in good shape:
- Table saw -
- Circular saw
- chop saw
- sawhorses
- screw guns - Chris has 1
- 1 gun per team
- Star head drive -
- 2 groups work
- Ask John for Recommendations -
Spoke with both Walter Grondzik ($50/hr for up to 10 hours) and Ryan Zaricki ($40/hr - 4-5 hours for hydronics) ... both are interested in contributing to the design of the project from an engineering perspective. Ryan had several ideas for moving heat with hydronics from one module to another. He has worked on several such projects. Walter is willing to consult on any MEP issues and to review the passive heating/cooling strategies used in the design.
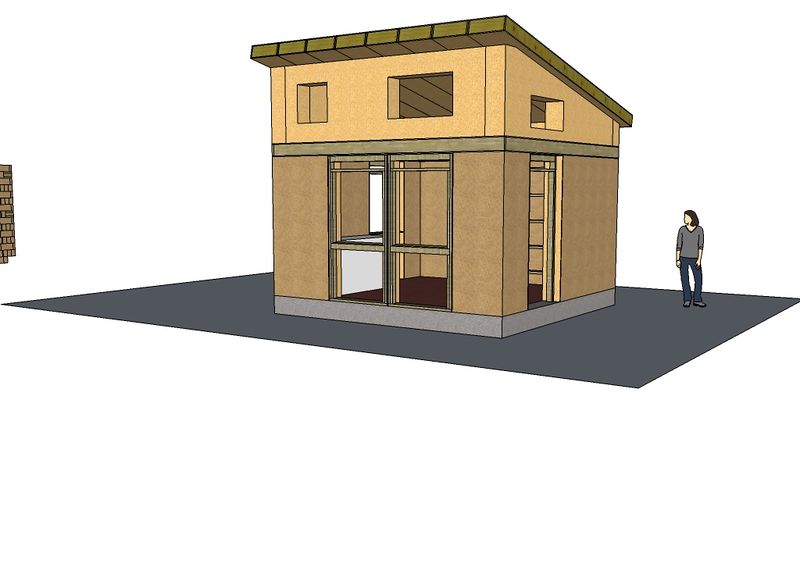
Perspective shows earthen walls, door and window frames, bond beam, and roof panels. My feeling is that with the loft, there is too much wood framing... the design no longer celebrates the earth blocks like it should... too much carpentry involved.
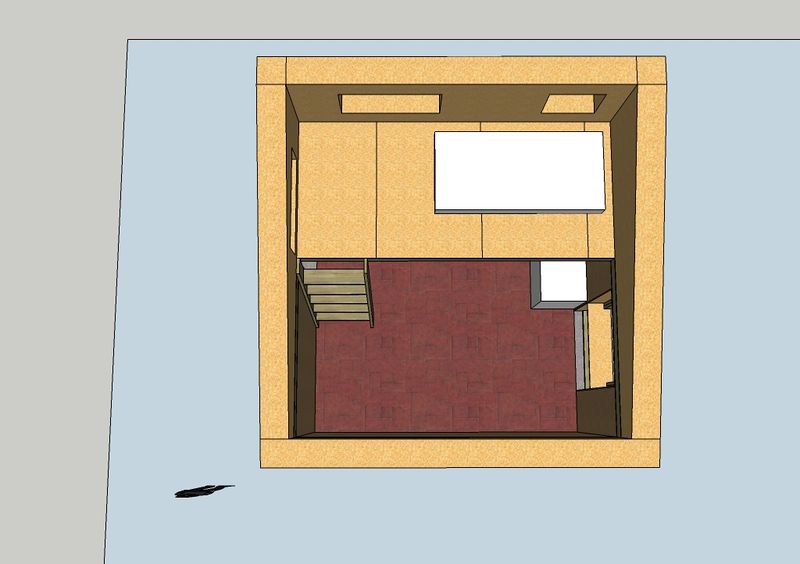
Overhead of sleeping loft
Loft removed to see first floor. Kitchen counter could wrap wall. Stove can be placed in back corner by ladder or on opposite side. Window frame on west side of building could be converted to a door to access future addition.
Fri Aug 16, 2013
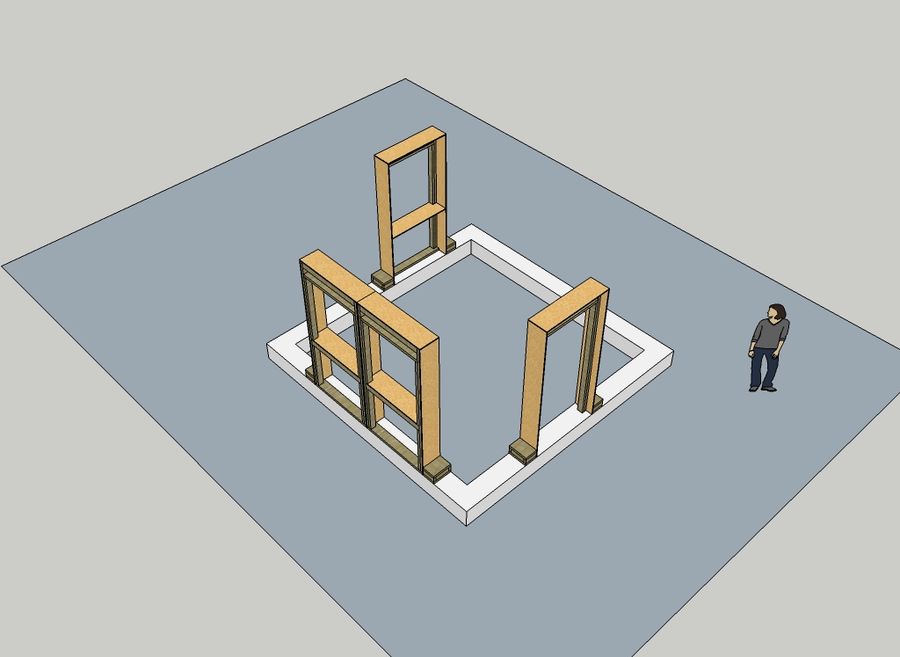
Foundation and Frames Set Up Before Build Day
This image begins to show the detail of what the foundation and framing set up will look like at the start of build day.
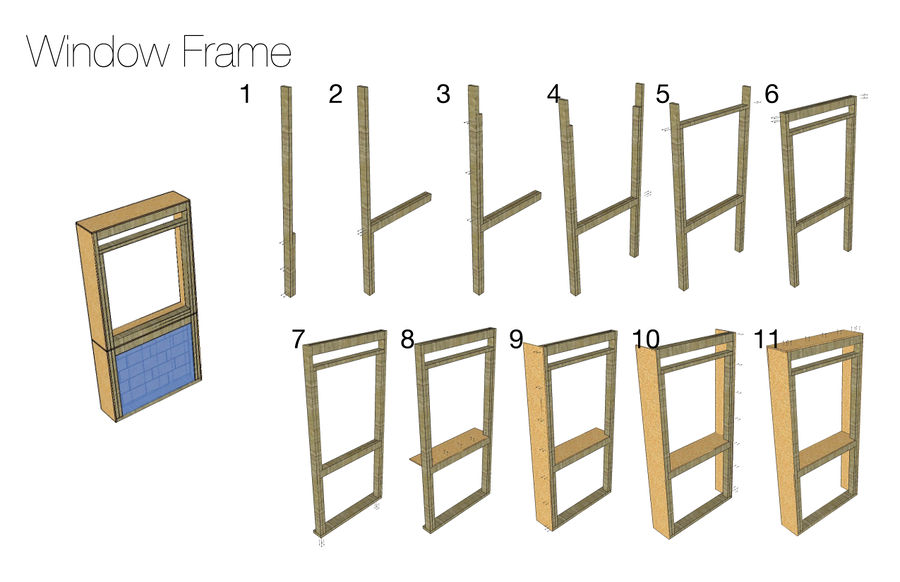
First Steps at Construction Diagrams
More detail is needed, but this sheet shows the steps in construction for a window frame. A cut sheet needs to be added. Also, more detail on the nailing is necessary, even though all nails are shown.
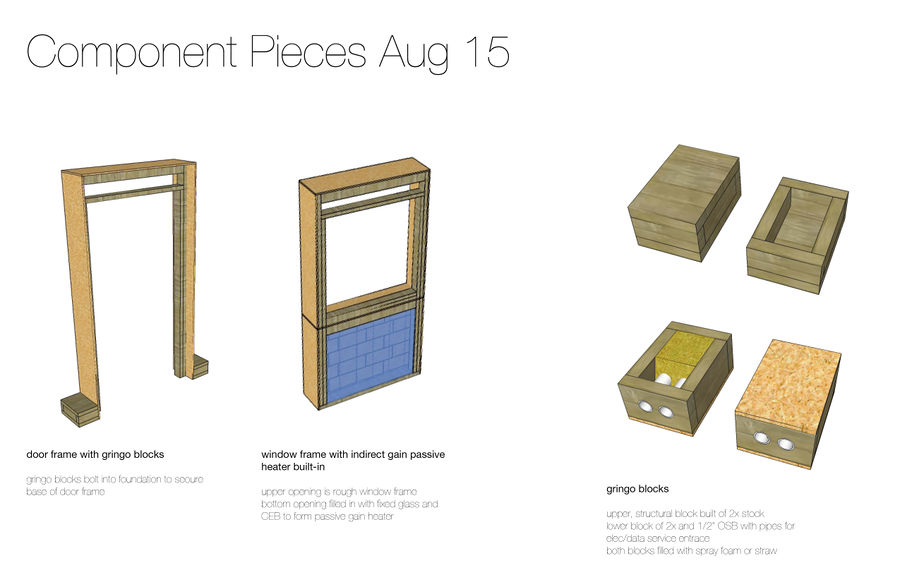
Wood Components
Shows detail of window and door frame, as well as a gringo block for attaching frames and a block for service entrance of data and electricity.
Wed Aug 14, 2013
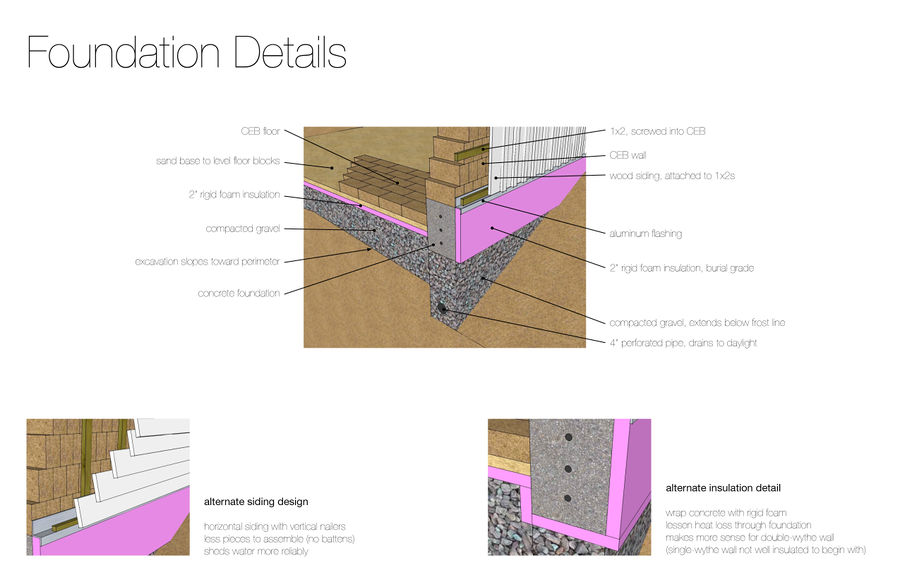
Foundation Details
Drawing of foundation details without dimensions - final dimensions to be determined.
Wed Aug 7, 2013
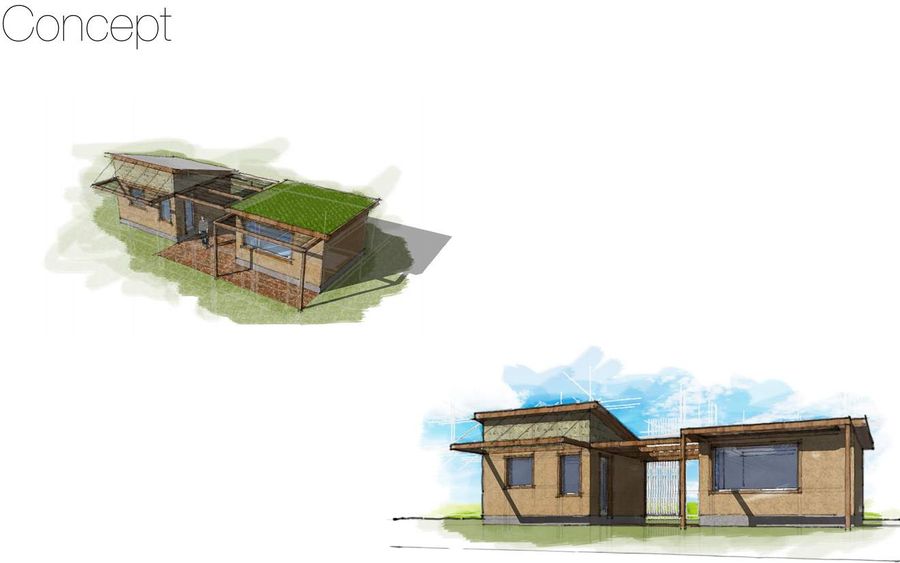
Concept drawing thoughts
reverse shed roof to allow for easier mounting of solar panels
look at option of upper windows for ventilation
add landscaping rain barrell viney plants
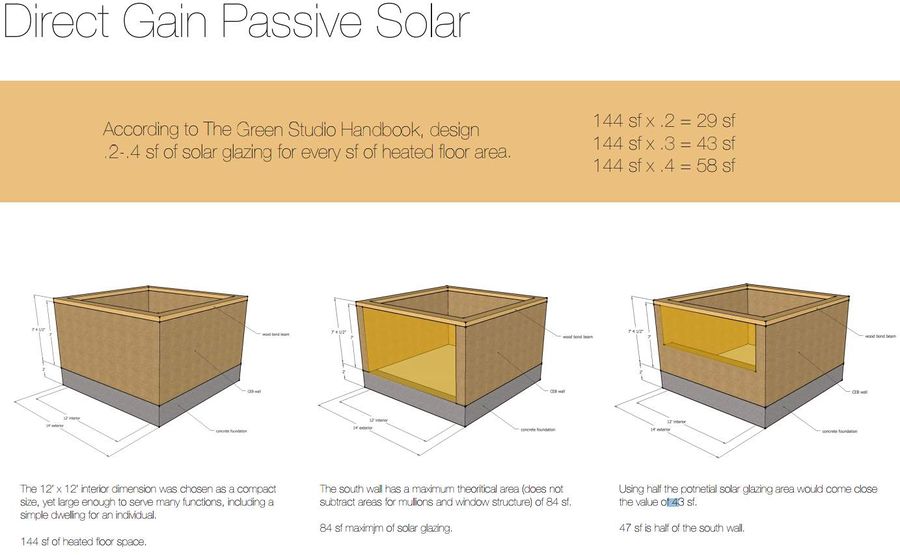
Passive Solar
Mechanical and plumbing modules - Mechanical and Electrical Equipment for Buildings - File:Direct Solar Gain.pdf
Chosen as the best passive heating strategy because of the building size. Future designs should explore indirect gain systems, as well. The page of calculations is a starting point for determining apertures.
Notes, in addition to what is on drawings pages (should be added to drawing pages) -Aperatures must be within 15 degrees of true south (north, in southern hemisphere) for the building to receive 90% of optimal winter heat gains (Green Studio Handbook 107)
also note that the Green Studio Handbook states… “The first, and most important step in the design of a passive solar heating system is to minimize the rate of heat loss through non-south-facing envelope components (including infiltration losses).” (109)
The single-wythe version of the CEB building will have the potential for large heat losses. Although thermal mass can help, uninsulated earth walls, when they get cold, they take some time to warm up. My experience in the earthen section of my home is that if I am at home throughout the day or at least in the mornings and the evenings, the home will stay cosy. If gone for a couple days in the winter, it takes a half a day or better to make the home feel good again.
The double-whythe section offers greater potential to use the solar gain by being better insulated.
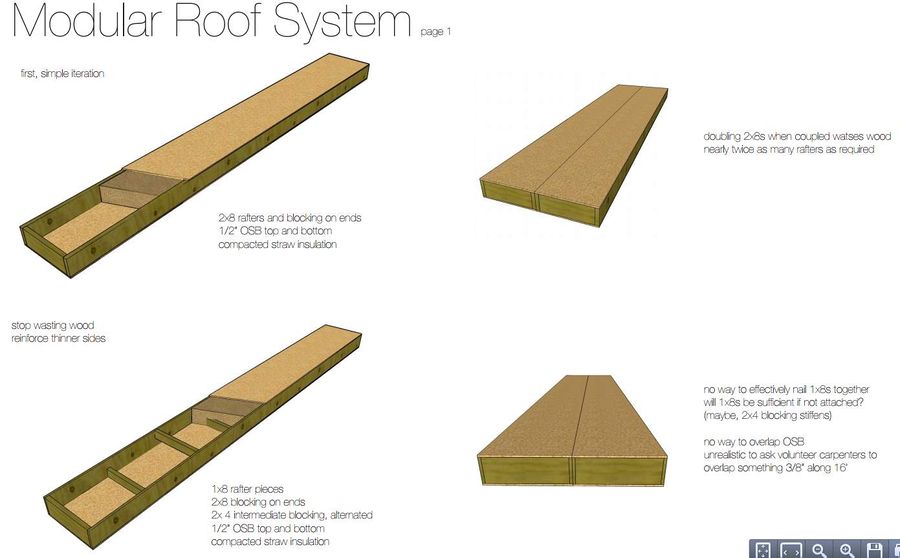
Roof Panels
Despite an enormous amount of information on prefabrication on the internet and at the library, it is clear that we are not working in the mainstream here. Every prefabbed roof panel I could find was a single, lifted-into-place-with-a-crane-type. We want something that four people can comfortably lift to a height of 8+ ft. Ideally, we want this technology replicable on two-story and greater buildings.
My explorations were based on the idea that four people could move a panel with a weight of about 200 pounds. The weight for the first iteration of the roof module is about 180 pounds without straw infill. (add weight calculations to drawings – also, final documents should include both English and metric units).
I think that the roof panel design can be improved as the details are explored. I think encasing the open side of the panel so that the straw cannot impede the panels coupling together would be slick. Something like luan plywood or masonite. Ideally, this thin piece is caulked into place, and the panels are caulked together when assembled.
The roof will have more linear feet of potential crack than any other component (assuming that the stucco is impermeable to moving air).
I would like to add to the schedule of events for the Labor Day visit that we build a full-scale test of a roof panel and track the process closely. It also makes sense to prebuild a jig for assembling the roof panels.
Construction Process
Numbers listed in contract add up to 28.
I think the mechanical unit might be best conceived as two units – one for plumbing, one for electrical – the idea of having critical connections of water and electricity and gas all next to each other is uncomfortable, indeed. This would break the team for the mechanical unit into two teams of 2.
What type of stucco is being used? Depending on the answer to that question, I think the stucco team of 4 could be smaller earlier in the day. We could go with 10 for bricks – 3 sliding and 5 laying. This could be one way of re-arranging if we are trying or needing to stay at exactly two dozen volunteers. If not, I think your numbers for adding up to 28 are comfortable.
House Layout
The two modules, separated by a courtyard, will create a wonderful outdoor space to be used for eating (cooking even, if desired), for relaxing, and for entertaining. However, two buildings separated require two separate MEP systems. Is it possible to arrange the building program so that functions are separated that have similar MEP needs? Could one space function without plumbing and gas?
One module with electricity, data, plumbing and gas:
- Kitchen
- Shower
- Toilet
- Dining
One module with electricity and data only:
- Bedroom (sleeping loft?)
- Living space
- Work Space
Brick Stacking Patterns
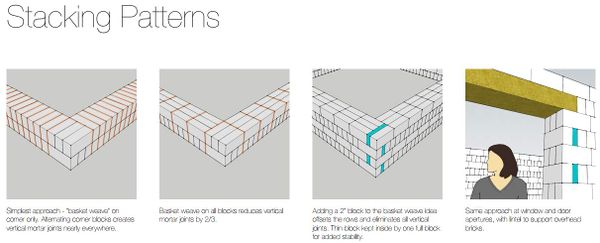 This makes the most sense to me as a couple trying to build a microhouse.
Time Log
Thu Aug 1, 2013
- See Microhouse Build Planning and Chris Reinhart Contract
- Initial conversation on design with Marcin
- Planning first cut of design on Wed, Aug 7
- Water Glass for stone sealing or - [4]
- Stove - [[5]]
- Factor e Farm site plan - Factor e Farm Site Plan
- Beginning of brick courses - Brick Stacking Patterns
- Soil map - [6]
Links
- Overall Time log - [7]
