Folgertech Kit
Build Instructions According to Module-Based Design
Source of Kit
- See [1]
Build Instructionss from Folgertech
These contain details, but procedures are inefficient and not in the same order as should happen in a swarm XM build. These are modified for the OSE case, though individual details are still relevant.
- Folgertech's Google Drive - [2]
Build Results
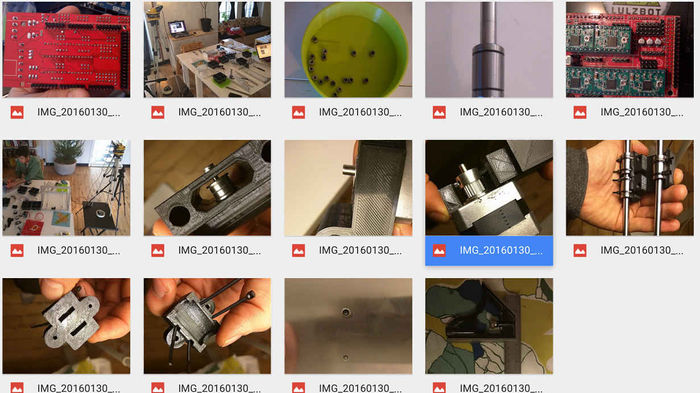
Build Pictures
See Folgertech Prusa i3 OSE Google Drive].
Build Review
- See copious data points in the spreadsheet at Data Collection
Improvements
The main improvement that we will make is adding automatic bed leveling. See Research_On_Inductive_Proximity_Sensors.
- Note: correction needs to be made based on the top 2 posts here - on end stop plug in location and change in firmware. [3]. This Github note [4] appears to say the same thing. Further, the first link also states that the firmware is outdated - outside of hte xmax issue mentioned.
- Upgrade firmware, including auto bed level with inductive sensor - [5]
- Anti-backlash nut case and belt tensioner - [6]
- Improvements on Thingiverse - auto level, cable chain, endstop improvements, etc. - [7]
- X endstop replacement - [8]
Candidates For Improvement Resolution
- Customized firmware found here.
- Libre sensor and fan brackets for Folgertech Prusa found here. Our copy of the same files: File:Induction Sensor Fan Bracket for Folgertech Prusa.zip. Also see elkayem's solution on thingiverse. Print in heat resistant material (not PLA).
Other Instructionals
- Reddit thread on building FPi3 - [9]
- Github Community Folgertech Prusa i3 documentation - [10]. No alignment procedure mentioned.
- Extensive list on Folgertech Prusa i3 2020 resources - [11]
- Build videos - [12]
- Wikia page - [13]
- The Folgertech Drive source itself is updated - [14]
Software/Firmware
- Firmware - Marlin, uploaded via Arduino IDE interface. Firmware is used to only communicate with software, to interpret g-code as related to the geometry of the 3D Printer - for example delta vs. right angle configuration.
- Software - on host computer - Repetier. Calls upon Slic3r for slicing strategy. Appears to control various 3D Printer parameters.
- What settings are adjusted in the firmware, and what settings are adjusted in the software?
- Note that firmware may have to be updated based on the specifics of the 3D printer. So for example, we may not be able to use the same Marlin as Prusa i3 Marlin - so we download one version already set for ours - Folgertech 2020 Prusa i3 Marlin. (it turned out that most of the motors were reversed in this firmware compared to original build from the Folgertech instructional, and the x endstop had to be changed from its position of MIN to MAX as in the Improvements section above.)
- Marlin is one option for firmware. Others are Repetier Firmware, RepRap Firmware, Teacup, Franklin.
Reprap Wiki Page on Gcode
It's the best, but it sucks regarding modularity concepts. - http://reprap.org/wiki/Gcode
Software, Calibration, Testing
Live Linux
In order to eliminate any software issues, OSE is preparing a Live Linux on a USB stick so the printer can be run from a USB stick, regardless of computer platform. Our software has all the required programs and settings for running the 3D printer.
Get the software download at D3D Live ISO.
Initial Tests
After downloading the Folgertech 2020 Prusa i3 Marlin, installed Repetier on an Ubuntu operating system. Dragged it to the sidebar (Unity launch bar) after installing via commandline, so clicking on the Repetier icon opened up Repetier.
Repetier kept crashing (apparently due to bad baud rate setting) se we switched to Cura, Lulzbot edition, which did not crash but allowed no settings to be changed. So we went to Pronterface as the most robust solution, which did not crash and allowed the baud rate to be changed. By this testing, Pronterface is thus our default choice, based on best initial performance.
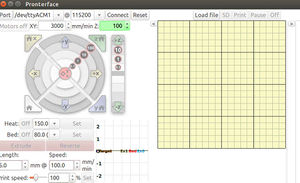
So back to Pronterface. After installing on the Desktop, and going into its directory and running it by typing in Terminal: ./pronterface.py (can't run .py by double clicking it on the used Ubuntu system) (see to the right).
- To connect to Pronterface, baud rate should be 115200 (matching the baud rate specified in Marlin's Configuration.h file), and then you can hit Connect to connect to 3D printer.
- Tested axes by moving them manually in Pronterface. Went back to Marlin to reverse the axes, until all motion worked and homing was proper. Uploaded OSE Folgertech Prusa i3 Marlin - this works with a build following the instructions and wiring exactly as the Folgertech Build Guide.
- Pronterface has a Gcode command line that allows you to provide commands. For example, it has a special code for cold extrusion - ie, bypassing thermal requirement for testing the extruder. See G Codes in Marlin.
- To test extruder, I stuck in a thread and hit the extrude button cold. Is sucked the thread out, so I reversed its direction in Marlin firmware, configuration.h file (using Arduino IDE)- by changing line 320 to #define INVERT_E0_DIR true.
- Note that machine will not let you travel away from endstops unless the machine is homed. So home the x, y, and z axes in Pronterface. Then you can travel freely by hitting the travel buttons in Pronterface.
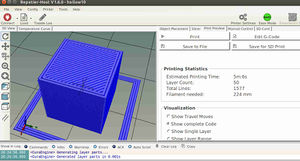
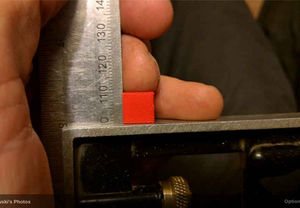
- Download 10 mm Calibration Cube - and sliced it within Repertier Host -
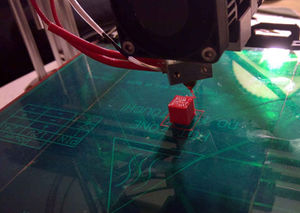
- Pressed print on Pronterface and it worked on the first try. see images. .
- Glory.
