Frame DXF Files
Linked from Christmas Gift to the World and CEB Press CAM Files. These are files for the Brick Press frame according to the Torch Table Digital Fabrication Process.
CAM File
Annotated with part and library numbers - File:CEBFrameAnnotated.dxf
Library Files
Download this complete library folder and put it in your LibreCAD or other software platform library folder. See LibreCAD#Filepath_for_Parts for directory structure in Ubuntu. Download individual files: File:Framelibrary.zip. Download nested file with multiples of library files as needed. DXF, full scale (units are inches, frame height is ~44" tall). File:CEB frame.dxf. Note: difference between complete file and individual files is that complete file collapses multiple objects into a single object, so the objects in the complete file cannot be modified.
Mods: needs (1), cylinder mount, (2) compression chamber spacer holes; (3) hopper interface plate holes; (4) compression chamber cover; (5) shorten top plate lower lip by 1.5" total to accommodate hopper rear support; get rid of double bolt hole lines; QC on hopper intterface plate and top frame lip alignment
- File:L-F1.dxf
- File:L-F2.dxf
- File:L-F3.dxf
- File:L-F4.dxf
- File:L-F5.dxf
- File:L-F6.dxf
- File:L-F7.dxf
- File:L-F8.dxf
- File:L-F9.dxf
- File:L-F10.dxf
- File:L-F11.dxf
Frame CAM File - DXF
File containing all components above: File:FrameCAMDXF.dxf
Conceptual Reference - Main CEB Frame Assembly
Note: CNC torch table version has one lip on bottom u-channel and the compression chamber plates are converted to a single plate.
Context:
Digital Master Index (CAM Master Index)
Note: Digital Master Index is a complete listing of parts, with unique library parts listed in red. A graphical screenshot should be taken of complete part set, analogous to Frame_DXF_Files#Procedure_in_Model_Material_.28Cardboard.2C_Wood.2C_Plastic.29
Scale Model of Incomplete Frame - Assembly Procedure from Flat Cutouts
Scale Model Cuts
See Frame_DXF_Files#CNC_Laser_Cut_Model below for full files of test cut - of main frame without: compression chamber cover, compression chamber spacers, and cylinder mounting
Model Cutting
To do a model test cut:
- Look at http://opensourceecology.org/wiki/Frame_DXF_Files#DXF_Files
- Download the File:CEB frame.dxf. If you have trouble opening the DXF, download the file and convert it to PDF if you would like to work with PDFs. See DXF to PDF Converter.
- Cut these out on laser. Size is 44", reduce it 1/4 scale to make it workable.
- Assemble. Glue the lips and other pieces together. This test asssesses that all fits together as it should to obtain a 3D structure from 2D cuts. Use pins of some sort in the bolt holes. The bolt holes make the frame adjustable for exact fit. The space between the 2 verticals should be exactly 16.2 inches - scaled down by your scale factor. That is the ultimate test. And, this should be adjustable by 0.4" in either direction. We are exploring perfect fit (+/- 1/32") with unskilled labor - which CNC allows.
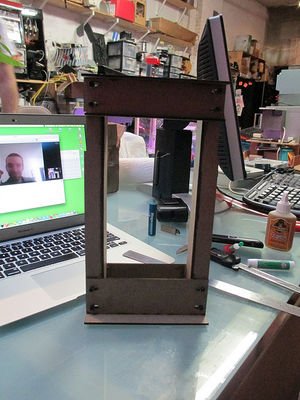
- See the annotated picture of the real frame. Taking pic now. 5:08 PM CST on Sunday.
Model Assembly
The following is a test up to the full frame, minus cylinder mount detail and minus compression chamber spacer details.
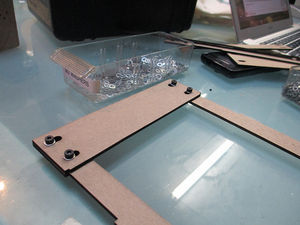
To assemble the frame, do analogous procedure to the procedure that would occur in metal. Note that when working with flats, the u-channel has to be build from weldments. However, the u-channel is not built first - but instead: First, pieces are bolted together. The structure still remains as a 2D assembly - while allowing for perfect alignment. Second, the 3D Structure is Assembled - The bolted together faces are spannen with the vertical U-Channel Webbing.
Procedure in Model Material (Cardboard, Wood, Plastic)
Note: full-size machine uses 1/2" steel plate and 3/4" bolts. A quarter scale model can be made as follows - us 1/8 bolts to assemble it. The following refers to the full scale model, so make adjustments based on your scaling factor.
- CNC Laser Cut or CNC Rout all CEB Frame model parts from DXF file above.
- Bolt Top Face Plate and Cylinder Mount Plate to U-Channel Lips. Make 2 of these assemblies, one for the front, and one for the back of the frame.
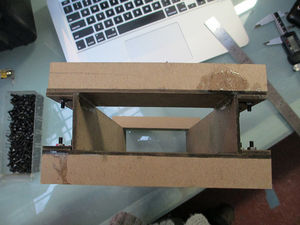
- Fit Vertical U-Channel Web in place, one on the right side and one on the left side. Put this Wed on the side of the lips such that the resulting compression chamber size is 6" (by 16.2").
- Glue (or weld) the web in place.
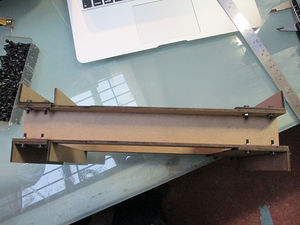
- Glue the top face lips in place at a right angle to the faces to form the u-channel shape. The upper lip is slightly longer than the bottom lip.
- Glue the lip on the cylinder attachment plate - to make an agle shape. Glue this on the bottom side of the cylinder mount plate.
Scale Model
Shape made from flat cutouts by Rob Forney:
CNC Laser Cut Model
See results:
http://www.flickr.com/photos/34906770@N07/8262593793/sizes/z/in/set-72157632217228983/


