Poli Log
Hours
Project planning
Specific goals
- Upgrade extruder (learn to make great extruders) - check out Chris_Caswell_Log#Oct_25_-_Oct_31 for the latest simple extruder - mj
- Recycle #1 plastic to filament
- Develop additional tool heads for different kinds of printing (solvent dispersion)- screw driven syringe
Current projects
- Volcano nozzle upgrade - get extruder prints from library, get missing BOM parts (bowden) , assemble
- 3D printing class - send follow-up email, establish relationships with library print services, curriculum, website
- D3D wiring upgrade - get bigger backboard, add prongs to power supply connections, reinforce the Arduino power connections
Upcoming projects
- Heat bed upgrade - look into dual power wire
Someday projects
- D3D workshop
- Plastic recycling shredder and extruder - experiment with recycled PET and virgin PETG coextrusion
2/8/20
Had ordered new PNP and NPN induction sensors, but post office didn't deliver them. Had some unhelpful but sympathetic phone calls, so had to re-order. Received sensors.
1/4/20
Was having problems with losing sound when OSE linux went to sleep. Tried messing with Alsa, and reinstalling OSE linux but continued to have problems. Wanted to upgrade to ubuntu 18.04 hoping to fix the issue, but didn't have space in partition for download. Used gparted repartition hard drive and reinstalled OSE linux. When running sudo apt upgrade started getting errors of E: Sub-process /usr/bin/dpkg returned an error code (0) referencing freecaddaily19-python3... and libocct7.3. Reinstalled without updates or internet connect. Removed freecad (https://installlion.com/ubuntu/xenial/universe/f/freecad/uninstall/index.html) and Freecad daily (http://www.pcds.fi/downloads/applications/graphics/cad/freecad/repository/freecad.daily.repository.html). Now I could upgrade the system and update to ubuntu 18.04. Upgrade went fine and sound seems good, GUI is gnome while I had come to like unity, seems a little more sluggish than 16.04. installed freecad 0.18, looks older than freecad 0.16 but didnt test too much. Thinking about installing OSEv0.1 as a third OS but need to add a hard drive first.
12/14/19
Designed MoClo vector first vector series (levels 0,1,2). Working on D3D, z-probe when plugged in still reads triggered regardless of sensor being activated or not, hot end is having trouble reaching temperature. Disassembled a bit and tightened heater block, hotend, and heat break, hope heater block isnt too close to the heat sink but is too stuck to loosen. Able to use nozzle fan with M106 but immediately halts heating. Disconnected heatsink fan allows hotend to get too temperature. Used M303 E0 S200 C3 to autotune PID, worked without extruder fan but fails with fan going. Research says fan is always on and not adjustable. Ordered replacement Z-probe parts. Not sure if running without fan will be okay, large thermal mass to absor heat but don't want filament to melt above heat break.
< M503< M301 P22.20 I1.08 D114.00 < M303 E0 S200 C3 < PID Autotune start < bias: 230 d: 24 min: 199.55 max: 200.56 Ku: 60.50 Tu: 48.96 < Classic PID < Kp: 36.30 Ki: 1.48 Kd: 222.15 < PID Autotune finished! Put the last Kp, Ki and Kd constants from below into Configuration.h < #define DEFAULT_Kp 36.30 < #define DEFAULT_Ki 1.48 < #define DEFAULT_Kd 222.15
> M303 E0 S200 C3 < PID Autotune start < bias: 230 d: 24 min: 199.55 max: 200.56 Ku: 60.50 Tu: 48.96 < Classic PID < Kp: 36.30 Ki: 1.48 Kd: 222.15 < PID Autotune finished! Put the last Kp, Ki and Kd constants from below into Configuration.h < #define DEFAULT_Kp 36.30 < #define DEFAULT_Ki 1.48 < #define DEFAULT_Kd 222.15 > M303 E0 S200 C3 < PID Autotune start < PID Autotune failed! timeout > M303 E0 S200 C3 < PID Autotune start < bias: 235 d: 19 min: 199.55 max: 200.03 Ku: 98.89 Tu: 66.44 < Classic PID < Kp: 59.33 Ki: 1.79 Kd: 492.79 < PID Autotune finished! Put the last Kp, Ki and Kd constants from below into Configuration.h < #define DEFAULT_Kp 59.33 < #define DEFAULT_Ki 1.79 < #define DEFAULT_Kd 492.79 > M301 P59.33 I1.79 D492.79 < echo: p:59.33 i:1.79 d:492.79 > M500 < echo:Settings Stored (398 bytes) > M503 < echo:Steps per unit: < echo: M92 X80.00 Y80.00 Z80.00 E161.30 < echo: M203 X300.00 Y300.00 Z10.00 E25.00
12/7/19
Working on designing open source Golden Gate vectors for Nannochloropsis. Researched, wrote, and posted a post on open sourcing CRISPR. Tried messing with the D3D. Worked out the Z motors so up and down is in the right directions on cura. Homing is up when z-sensor is plugged into fifth plug down, but bed continues up when sensor is triggered. When the z-sensor is in the 6th plug, the homing is down and does not stop when sensor is triggered.
Seems like sensor plugs may be opposite what is in documentation, but it is the orientation sensor was originally in and is the orientation that makes the sensor LED come on with metal nearby.
Using M119 command to try to figure out what is going on, see diagram below. Worried it is a hardware problem on the board. Thought using the 6th pin would work to at least make the z-max triggerable and then marlin update could make that input the z-min. Not sure how to further troubleshoot.
Moved Y-end stop from y-max to z-min. Reads triggered z-min when unpressed but open when pressed. Suggests a firmware and possibly new sensor would fix the issue.
12/1/19
Designed a simple piece to attach onto the extruder mounting plate to push again the endstop. The end-stop on my D3D is little loose and doesnt trigger until pressed against hard, thinking about replacing. The extension piece is meant to be screwed together with mounting plate, has a countersink so the screw heads don't stick out.
File:End stop extension flat.fcstd
(Wife) crimped the ends of the new and old z-axis sensors, using https://www.amazon.com/gp/product/B07CVYPDGS. New sensor still doesn't work, but old sensor does (though brown wire is loose). Only problem with the old sensor is the thread are too big to fit through holder so it is insecure. Tried testing setup, but z-axis sensor is not causing bed to stop and up/down directions are flipped (!?). Homing is going down. Tried using M562 Z but it doesn't work, even with M500 and a restart. Flipping motor wires on arduino did work to correct direction but sensor still doesn't cause bed to stop raising. M119 says x- is min, y is max and z is min.
11/27/19
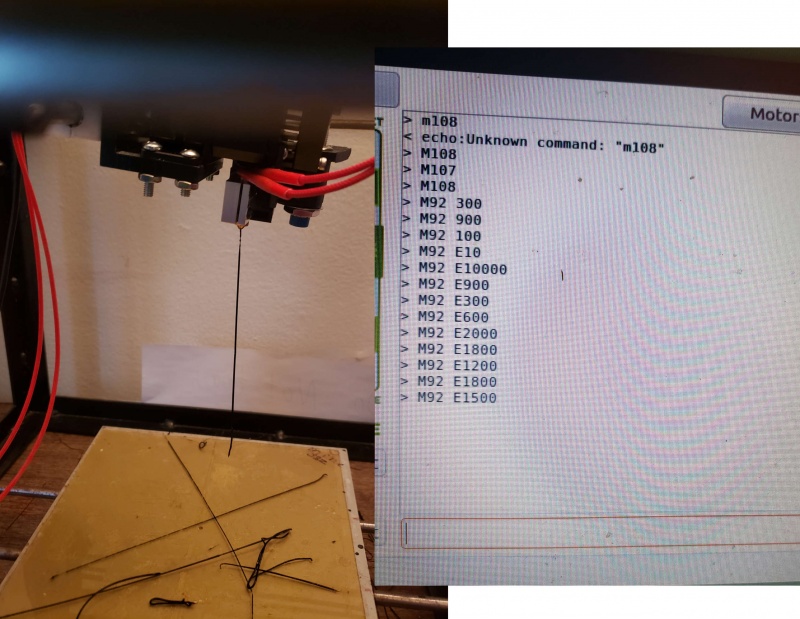
Setting up the extruder. Connected the induction sensor to the older induction sensors wires to plug. Cut off old heat shrink, cut off old induction sensor, and cleaned off or cut new terminal. Connected new sensor by braiding the terminals and soldering, folded back and heat shrinked. Unfortunately the induction sensor was not function, so I need to troubleshoot why (hopefully not broken, maybe should buy a spare). Found heater carriage to be loose so I tightened it, now able to heat up the hot-end to 205 C with aero fan going. Used gcode command line to test different extruder drive ratios (M92 E#) and used extruder retraction button to push filament through hotend. Found ratios of several hundred needed for extrusion to be noticable. Ratio of 1500 seems to work well, higher ratios make high pitched sound. Need to determine by extruding a known length with the steps counted. Satisfying to be smoothly extruding fat strings of filament, likely to work well once induction sensor is working and gcode adjusted.
11/26/19
Examining the extruder, seems like the filament is being moved by the gear but drive ratio is super low (duh). So probably need to change the steps of the motor to length of filament in gcode/cura? Also need to determine how to turn down cooling fan and how to turn on auxiliary fan? Got wire connectors but not sure if they will fit correctly. Need a review of wiring the D3D, mainly linking to good connectors/crimps (should be part of assembly instructions), interested in single connector for all wires.
Found this: Marlin_Settings_for_Geared_Extruders 11/24/19= Working on making an open source biotechnology lab starting with a MoClo kit for Nanno
11/23/19
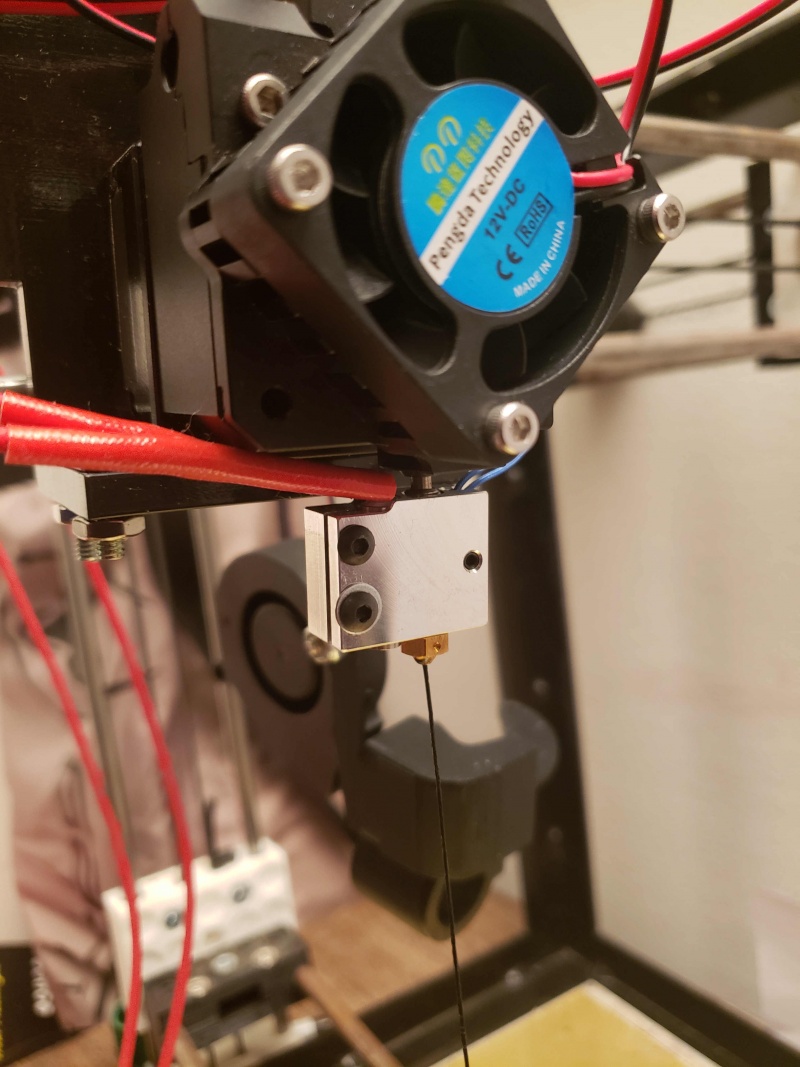
Worked on attaching the titan aero to D3D. Motor and thermistor had compatible plugs, haven't changed z-sensor, used crimps to attach aero fan temporarily, ran cooling fan to heater 2 power plugs. Powered up. Heater 2 hot end blower isn't on, not sure how to make it come on, also didn't run on mk8 but assumed it was broken. Heating on hotend works, but gets heating failure at ~195 C or when the extruder motor is run. Seems like the aero fan is overcooling so the hotend can't get past 195. Turned off fan and hotend is able to get to 200 C. Able to push filament through hotend, doesn't seem that smooth. Running extrusion motor doesn't push filament through. Ordered better wire connection doodads.
11/16-11/19/19
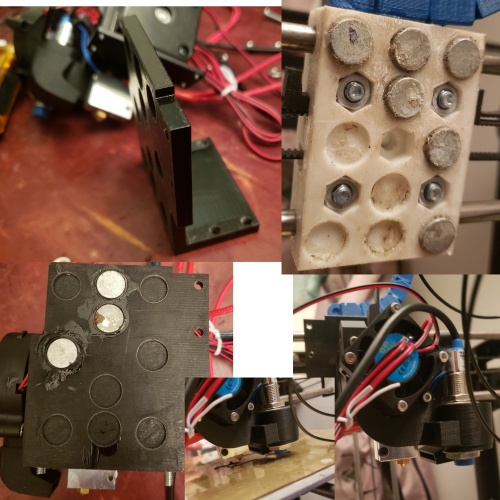
Printed flattened aero mount plate, cleaned up and found screws and nuts that fit lying around (need to figure out standardized size). Screwed together with extruder, looks pretty cool and beastly. Dimensions are okay, but making corner circles on plate smaller was a bad idea (should make them match other holes). Found buried on the wiki that the magnets are N52 3mm x 12mm (1/2 in x 1/8 in). Ordered some on ebay, not carried on amazon. Worried that it is too heavy for magnets
Used a few spare magnets to superglue on new extruder with mount. Current z-axis mount carriage has many magnets removed because they interfered with mk8 extruder fan. Will need to replace them. Even with just 3 magnets the extruder is held decently, thinking I will go with all 10 magnets again and no stabilizer extensions. Adjusted z-sensor to be more in-line with hot end. Looking at wires of current extruder and new one, fans are plugged in to extension wires so those should be easy to switch, the hot end has accessible screw in plugs (don't think polarity matters), motor has a plug, will need to add a plug to the z-sensor or take old sensor.
11/13-11/14/19
Started getting D3D working again, main issue is with z-axis level, the bed is not totally level and the z-sensor is super wobbly. Added G92 command to start g-code to get bed leveling. Trying to secure the induction sensor, which helps with getting the right offset.
Did a test print of the aero mount plate. Need to push out the end-stop and make stabilizer pegs smaller.
Redesigned plate to be a flatter print. File:Aero mount end stop extension for screws flat panel.fcstd File:Flattened aero extruder plate.stl 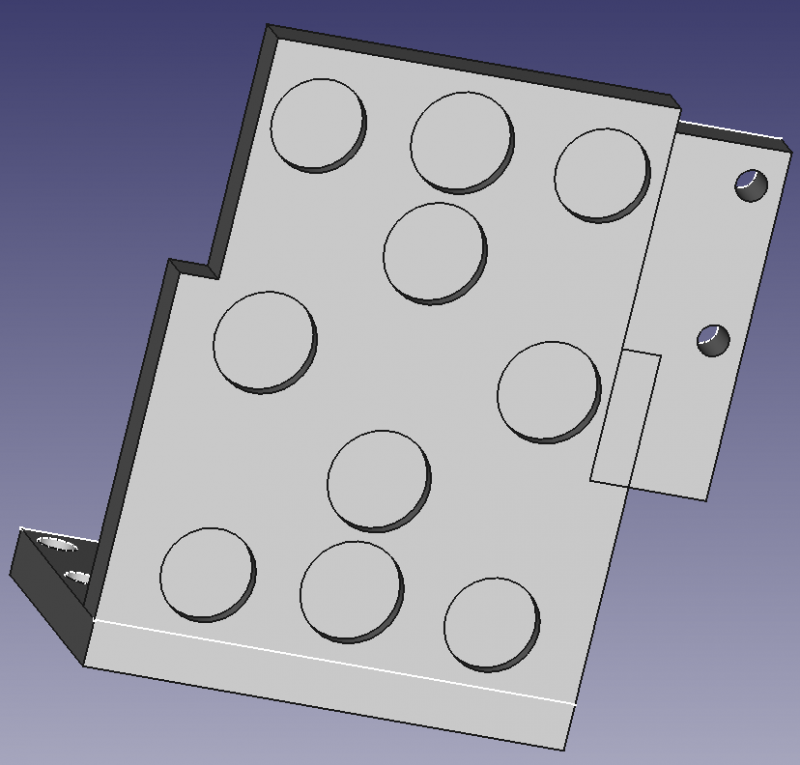
Starting gcode
G21 ;metric values G90 ;absolute positioning M82 ;set extruder to absolute mode M107 ;start with the fan off G28 X0 Y0 ;move X/Y to min endstops G28 Z0 ;move Z to min endstops G1 Z15.0 F{travel_speed} ;move the platform down 15mm G92 E0 ;zero the extruded length G1 F200 E3 ;extrude 3mm of feed stock G92 E0 ;zero the extruded length again G1 F{travel_speed} G29 G28 X0 Y0 ;move X/Y to min endstops G28 Z0 ;move Z to min endstops G1 F200 E3 ;extrude 3mm of feed stock G92 E 0 ; bed leveling M117 Printing...;Put printing message on LCD screen
11/10/19
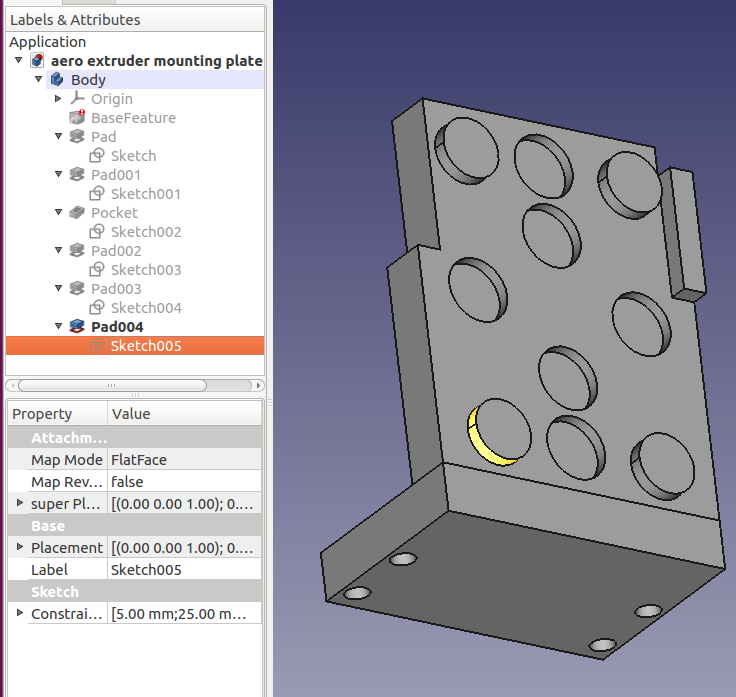
Redesigned the aero mount plate based upon print that wasn't quite lined up right. Made attachment surface large enough and thickened pad, extended 4 corner pads from 2.5 to 2.8 mm. Hoping 6 magnets is enough to hold fairly heavy extruder, may need to use all 10 magnets. File:Aero extruder mounting plate BODY 2.fcstd File:Aero extruder.stl
11/9/19
Cleaned off D3D and booted up. Tightened up screws and axis chains. Printer booted and components seemed to run fine, heat bed taken to 75 and hotend to 210. PLA plastic extruded okay. The extruder fan cover was hanging below the hotend and scraping, so removed and cut off the attachment point, fan doesnt seem to be spinning anyways. Fiddled with settings to get okay prints. Tension in filament, possibly from filament running under itself on the spool (ordering new spool). Sometimes printer is recognized with old settings, sometimes not. sometimes does the four corner bed leveling pre-print, sometimes not.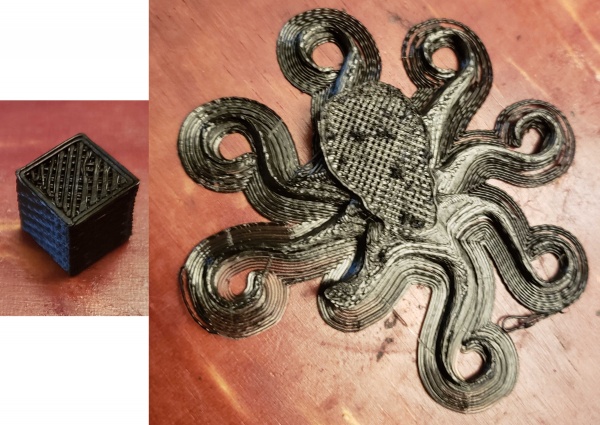
11/2/19
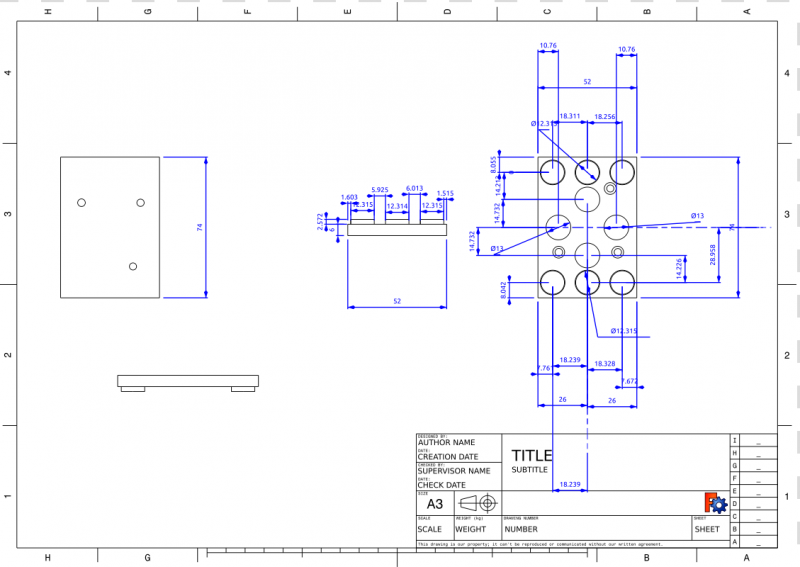
Finished 3D model of aero extruder mounting plate. Used draft and dimension drawing workbench to determine dimensions of mk prusa mounting plate. File:Aero extruder mounting plate BODY.fcstd
10/26/19
Started generating 3D model of aero/volcano mounting plate. Using Prusa_i3_mk2_extruder_adapted_interface.fcstd as a template. Designed new part from scratch. Measured aero mounting bracket and formed fusion part. Signed up for the MSU Science Festival (April 2020) again to show the D3D, D3D needs to be tested and worked on. The extruder axis has come loose and is bent.
10/11/19
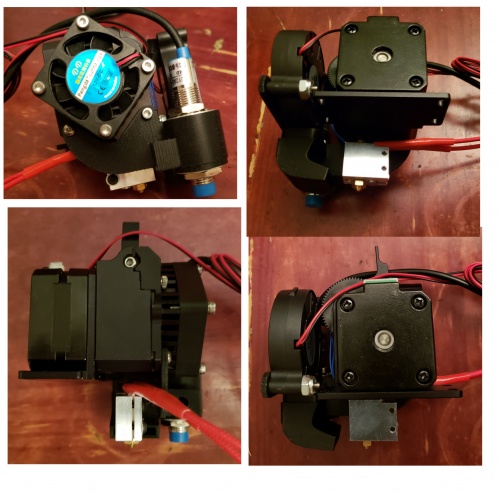
Started assembling all metal aero extruder with volcano nozzle. Fairly simple to assemble, mount gear on motor shaft and screw together. One screw is too short due to the additional length of the z-sensor holder, likely can find a workable one at the lab. Missing a screw and nut to attach nozzle fan to sensor holder, using a zip tie for now. There are a large number of wires to decide how to attach to electronics. Will get a carriage mount printed in the next few weeks.
10/8/19
Took a step back after Science fest and PorcFest, to work, publish a paper, and prepare an online CRISPR course. Ready to get back into OSE D3D optimization again. Have largely switched over to working in OSE linux (amazing), using it to make online courses and 3D models for the lab. Once successful with online courses will make a course about making a course with OSE linux. Using freecad to make 3D printed parts for a spectroscopic cuvette flow-cell.
Will assemble volcano extruder with current internal mount. Preparing a 3D model of the magnet quick attach plate to attach extruder to.
6/1/19
Trying to get the D3D optimized to print. Looking to present open source 3D printing at ForkFest and Midwest Peace and Liberty Fest, so need to get spiel together. D3D is not using the z-offset from Cura. Need to figure out if it is due to g-code at start (G28 command?) or marlin overriding something.
5/10-5/11/19
Looking to redesign magnetic mount plate for D3D with aero titan extruder, do not want to reorient the y axis. Looking to combine File:Prusa i3 mk2 extruder adapted interface.fcstd and File:E3dtitanbracket.fcstd. Tried an assembly but the dimensions weren't right. Will redesign from scratch but need to find the dimensions of the parts. Need to use drawing view in FreeCAD? Definitely need to practice more with FreeCAD. Confused about the difference between a part and a body. Can't map a sketch to a face with an error "need to add a body, use transfer function". Want to keep five magnet spaces, and have extender on each corner, but maybe should use magnets in all 9 positions. Maybe make mounting plate thicker to reduce magnets' effect on extruder electronics.
4/28/19
Purchased all metal titan aero knockoff from ebay, along with inductive sensor and fan. Need to find what size screw to secure inductive sensor to nozzle assembly. Titan aero will require assembly. Need to redesign mounting plate and purchase magnets. Need to figure out how to add plugs to hot end wires.
4/27/19
Examining the D3D v19.02 extruder and the parts. Nozzle assembly attaches to the heat sink of titan aero, the assembly holds the z sensor and a blower fan for the hotend. Would prefer not to turn z axis cable and will alter magnetic mounting plate to hold aero by the mounting bracket.
4/21/19
Sent follow-up email for interest in D3D and 3D printing.
4/6/19
At the MSU expo for the day. Started up the D3D and OSE linux but had scaling issues with models be 10x (very strange). Had to reset the settings, but lost the start-gcode. Using default start g-code worked with the addition of command G29 (autolevel bed) and G92 E161.2 (steps of extruder per cm). Wasn't getting great printers (issues with not sticking to the bed, z-axis) but good enough to demonstrate. Kids and some adults were pretty into the concept. Should have grabbed a second screen to display computer on the walkway side of the table. Talked to 100+ people and gathered contacts of ~20 people/families interested in a D3D build workshop locally. Many kids had 3D printed at school, a few kids have made their own models with TinkerCAD, a few very inspiring. One had just gotten a 3D printer for home. Definitely an educational niche, with some parent investment. Suggested parents help children get FreeCAD or TinkerCAD and use 3D print services at a local library.
4/1/19
Printing volcano nozzle with 0.1 mm layers, z-offset of .12 seems very good. Tried using a snippet of filament, while print went overnight and the filament ran out. Good print quality but incomplete. Need to tape down servo wires. The extruder attachment plate does not have magnets on the fan corner and this may allow the extruder to wobble, need to stabilize corner with an insert.
3/31/19
Attached cable guide to extruder and collected wires in bundles. Zip tied wire bundles and placed attached to guides, wires seem too short to fit completely in guide, maybe the guide can be shortened by removing links. Did some practice prints, issues with extruder retracting filament before printing. Googling found the code G92 E0, should be included in G-code start to reset extruder position after the first print. Got it confused with M92 E161.2 (extruder steps), wasted some time. Everything is working pretty well now. Attached filament spool with more zip ties. Filament likely has crossing strands, making torsion during print.
3/27/19
Not successful at tweaking z-offset through marlin lcd interface and had to use the Cura settings. Printer is up and running. Printed the body for a volcano extruder with .15 mm layers (will add pic soon). Print went pretty well, some strings and globs but hollow cylinder was produced. Extrusion sometimes doesn't seem to happen with some first layers, and manual pressure is needed. Slight warping on extended arm but likely can be improved with more outlines. Further tests and printing of the extruder parts are next.
3/25/19
Replaced mosfet board, and soldered on prong connector to the end of the wires. This seems like it could be a good step to increase robustness, ease of assembly, and introduce the connections to new builders (would have to connect two wires to a few connectors). Heat bed works well. Did some small printing, but need to tweak z axis offset.
Have been using Cura to control printer but need to start using marlin interface directly. https://www.youtube.com/watch?v=Q5M7DvdMcew
3/23/19
Smoking D3D. Mosfet has heat damage at the DC out terminal, melted plastic and ash. Wires at DC terminals are covered in melted burned plastic. Ordered new mosfet, filament holder, and heated bed (prewired). Replacing the bared stranded wire for the connection with screwed on connectors. If conducting builds with first time builders outcomes would likely be more successful if using quality prewired components. Plan to print volcano extruder when D3D is running.
Gluing the heat bed to the z-axis is inconvenient when troubleshooting a heated bed, which seems to be a temperamental component, need to think about mechanical mounting. Looking at aluminum t-slot bars on ebay as a frame for the next build.
3/19/19-3/20/19
Getting decent prints with D3D. Honing the z-axis takes a while but there may be a more efficient technique. Got down to .12 mm layers, pretty good details. Need a spool for the filament. Was able to tighten in hotend thermistor after a print, the tightening screw was
Small wisps of smoke are coming from the control panel towards middle/end of prints when fan in power unit comes on. Seems to be coming from DC in terminal of hotend board, likely when the hotbed is being heated. There may be solder on the end of the wire that is the source. Going to cut end off end of wire and reattach.
3/13/19-3/15/19
Still working on getting D3D running consistently. Had a very good print at 0.15 mm layer height. Then started tetting thermal runaway error on the heated bed during printing. Once the issues are worked out, will secure wires in wire guides. Planning to bring D3D to some liberty festivals this summer, so I need to get the D3D secured for transport.
3/12/19
Ran D3D. had to pull out filament, stringy end from last failed print. With fresh PLA end, was able to print roctopus with decent fingers. Slowed print to 20mm/sec. Maybe need to tighten axis belts. Pretty happy to have a printer!
3/6/19
Cleaned out axis, little black screw and axis piece fragments built up, removing the material allowed the motor to rotate freely. Reassembled and printed a cube. After honing z-axis had problems with extruder, maybe overheating.
3/2/19-3/4/19
Worked on D3D. Calibrating z-axis. Honed in the height probe distance and used z-offset to get the perfect distance. Had some pretty good prints with PLA, slowed down speed to .30 mm/s. One of the axis locked up after a print. Have to disassemble motor from axis and see what is not rotating freely.
2/28/19
Received OSE poster for expo. Looks pretty good.
2/26/19
Had an online meeting to gather people interested in open source genetic engineering/open science. Organizing future mastermind group.
2/17/19
Planning materials for expo. Want to have a few figures to teach concepts related to D3D. Need to introduce the math concepts involved in making a model and how to turn that into an object by CNC.
2/12/19
https://docs.google.com/spreadsheets/d/1AcKUtG-xO9yKC-D6WLwFMXNuaYYd0Po4k1XSALTOvi0/edit?usp=sharing
Getting together BOM for D3D volcano extruder
1/25/19-2/5/19
Will have an expo table at the 2019 MSU science festival (April 6th), so need to get materials together and D3D working well. Have a Rostock 3D printer in the lab that I can borrow and use to print parts for D3D. Optimizing Rostock for ABS printing for new extruder parts. Installed PET heatbed to get bottom layers to stick, also applying ABS/acetone solution to bed before rinting for better sticking.
D3D heatbed has been a little finicky for retaped with kapton and seems okay. Thermistor is falling out of hotend and I cannot tighen or loosen the black screw on the hotend. Used a little superglue to secure it but it is not ideal.
Working on longterm vision for OS work and life.
Need: Working 3D printers with corresponding computers.
Signage to draw eyes and give impression of demonstration
Handouts or QR codes linked to OSE resources
Want:
D3D printed manual
Signage/graphics of GVCS
(Eric Here, OSE Participation in Makerfaires may be a good place to put some stuff. Then also pamphlets on pretty much everything sounds like it would be good (brocures from a mass print service). Using an Open Source Power Supply (Solar Controller etc) may spark some additional intrest if you can manage that (not too neccissary though). One completely crazy (yet possibly possibly doable) would be to drive a lifetrack/lifetracck mini up to the event; I don't know the exact adresses, but I did plug this into google maps: https://www.google.com/maps/dir/Michigan+State+University,+220+Trowbridge+Rd,+East+Lansing,+MI+48824/Kansas+City,+Missouri/@42.4046285,-123.0686184,4z/data=!4m14!4m13!1m5!1m1!1s0x8822c259da888d63:0x6e9898ab05aa3b3f!2m2!1d-84.4821719!2d42.701848!1m5!1m1!1s0x87c0f75eafe99997:0x558525e66aaa51a2!2m2!1d-94.5785667!2d39.0997265!3e0 It seems like ~ a 10 hour drive.
I may make a construction set for publicity event kits soon and maybe even some graphics for posters etc (altough I probably will just dig for old ones to keep the style the same).
All in all it is great that you are getting us out there for some publicity, I will try to help, and good luck!)
7/31/18
https://www.lansingmakersnetwork.org/ https://lib.msu.edu/makecentral/3DPrinting/
7/1/18
Messing around with FreeCAD-PCB. Putting together guide for OSE.
6/30/18
Mounted flash drive with GParted and split off a partition from the oversized main partition (this was likely a waste of time), probably should have shrunk drive just using windows disk manager. Installed OSE linux on empty space (use do something else option for installation), ext4 format, mount /, primary, start. Stable OSE linux successful, to boot between systems switch Bios to UEFI or legacy. Downloaded FreeCAD-PCB workbench, extracted. Had trouble moving the file in the mod folder /usr/lib/freecad/MOD, wanted to use gksu nautilus, had to reset root (sudo passwd root). Opened Nautilus, moved PCB into MOD. Booted up FreeCAD but needed a model. Located templates for kicad http://kicad-pcb.org/libraries/download/ . Opened PCB of Arduino Mini, voila.
6/29/18
Researching KiCAD to FreeCAD. Seems to be FreeCAD-PCB workbench available and it looks pretty nice. Working with workbenches will require a stable OSE linux.
6/20/18
Having too much fun outlining OS synbio. Trying to make contact with other OS synbio backers, so we can get stock what is already OS. Thinking about yeast and yeast vectors. Strategizing to OS current bio projects. Getting ready to dive into CNC circuit mill, emailed Shane to get wiring info and any other info he might have.
6/18/18
Organizing thoughts on OS synthetic biology
6/16/18
Getting D3D CNC Circuit Mill v18.06 design requirements and modules broken down. Looking for wiring info but can't find it.
6/14/18
Looking through D3D CNC Circuit Mill, collecting CAD files. Want to dual install OSE linux on laptop running windows, only open source partition software found is GParted. Will work through development template of circuit mill.
6/13/18
Collecting thoughts on conversations yesterday, poking around kicad and watching some tutorials, going through D3D CNC Circuit Mill appreciate the design work but the development template is very incomplete. Embedded new development template on CNC Circuit Mill v18.06.
June 12, 2018
- CNC Circuit mill - 12 weeks
- Schedule by week:
- Set up Development Template for CNC Circuit Mill v18.06 and embed a Burndown
- Use 20 item templat
- Burndown from OSEdev page - Lex@berezhny.com
- Get acceess to $109 Welder + flux core welder
- Get access to 5 amp angle grinder or 15 amp abrasive metal cutoff
- Take a look at all stuff at the https://www.opensourceecology.org/cnc-circuit-mill-workshop/ page
- Addding the arduino controller + wiring into FreeCAD using the KiCAD export - Teach the Team how to import electronics between FreeCAD and KiCAD.
- Use the OSE Piping Workbench - and add the wiring into CNC Circuit mill
- Wiring diagram from Shane Oberloier
- Source materials, do logging, take pictures - upload to drive
- Create a Part Library (gallery) as in the Part Library of all the electronics parts and wires
- Shoot for Electronics Components in FreeCAD lesson to team on July 10, 2018
6/8-6/10/18
Reviewing fluidized bed reactor specifications and making model in freecad.
Developer test self-assessment
Overall the developer cube test likely took 20 hours to complete, spread over a few weeks. Downloading the iso was delayed by browser issues, but after download setup was easy enough, taking maybe 2 hours and buying a flash drive. Making the cube in CAD was the most time consuming part of the exercise taking time to refresh CAD navigation, toolbars, and selecting things. The exercise took several (10-20) tries mainly due to conflicting constraints, this is when I started to review previous tests to see the strategies used. One trick I have been unable to replicate is being able to select or copy an object and move it with the mouse without changing the orientation. The strategy I used was to duplicate tubes made in each orientation and place the tubes using constrains on each axis, building a cube. It took several hours of frustration with plane constraints to find out about the fixed position property, with the ability to fix a single tube and constrain the others to it building the cube was fairly straight-forward. Marcin told me how to find the bolt in the fastener workbench and it took watching a few old tests to find out how to attach the bolt and screw. Building the cube took about 15 hours, but I can now make the cube in less than 20 minutes. After unsuccessfully trying to screen record in windows I booted OSE linux. What a difference! Very smooth operation, with programs that have most professional options. Recording with vokoscreen produced manageable videos, these were easy to lay out in kdenlive. Googling found options to speed up the video but it couldn't be reduced to 30 seconds. Making the videos took maybe 3 hours in total.
I would assess myself a score of 80% mainly due to a lack of following directions. I did not switch to linux until I had already reviewed freecad in windows, working in linux longer may have produced a been video (-10). As a result the video is over the allotted time (-10), perhaps there is another option for speeding up the video that I overlooked.
Overall score: 80
6/5/18
Test 2
Test 1
Booted up OSE linux on acer aspire e5-525, had to change bios from uefi to legacy. Very nice platform! Used vokoscreen to record building the cube. Had to modify toolbars to include duplicate selection and pocket. Collected a few clips to cover all of the steps and laid out in kdenlive, used property->motion->speed 2000% to speed up movie, max setting but video is still 1 min. Downloaded OS music, dropped in audio track, clipped at 1 min. Rendered as MP4 and MPEG for upload to youtube, had issues with MP4 on youtube at first but worked eventually.
6/4/18
Trying to get a recording of the developer test cube, having issues with VLC and CamStudio. Will try to work in OSE linux next.
6/3/18
Working on finishing developer test cube. Attaching bolt (ISO 4014 M27 220 length) and hex nut (ISO 4032). Working to produce recording of desktop by VLC, VCL output is by default to very large avi files https://superuser.com/questions/613368/how-do-i-set-the-format-vlc-media-player-uses-when-recording https://forum.videolan.org/viewtopic.php?t=95081 Still working on creating pocket from initials.
60/1/18
Reorganizing OSE approach to biotechnology pages
5/30/18
Made the cube by constraints using assembly2, looking for bolt part to finish design.
5/26-5/28
Downloaded ose linux iso, was having trouble with google download link through brave browser but worked with chrome. Formatted and mounted image to usb. Have been practicing freecad, making the cube for the developer test. Downloaded VLC for screen capture.
4/17-14/18
Have been experimenting with 3D printed parts for D3D using a Rostock printer, ABS plastic, and Repetier to generate g-code. ABS is warping away from the bed, and optimization has included raising the bed temperature, decreasing the printing speed, and printing on a bed lined with painters tape. In order to optimize prints had to generate axis pieces stl files and mirror part.
3/22/18
Started receiving ordered materials. Preparing to print necessary parts in ABS on Rostock printer. Investigating 16' frames considering steel, PVC or acrylic, leaning towards steel.
3/19/18
Have been researching D3D printer and how to solvent cast 3D print set-up documentation site for a replication build. Dispersion of solvent disssolved material require fluid pumping to drive extrusion.
3/15/18
Installed freecad. Focusing research on cellulose based 3D printable materials because this seems to be the most boot-strappable material to manufacture in the OSE context. Printable cellulose requires solvents for dispersion rather than using thermal melting.
3/13/2018
After a long hiatus the OSE bioplastic project is back under development. Background research is near completion and current work is to design and build prototypes of a chemical reactor capable of producing PLA (and PE).
Where to pick up again?: 1. Determine the necessary capabilities of a reactor for producing bioplastics. 2. Make reactor core schematics and determine manufacturing techniques. 3. Build a budget for reactor prototype and substrates. 4. Crowdfund necessary funds. 5. Build prototypes at FeF in Summer 2019.
