Seed Eco-Home 4 3D CAD: Difference between revisions
| Line 162: | Line 162: | ||
<gallery perrow=6> | <gallery perrow=6> | ||
File:seh2_9ft_short_left_corner.png|'''Wall Module 24''' <br/>FreeCAD- [[File:seh2_wall_24.fcstd]]<br/> | File:seh2_9ft_short_left_corner.png|'''Wall Module 24''' <br/>FreeCAD- [[File:seh2_wall_24.fcstd]]<br/> | ||
File:seh2_9ft_panel.png|'''Wall Module 25''' <br/>FreeCAD- [[File:seh2_wall_25.fcstd]]<br/> | File:seh2_9ft_panel.png|'''Wall Module 25''' <br/>FreeCAD- [[File:seh2_wall_25.fcstd]]<br/> | ||
File:Upperdoorupdate.png|'''Wall Module 26 - second story door''' <br/>FreeCAD- [[File:seh2_wall_26.fcstd]] <br/> | File:Upperdoorupdate.png|'''Wall Module 26 - second story door''' <br/>FreeCAD- [[File:seh2_wall_26.fcstd]] <br/> | ||
File:seh2_9ft_short_right_corner.png|'''Wall Module 27''' <br/>FreeCAD- [[File:seh2_wall_27.fcstd]]<br/> | File:seh2_9ft_short_right_corner.png|'''Wall Module 27''' <br/>FreeCAD- [[File:seh2_wall_27.fcstd]]<br/> | ||
File:seh2_9ft_long_left_corner.png|'''Wall Module 28''' <br/>FreeCAD- [[File:seh2_wall_28.fcstd]]<br/> | File:seh2_9ft_long_left_corner.png|'''Wall Module 28''' <br/>FreeCAD- [[File:seh2_wall_28.fcstd]]<br/> | ||
File:seh2_9ft_panel.png|'''Wall Module 29''' <br/>FreeCAD- [[File:seh2_wall_29.fcstd]]<br/> | File:seh2_9ft_panel.png|'''Wall Module 29''' <br/>FreeCAD- [[File:seh2_wall_29.fcstd]]<br/> | ||
File:seh2_9ft_panel.png|'''Wall Module 30''' <br/>FreeCAD- [[File:seh2_wall_30.fcstd]]<br/> | File:seh2_9ft_panel.png|'''Wall Module 30''' <br/>FreeCAD- [[File:seh2_wall_30.fcstd]]<br/> | ||
File:seh2_9ft_panel.png|'''Wall Module 31''' <br/>FreeCAD- [[File:seh2_wall_31.fcstd]]<br/> [[ | File:seh2_9ft_panel.png|'''Wall Module 31''' <br/>FreeCAD- [[File:seh2_wall_31.fcstd]]<br/> File:seh2wall32.png|'''Wall Module 32''' <br/>FreeCAD- [[File:seh2_wall_32.fcstd]]<br/> | ||
File: | File:seh2_9ft_panel.png|'''Wall Module 33''' <br/>FreeCAD- [[File:seh2_wall_33.fcstd]]<br/> | ||
File:seh2_9ft_panel.png|'''Wall Module 34''' <br/>FreeCAD- [[File:seh2_wall_34.fcstd]]<br/> | |||
File:seh2_9ft_panel.png|'''Wall Module 34''' <br/>FreeCAD- [[File:seh2_wall_34.fcstd]]<br/> | |||
File:seh2_9ft_long_right_corner.png|'''Wall Module 35''' <br/>FreeCAD- [[File:seh2_wall_35.fcstd]]<br/> | File:seh2_9ft_long_right_corner.png|'''Wall Module 35''' <br/>FreeCAD- [[File:seh2_wall_35.fcstd]]<br/> | ||
File:seh2_9ft_short_left_corner.png|'''Wall Module 36''' <br/>FreeCAD- [[File:seh2_wall_36.fcstd]]<br/> | File:seh2_9ft_short_left_corner.png|'''Wall Module 36''' <br/>FreeCAD- [[File:seh2_wall_36.fcstd]]<br/> | ||
File:seh2_9ft_panel.png|'''Wall Module 37''' <br/>FreeCAD- [[File:seh2_wall_37.fcstd]]<br/> | File:seh2_9ft_panel.png|'''Wall Module 37''' <br/>FreeCAD- [[File:seh2_wall_37.fcstd]]<br/> | ||
File:seh2_9ft_panel.png|'''Wall Module 38''' <br/>FreeCAD- [[File:seh2_wall_38.fcstd]]<br/> | File:seh2_9ft_panel.png|'''Wall Module 38''' <br/>FreeCAD- [[File:seh2_wall_38.fcstd]]<br/> | ||
File:seh2_9ft_short_right_corner.png|'''Wall Module 39''' <br/>FreeCAD- [[File:seh2_wall_39.fcstd]]<br/> | File:seh2_9ft_short_right_corner.png|'''Wall Module 39''' <br/>FreeCAD- [[File:seh2_wall_39.fcstd]]<br/> | ||
File:seh2_9ft_long_left_corner.png|'''Wall Module 40'''<br/>FreeCAD- [[File:seh2_wall_40.fcstd]]<br/> | File:seh2_9ft_long_left_corner.png|'''Wall Module 40'''<br/>FreeCAD- [[File:seh2_wall_40.fcstd]]<br/> | ||
File:seh2wall41.png|'''Wall Module 41''' <br/>FreeCAD- [[File:seh2_wall_41.fcstd]]<br/> | File:seh2wall41.png|'''Wall Module 41''' <br/>FreeCAD- [[File:seh2_wall_41.fcstd]]<br/> | ||
File:seh2wall42.png|'''Wall Module 42''' <br/>FreeCAD- [[File:seh2_wall_42.fcstd]]<br/> | File:seh2wall42.png|'''Wall Module 42''' <br/>FreeCAD- [[File:seh2_wall_42.fcstd]]<br/> | ||
File:seh2_9ft_panel.png|'''Wall Module 43''' <br/>FreeCAD- [[File:seh2_wall_43.fcstd]]<br/> | File:seh2_9ft_panel.png|'''Wall Module 43''' <br/>FreeCAD- [[File:seh2_wall_43.fcstd]]<br/> | ||
File:seh2_9ft_panel.png|'''Wall Module 44''' <br/>FreeCAD- [[File:seh2_wall_44.fcstd]]<br/> | File:seh2_9ft_panel.png|'''Wall Module 44''' <br/>FreeCAD- [[File:seh2_wall_44.fcstd]]<br/> | ||
File:seh2wall45.png|'''Wall Module 45''' <br/>FreeCAD- [[File:seh2_wall_45.fcstd]]<br/> | File:seh2wall45.png|'''Wall Module 45''' <br/>FreeCAD- [[File:seh2_wall_45.fcstd]]<br/> | ||
File:seh2wall46.png|'''Wall Module 46''' <br/>FreeCAD- [[File:seh2_wall_46.fcstd]]<br/> | File:seh2wall46.png|'''Wall Module 46''' <br/>FreeCAD- [[File:seh2_wall_46.fcstd]]<br/> | ||
File:seh2_9ft_long_right_corner.png|'''Wall Module 47'''<br/>FreeCAD- [[File:seh2_wall_47.fcstd]]<br/> | File:seh2_9ft_long_right_corner.png|'''Wall Module 47'''<br/>FreeCAD- [[File:seh2_wall_47.fcstd]]<br/> | ||
</gallery> | </gallery> | ||
Revision as of 04:28, 6 August 2022
Master Files
![House with PV. FreeCAD- File:Housewithpv.fcstd - incomplete. Final - [1]](/images/thumb/e/e5/Housewithpv.png/120px-Housewithpv.png)
House with PV. FreeCAD- File:Housewithpv.fcstd - incomplete. Final - [1]
Seed Eco-Home Plumbing. See SEH 4 Plumbing
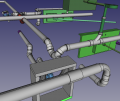
![Seed Eco-Home Water Supply. FreeCAD with fittings - [2] and one-item part tree - [3]. File with 5 components but not fittings: File:Seh2 watersystem.fcstd.](/images/thumb/e/e4/Seh2_watersystem.png/120px-Seh2_watersystem.png)
Seed Eco-Home Water Supply. FreeCAD with fittings - [2] and one-item part tree - [3]. File with 5 components but not fittings: File:Seh2 watersystem.fcstd.
Electrical Design. See SEH 4 Electrical.
PV panel mounting. FreeCAD- File:Pvpanelmounting.fcstd

Tapered roof. FreeCAD- File:Taperedroof.fcstd
Modular Carport. FreeCAD- File:Modularcarport.fcstd
![Utility Wall assembly. Taken to Gitlab - [4]. After 1 MB on the wiki the plumbing part is split into the next file. FreeCAD -File:Utewallassy.fcstd](/images/thumb/5/52/Utewallassy.png/120px-Utewallassy.png)
Utility Wall assembly. Taken to Gitlab - [4]. After 1 MB on the wiki the plumbing part is split into the next file. FreeCAD -File:Utewallassy.fcstd
![Cabinets. - Catarina's FreeCAD source including Rosebud-SeedA-v2.fcstd is at [5]. Cabinets all - File:Cabinets.fcstd. Cabinets pieces - [6]](/images/thumb/a/a5/Cabdsafsdf.png/120px-Cabdsafsdf.png)
Cabinets. - Catarina's FreeCAD source including Rosebud-SeedA-v2.fcstd is at [5]. Cabinets all - File:Cabinets.fcstd. Cabinets pieces - [6]
![Catarina's FreeCAD 2022. - Catarina's FreeCAD source including Rosebud-SeedA-v2.fcstd is at [7].](/images/thumb/e/e1/Seh2.jpg/120px-Seh2.jpg)
Catarina's FreeCAD 2022. - Catarina's FreeCAD source including Rosebud-SeedA-v2.fcstd is at [7].
![Vanity lighting, fan, GFCI locations for bathroom. FreeCAD, see latest bathlighting file - [8]](/images/thumb/b/bf/Bathlighting.png/120px-Bathlighting.png)
Vanity lighting, fan, GFCI locations for bathroom. FreeCAD, see latest bathlighting file - [8]

Second Story Framing. This is just a simple copy of second floor. FreeCAD- File:Secondstoryframing.fcstd
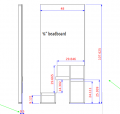
First Floor Beadboard. FreeCAD- File:Seh2 firstfloorbeadboard.fcstd
Closet. FreeCAD- File:Closet.fcstd
Laundry. FreeCAD- File:Laundry.fcstd
House Location Master File FreeCAD- File:Houselocation.fcstd
Master interface design. FreeCAD- File:Masterinterface.fcstd
![House with PV. FreeCAD- File:Housewithpv.fcstd - incomplete. Final - [1]](/wiki/File:Housewithpv.png)

![Seed Eco-Home Water Supply. FreeCAD with fittings - [2] and one-item part tree - [3]. File with 5 components but not fittings: File:Seh2 watersystem.fcstd.](/wiki/File:Seh2_watersystem.png)


![Utility Wall assembly. Taken to Gitlab - [4]. After 1 MB on the wiki the plumbing part is split into the next file. FreeCAD -File:Utewallassy.fcstd](/wiki/File:Utewallassy.png)
![Cabinets. - Catarina's FreeCAD source including Rosebud-SeedA-v2.fcstd is at [5]. Cabinets all - File:Cabinets.fcstd. Cabinets pieces - [6]](/wiki/File:Cabdsafsdf.png)
![Catarina's FreeCAD 2022. - Catarina's FreeCAD source including Rosebud-SeedA-v2.fcstd is at [7].](/wiki/File:Seh2.jpg)
![Vanity lighting, fan, GFCI locations for bathroom. FreeCAD, see latest bathlighting file - [8]](/wiki/File:Bathlighting.png)


Select Details
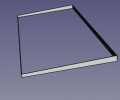
Vertical Cross Section. FreeCAD- File:Verticalcrosssection.fcstd
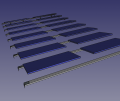
PV rack. FreeCAD- File:Pvrack.fcstd
Top roof band. FreeCAD- File:Toproofband.fcstd
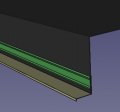
EPDM roof + termination bar. FreeCAD- File:Epdm+term.fcstd
PV ledgerbrackets. FreeCAD- File:Pvledgerbrackets.fcstd
Top of the house OSB. FreeCAD- File:TophouseOSB.fcstd
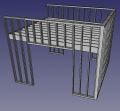
Second iteration trellis. Positioned for master file.
FreeCAD- File:Trellisv2.fcstd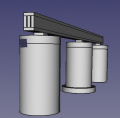
Car port footer assembly. 22" and 28". Dug with 22" auger.
FreeCAD- File:Carportfooterassy.fcstd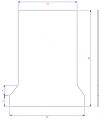
Car port footer. 22" and 28". Dug with 22" auger.
FreeCAD- File:Carportfooter.fcstd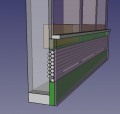
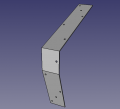
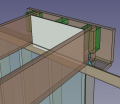
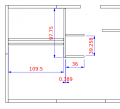
Second floor back wall detail. 9.5" height of cover.
FreeCAD- File:2ndflbackwalldete.fcstd
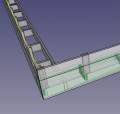
Second floor utility channel. Still 10" cover, may want 9.5"- File:2ndfloorutechan.fcstd
Floor joist blocking. With sketch. File:Blockingsketch.fcstd
Floor joist cover. With sketch. File:Blockingcover.fcstd
First Floor Ceiling Detail
FreeCAD- File:Blockingdetail.fcstd
Stringerless stairs for SEH 2
FreeCAD- File:SEH2stairs.fcstd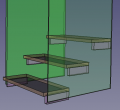
Stringerless stairs concept. See also Stairs.
FreeCAD- File:Stringerless.fcstd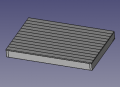
Landing Box
FreeCAD- File:Landing.fcstd


Build Cheatsheets
Protocol: Note that only single objects can be used in dimensional drawings with the Drawing Dimensioning workbench. For complex assemblies, simply collapse into simple copies of compounds - or compound STEP exports (to turn them into simple solids). As such - take master files - take the necessary selection - and turn into one dumb object. Then you can get nice dimensions. Save the file with teh pages included - pages with dimensions show up in another tab, though.
First Floor
Foundation cheatsheet. Extracted from electrtical_68 file -File:Foundationcheatsheet.FCStd.
Interior Wall 1. Bath Tub 1 wall. Extracted from plumbing_32 file. - File:Interiorwall1.FCStd.
Interior Wall 2. Next to tub. Extracted from plumbing_32 file. - File:Interiorwall2.FCStd.
Interior Wall 3 - thin.Extracted from electrical_68 file and modified. - File:Interiorwall3.FCStd.
Interior Wall 4 - bath door. And 6 is small module on top. Extracted from electrical_69 file and modified. - File:Interiorwall4.FCStd.
Interior Wall 5 - behind washer. And 7 is small module on top - File:Interiorwall5.FCStd.
Interior Wall 17 and 18. Laundry closet wall. - File:Interiorwall17.FCStd.
Interior Wall 19. Laundry closet cap. - File:Interiorwall19.FCStd.
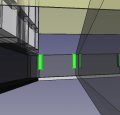
Vent Fan Location. - File:Ventfanlocation.FCStd.


Second Floor
Exterior Walls

Exterior Wall 1. Build cheatsheet. File:Exteriorwall1.FCStd.
- Exteriorwall2.png
Exterior Wall 2. Build cheatsheet. File:Exteriorwall2.FCStd.

First Floor Exterior
Wall Module 1 SweetHome3D- File:Seh2wall1.sh3d.zip
FreeCAD- File:Seh2 wall 1.fcstd
Build Cheatsheet
Wall Module 2 SweetHome3D- File:Seh2wall2.sh3d.zip
FreeCAD- File:Seh2 wall 2.fcstd
Build Cheatsheet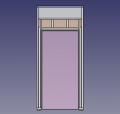
Wall Module 3 SweetHome3D- File:Seh2 wall 3.sh3d.zip
FreeCAD- File:Seh2 wall 3.fcstd
Build Cheatsheet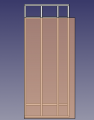
Wall Module 4 SweetHome3D- File:Seh2 wall 4.sh3d.zip
FreeCAD- File:Seh2 wall 4.fcstd
Build Cheatsheet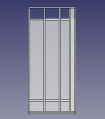
Wall Module 5 SweetHome3D- File:Seh2 wall 5.sh3d.zip
Build Cheatsheet
FreeCAD- File:Seh2 wall 5.fcstd - Same as Wall Module 17 (opposite long side left corner)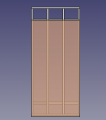
Wall Module 6 SweetHome3D- File:Seh2 wall 6.sh3d.zip
FreeCAD- File:Seh2 wall 6.fcstd
Wall Module 7 SweetHome3D- File:Seh2 wall 7.sh3d.zip
FreeCAD- File:Seh2 wall 7.fcstd
Wall Module 8 SweetHome3D- File:Seh2 wall 8.sh3d.zip
FreeCAD- File:Seh2 wall 8.fcstd
Adjustment module.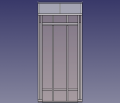
Wall Module 9 SweetHome3D- File:Seh2 wall 9.sh3d.zip
FreeCAD- File:Seh2 wall 9.fcstd
Wall Module 10 SweetHome3D- File:Seh2 wall 10.sh3d.zip
FreeCAD- File:Seh2 wall 10.fcstd
Wall Module 11 SweetHome3D- File:Seh2 wall 11.sh3d.zip
FreeCAD- File:Seh2 wall 11.fcstd
Wall Module 12 SweetHome3D- File:Seh2 wall 12.sh3d.zip
FreeCAD- File:Seh2 wall 12.fcstd
. Structure same as Module 23.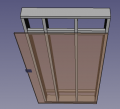
Wall Module 13 SweetHome3D- File:Seh2 wall 13.sh3d.zip
FreeCAD- File:Seh2 wall 13.fcstd
Same as Wall 1 structure. But - Wall 1 has a hole for electrical.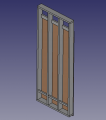
Wall Module 14 SweetHome3D- File:Seh2 wall 14.sh3d.zip
FreeCAD- File:Seh2 wall 14.fcstd
Wall Module 15 SweetHome3D- File:Seh2 wall 15.sh3d.zip
FreeCAD- File:Seh2 wall 15.FCStd
Wall Module 16 SweetHome3D- File:Seh2 wall 16.sh3d.zip
FreeCAD- File:Seh2 wall 16.fcstd
Build Cheatsheet Same structure as Module 4.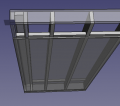
Wall Module 17 SweetHome3D- File:Seh2 wall 17.sh3d.zip
FreeCAD- File:Seh2 wall 17.fcstd
Build Cheatsheet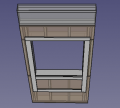
Wall Module 18 SweetHome3D- File:Seh2 wall 18.sh3d.zip
FreeCAD- File:Seh2 wall 18.fcstd
Build Cheatsheet 1st story window module.Wall Module 19 SweetHome3D- File:Seh2 wall 19.sh3d.zip
FreeCAD- File:Seh2 wall 19.fcstd
Build Cheatsheet First story window module. Structure same as 18.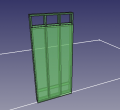
Wall Module 20 SweetHome3D- File:Seh2 wall 20.sh3d.zip
FreeCAD- File:Seh2 wall 20.fcstd
Build Cheatsheet
Wall Module 21 SweetHome3D- File:Seh2 wall 21.sh3d.zip
FreeCAD- File:Seh2 wall 21.fcstd
Build Cheatsheet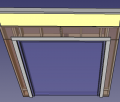
Wall Module 22 SweetHome3D- File:Seh2 wall 22.sh3d.zip
FreeCAD- File:Seh2 wall 22.fcstd
Note: FreeCAD file is updated, SH3D is older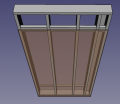
Wall Module 23 FreeCAD- File:Seh2 wall 23.fcstd


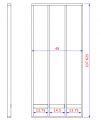
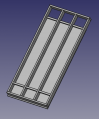
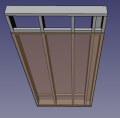
Second Floor Exterior - 9' Version
See also - Computer Generated 2nd Floor Exterior Wall Modules by Coderjeff Master files for both 8' and 9' walls with detailed parts - Coderjeff 2nd Floor Exterior.
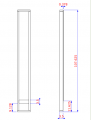
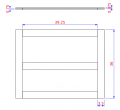
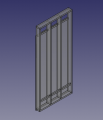
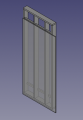
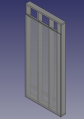
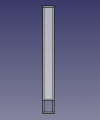
Wall Module 24
FreeCAD- File:Seh2 wall 24.fcstd
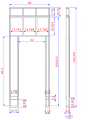
Wall Module 25
FreeCAD- File:Seh2 wall 25.fcstd
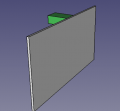
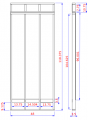
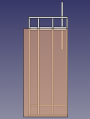
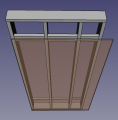
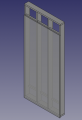
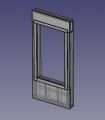
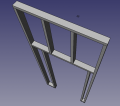
Wall Module 26 - second story door
FreeCAD- File:Seh2 wall 26.fcstd
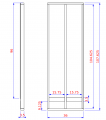
Wall Module 27
FreeCAD- File:Seh2 wall 27.fcstd
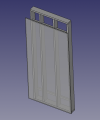
Wall Module 28
FreeCAD- File:Seh2 wall 28.fcstd
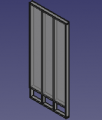
Wall Module 29
FreeCAD- File:Seh2 wall 29.fcstd
Wall Module 30
FreeCAD- File:Seh2 wall 30.fcstd
Wall Module 32
FreeCAD- File:Seh2 wall 32.fcstd
Wall Module 33
FreeCAD- File:Seh2 wall 33.fcstd
Wall Module 34
FreeCAD- File:Seh2 wall 34.fcstd
Wall Module 35
FreeCAD- File:Seh2 wall 35.fcstd
Wall Module 36
FreeCAD- File:Seh2 wall 36.fcstd
Wall Module 37
FreeCAD- File:Seh2 wall 37.fcstd
Wall Module 38
FreeCAD- File:Seh2 wall 38.fcstd
Wall Module 39
FreeCAD- File:Seh2 wall 39.fcstd
Wall Module 40
FreeCAD- File:Seh2 wall 40.fcstd
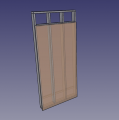
Wall Module 41
FreeCAD- File:Seh2 wall 41.fcstd
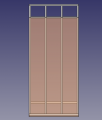
- Seh2wall42.png
Wall Module 42
FreeCAD- File:Seh2 wall 42.fcstd
Wall Module 43
FreeCAD- File:Seh2 wall 43.fcstd
Wall Module 44
FreeCAD- File:Seh2 wall 44.fcstd
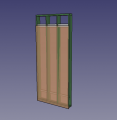
- Seh2wall45.png
Wall Module 45
FreeCAD- File:Seh2 wall 45.fcstd
- Seh2wall46.png
Wall Module 46
FreeCAD- File:Seh2 wall 46.fcstd
Wall Module 47
FreeCAD- File:Seh2 wall 47.fcstd


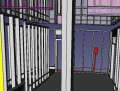
First Floor Interior
![]() Hint: The first floor exterior walls sit on the sill so the interior walls start 1.5" lower. These panels have been designed to use 106.125" studs (1.5" longer than standard pre-cut studs) so they will be the same height as the exterior walls when they are in place. The utility channel spacers are also raised 1.5" to be at the same height as in the exterior walls
Hint: The first floor exterior walls sit on the sill so the interior walls start 1.5" lower. These panels have been designed to use 106.125" studs (1.5" longer than standard pre-cut studs) so they will be the same height as the exterior walls when they are in place. The utility channel spacers are also raised 1.5" to be at the same height as in the exterior walls
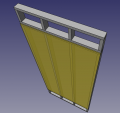
Full 2x4 interior panel FreeCAD Detail- File:Seh2 9ft interior.fcstd
Modules 58 & 59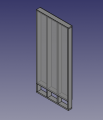
Full 2x6 interior panel FreeCAD Detail- File:Seh2 9ft 2x6 interior.fcstd
Modules 48 & 49Wall Module 48 SweetHome3D- File:Seh2 wall 48.sh3d.zip
File:Seh2 wall 48.fcstd
Wall Module 49 FreeCAD- File:Seh2 wall 49.fcstd
Wall Module 50 FreeCAD- File:Seh2 wall 50.fcstd
Wall Module 51-First Floor Bathroom Door SweetHome3D- File:Seh2 wall 51.sh3d.zip
FreeCAD- File:Seh2 wall 51.fcstd
Wall Module 52-First Floor Bathroom Wall SweetHome3D- File:Seh2 wall 52.sh3d.zip
FreeCAD- File:Seh2 wall 52.fcstd
Wall Module 55 (Laundry)
FreeCAD- File:Laundry.fcstd
Build Cheatsheet
modules 53, 54 & 55 combined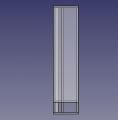
Wall Module 57 FreeCAD- File:Seh2 wall 57.fcstd
Wall Module 58 FreeCAD- File:Seh2 wall 58.fcstd
Wall Module 59 FreeCAD- File:Seh2 wall 59.fcstd


![Wall Module 56[9] FreeCAD- File:Seh2 wall 56.fcstd](/wiki/File:Seh2wall56.png)

Second Floor Interior
Second floor utility channel. FreeCAD Detail- File:2ndfloorutechan.fcstd
SEH 2 Bathroom Walls. FreeCAD Detail- File:Seh2 bathroomwalls.fcstd

Full interior panel FreeCAD Detail- File:Seh2 8ft interior.fcstd
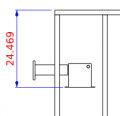
Interior door FreeCAD Detail- File:Seh2 8ft interior door.fcstd
(38x83 rough opening)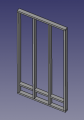
Wall Module 60 SweetHome3D-File:Seh2 wall 60.sh3d.zip
FreeCAD- File:Seh2 wall 60.fcstd
Build Cheatsheet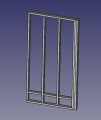
Wall Module 61 SweetHome3D-File:Seh2 wall 61.sh3d.zip
FreeCAD- File:Seh2 wall 61.fcstd
Build Cheatsheet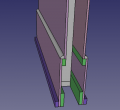
Wall Module 63 SweetHome3D-File:Seh2 wall 63.sh3d.zip
FreeCAD- File:Seh2 wall 63.fcstd
Build Cheatsheet
Wall Module 64 SweetHome3D-File:Seh2 wall 64.sh3d.zip
FreeCAD- File:Seh2 wall 64.fcstd
Build CheatsheetWall Module 65 SweetHome3D-File:Seh2 wall 65.sh3d.zip
FreeCAD- File:Seh2 wall 65.fcstd
Build Cheatsheet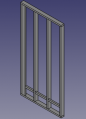
Wall Module 66 SweetHome3D-File:Seh2 wall 66.sh3d.zip
FreeCAD- File:Seh2 wall 66.fcstd
Build CheatsheetWall Module 67 SweetHome3D-File:Seh2 wall 67.sh3d.zip
FreeCAD- File:Seh2 wall 67.fcstd
Build Cheatsheet
Wall Module 68 SweetHome3D- File:Seh2 wall 68.sh3d.zip
FreeCAD- File:Seh2 wall 68.fcstd
Build Cheatsheet
Python Workbench Code
Wall Module 69 SweetHome3D- File:Seh2 wall 69.sh3d.zip
FreeCAD- File:Seh2 wall 69.fcstd
Build Cheatsheet


Plumbing Final
See more at SEH 4 Plumbing - latest work from March 2022 onwards, needs update for 9' walls.
Electrical
See SEH 4 Electrical
Visual History:


Gallery:
Stairs only, 1/10 scale. - FreeCAD - File:Staironly.fcstd.
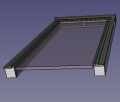
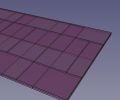
![Roof layers. - SweetHome3D -[10].](/images/thumb/5/56/Rooflayers.png/120px-Rooflayers.png)
Roof layers. - SweetHome3D -[10].
![Staircase. Technical detail. - SweetHome3D -[11].](/images/thumb/8/8c/Staircase.png/116px-Staircase.png)
Staircase. Technical detail. - SweetHome3D -[11].
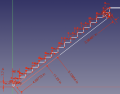
![Stairs. Early concept detail. - SweetHome3D -[12].](/images/thumb/d/d3/Stairs.png/120px-Stairs.png)
Stairs. Early concept detail. - SweetHome3D -[12].
![Stairs. Correct for Aspen. - SweetHome3D -[13].](/images/thumb/a/a7/Stairs2.png/117px-Stairs2.png)
Stairs. Correct for Aspen. - SweetHome3D -[13].
![Technical of floor and roof. - SweetHome3D -[14].](/images/thumb/3/31/Floorandroof.png/120px-Floorandroof.png)
Technical of floor and roof. - SweetHome3D -[14].
Stairs
https://wiki.opensourceecology.org/wiki/Seed_Home_v2_3D_CAD#Technical_Modules
Stair stringer with steps, no nosing. Generate technical drawing with TechDraw. FreeCAD -File:Stairstringer.fcstd.

Also - See Stairs

Mudsill anchor. - FreeCAD -File:Mudsillanchor.fcstd
Insulation pattern. Not rotated or positioned. - File:Roofinsulpattern.fcstd.

