Jellybox 1.3 Build 2018-05
This page documents my (Michael Altfield) experience building the Imade3d JellyBox v1.3 in 2018-05 during my first visit to FeF.
Note that, prior to this, I had zero hands-on experience with 3d printers. I've seen them & read about them, but I've never used one. And I've certainly never touched one. Most of the components' names are foreign to me. That said, I am a very technical person.
Build Time
I built the Jellybox in 10.5 hours spaced over 4 sessions over a few days. This is the entire time--from opening the box to the finishing of my first print.
Notes on my Experience
- the box didn't actually include instructions; it included a few pages that said "go here on our website to view the instructions." So I mostly ended up watching videos on youtube that break apart the steps
- the videos didn't tell me which box everything was in. The first task was to install thread lock on set scrws for the puller motors. Where is the thread lock? Does this kit even include it? Finally, it was found in the Tools box. Once you open each box, it has a checklist with the items inside that box. It would be great, however, if the instructions (either the ones printed or the ones found online) iterated all the boxes and specified what each box contains. And then, for each step, it mentioned "you'll need X part, which can be found in the Y box"
- some of the items were actually already built, so I just dumbly watched a video describing how to build something that was already built. Okay..
- putting the "bird on the branch" and "jelly label on the jelly jar" was brilliant. Even though I didn't have to do this; it was already built

- the kit didn't include a phillips head screwdriver, which is necessary for installing the fan. not a big deal, but worth noting
- the wires were already run in the box. That was nice.
- in general, having videos is great. If a picture says a thousand words, then a video says a thousand pictures (well, ~30 pictures per second). Being able to see the thing oriented rather than trying to figure out what is the right vs left side is critical.
- that said, the videos on youtube were just 360p. This should really, really be high def. If I want to freeze frame to see which small hole a bolt is going though, it's necessary to have high def so I get a detailed picture instead of a blur.
- The number of zipties was off from the video & my version of the jellybox. Not a big deal.
- the orientation of the idler bearings was not specified in the video. Probably someone with more mechanical experience wouldn't fuck this up, but I did. I realized my mistake when putting together the second idler. The correct orientation was still not specified, but the video happened to show it properly.
- note that the jelly box doesn't include a multimeter
- I did find HD photos on their site that do a great job at providing pictoral detail. Now that I think about it, they should probably just splice these into the video, either PIP style in the corner or 1-second overlays. I did a lot of pause-work-play-pause-work action for the videos. And sometimes I had to switch tabs to the documentation online with the HD photos. If I could just pause the 1-second video with a nice HD, annotated shot that would be very helpful.
- the install for the usb cable didn't tell me I needed a nut. Perhaps the usb cable end used to have this built-in, but I definitely needed to add a nut to mine. Also it the bolt wasn't long enough to add a nut, so I had to use an m3x16 instead of the m3x12. This will probably make m## somehow I skipped the part where the back is installed. Maybe it was absent or I was absent minded. Any way, after I installed the so-called "last" acrylic piece on the top & saw that the back was already attached, I just snapped in the back at that point
- somehow I made it to the end without installing the proximity sensor. I went back to this doc & did it https://docs.imade3d.com/Guide/Assemble+the+X+Assembly/147
- the info on the checklist after the build was *extremely* lacking, so I just went off guide & started poking it at this point https://docs.imade3d.com/Wiki/Easy_Kit_Flow#Section_Checkpoint_It_s_Alive
- I stuck in the sd card, navigated to some thing, and told it to print
- I threw the filament spool where it looked like it went, clipped off the end, stuck it in where it looked like it belonged, and clipped it shut
- It heated up, moved around, and then immediately ran horizontally with the extruder tip slamming into the bed. I quickly turned off the big friendly button (power switch)!
- the guide was wrong for setting the "x homing offset". It should be "Settings -> Motion -> X home offset", but it said simply "Settings > X Homing Offset". I found it after poking around the menu for a bit https://docs.imade3d.com/Guide/%E2%86%B3+X+Homing+Offset/213
- there was no y homing offset option
- my first print didn't turn out so great. I discovered that it's because--after watching the 10 hours worth of videos to build the thing--I didn't make it to the post-build video that includes the step to tighten the z-axis motor to the frame! I tightened that & adjusted the z-height, and print quality improved significantly
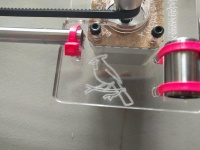
- there was a zip tie that was cut just enough to touch the belt, and it began to eat away at the belt during printing (see photo
- I got some of the power cables for the fans wrong. Some fans should be on constantly; others should not. This matters, and it should probably be more obvious which one goes where.
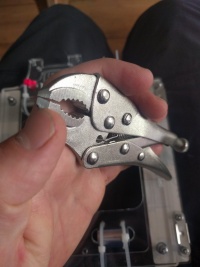
- the vice grip supplied was very bad, and it didn't grip evenly
 ]
]


Other Photos
construction of the x axis
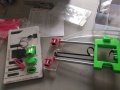
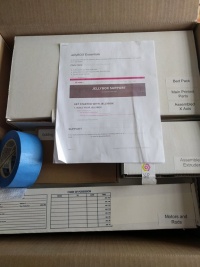
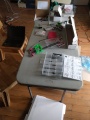
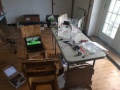
packaging for the 3d printed pieces
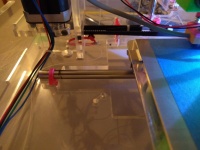
back panel where the electronics are being mounted
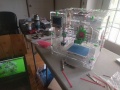
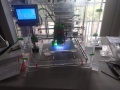
front-side after it was built
rear-side after it was built
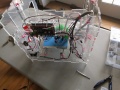
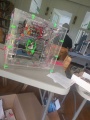
beginning to construct the plexiglass frame
first test print of the gear whee
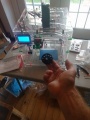
first 3d printed object = the gear wheel
printing components for the D3D Modified Prusa i3 MK2 Extruder


