Prusa i3 MK2 OSE Mod
v18.12
Part Library
Build Instructions
September 2018 - E3D Titan Aero
August 2018 - Prusa i3 MK2
D3D Extruder Versions
Currently, the Modified Prusa I3 MK2 version is being tested and evaluated and is considered the main trunk version.
Modified Prusa i3 MK2
![]() Hint: D3D second version - Prusa i3 MK2 Original - OSE Adapted - Extruder - 7/18 current version - File:Prusa i3 mk2 extruder adapted.fcstd
Hint: D3D second version - Prusa i3 MK2 Original - OSE Adapted - Extruder - 7/18 current version - File:Prusa i3 mk2 extruder adapted.fcstd
- some build photos of one of these for D3D v18.07
CAD
CAM (3D Print Files of Modified Prisa i3 MK2)
3d printable parts extracted to stl for the 8 mm height sensor with lowered sensor holder:
- New modified body with proper nut catcher, lowered sensor holder for 8 mm sensor -File:Extruder mod 8mm.stl
- File:Prusa i3 mk2 extruder adapted cover.stl
- File:Prusa i3 mk2 extruder adapted idler.stl
- File:Prusa i3 mk2 extruder adapted fanNozzle.stl
- File:Prusa i3 mk2 extruder adapted bearingShaft.stl
- Just the interface plate - File:Prusa i3 mk2 extruder adapted interface.fcstd - File:Prusa i3 mk2 extruder adapted interface.stl
Lay the parts like this for packing fraction and proper overhang considerations:

BOM
![]() Hint: m3x20 for print cooling fan is missing from BOM. So is m3x35 for attaching the magnetic quick attach.
Hint: m3x20 for print cooling fan is missing from BOM. So is m3x35 for attaching the magnetic quick attach.
vBOM
CAD File Downloads
Simple Extruder Holder

- FreeCAD -File:Motor interface.fcstd. I used M4 nuts for the nut catcher, but for the screws I used added the https://www.mcmaster.com/#90116a217/=14gcc4s that are already in the universal axis, in order to avoid adding a new item to the BOM
- STL - File:Motor interface.stl
Technical Notes on the Prusa i3 MK2
- See build manual for the i3 MK2 extruder from Prusa Research (which is discontinued) - [3]
- Note that the extruder uses a Universal v6 heat sink ([4] - good for Bowden and Direct) - which has a Teflon liner up to the cold part of the heat break. This Teflon liner sticks into the 3D printed parts to make feeding of filament smoother - see Step 5 - [5] - and video in Step 11 - [6]
- Note that we need washers around bearing - [7]. We printed the bearing shaft and it works well.
- About 13 mm of idler spring distance when tightnened - [8]
- E3D discussion - 3mm and 1.75 mm should work on Prusa i3 -[9] - but that is older Prusa, not MK2.
- E3D v6 assembly instructionals - how to assemble a hot end. Do the tightening on the nozzle - NOT on the heat break. Heat break is designed thin to be a heat break - so it can break off easily. [10]
- Note that E3D Universal heat sink has a Teflon insert. 3mm direct doesn't. Bowden has a larger insert than Universal. Universal works both as Bowden and direct. [11]
Screws
These are the screws used in the Prusa i3 MK2 OSE Mod.
- 2 hex nut in cover - one inserted deep into cover - [12], and second for fan mount arm - [13]
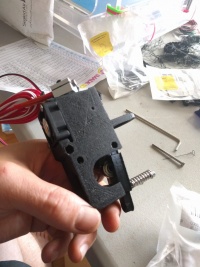
- 2 hex nuts inserted into body - left one in this picture- [14] and the second one under the heat sink - [15]
- 1 square nut in body - right one in this picture - [16]
- 2 square nuts in tensioner - [17]
- M3x8 for the attachment of quick attach tool mount to body, under the heat sink. Can use socket or philips head.
- M3x40 is good for tensioner
 [4] M3x18 for small heat sink fan - [18]. 2 are way sufficient
- m3x20 for print cooling fan are needed - or m3x25 can be used but one screw is too long and needs spacer to limit its length
- M3x18 and M3x25 for cover closure - socket cap - can't be panhead for the 25 mm because need to countersink head -[19]
- [2] M3x35 socket head are ideal for motor attach through quick mount plate - as oppesed to 30 mm of [20]. The third socket cap should be 30 mm. M40 is acceptable in all cases here, but require carriage to remove 2 of the 6 mm bolts, and third one needs spacers
- Springs are 24 mm long. Too long - need to be 13 mm
- M3x18 for nozzle
Replications
Here are details of replications of the D3D extruder by version. General notes on the build can live here, but fine details are on replication wiki pages.
Prusa i3 MK2
Prusa i3 MK2 with Volcano Nozzle
- D3D Extruder v1708
- Designs are available for a Volcano nozzle retrofit - https://www.thingiverse.com/thing:2117460 (note: cover of extruder is missing holes, update needed)
- full vetting is cataloged on facebook presently.
Prusa i3 MK2 Stock Nozzle D3D ohio
- D3D Extruder v1807
- Made from D3D Ohio [D3D_Ohio_v18.02] 12" PVC varient of the D3D
- uses stock nozzel of E3D V6 J-head Direct Hotend which is 1.75mm
- See D3D_v18.07,D3D_Ohio_v18.02 (pending) for the printer this was used in.
2018-06 Notes
These were noted by User:Maltfield when he attempted to build the D3D extruder from the part files on this wiki in 2018-06.
- There is a hole missing in extruder body which should receive the bolt for mounting motor
- Some of the bolts appear that they're supposed to be nut-less, simply catching on the 3d printed plastic. this is a bad design that doesn't work in practice. The places where there's a slot for dropping a nut catcher in perpendicular to the bolt work great, and that design should be replicated for all bolts.


Working Document
Development Document
Exploded Part Diagram
Part Files
3D Printed
- Extruder Idler - File:Idler.stl - File:Idler.fcstd
- Extruder carriage side - File:Carriage side.stl - File:Carriage side.fcstd
- Extruder motor side - File:Motor size.stl File:Motor side.fcstd
Other Parts
- Stepped motor - File:Nema17.stl - File:Nema17.fcstd
- Pulley - File:Pulley.fcstd - File:Pulley.stl
- 8mm bearing - File:8mm bearing.stl - File:8mm bearing.fcstd
- E3D V6 - File:E3Dv6.stl - File:E3Dv6.fcstd
Tech Tree of Choices
This is what choices went into each version of the extruder. We go from Tech tree of choices -> Industry Standards -> Technology Assessment -> Value Proposition
- These are all the different ways to implement an extruder for a 3D printer. This includes filament makers.
- Hit Ctrl-mouse scroll to zoom in
Genealogy
- MK8 Extruder
- Prusa i3 MK2 OSE Mod Extruder - 2018 version