LifeTrac III/Manufacturing Instructions/Assemble/Frame: Difference between revisions
Jump to navigation
Jump to search
No edit summary |
(→Frame) |
||
| Line 7: | Line 7: | ||
==Frame== | ==Frame== | ||
<html> | |||
<iframe src="https://player.vimeo.com/video/29845279?title=0&byline=0&portrait=0" width="400" height="225" frameborder="0" webkitAllowFullScreen allowFullScreen></iframe> | |||
</html> | |||
===Tools=== | ===Tools=== | ||
*Jig | *Jig | ||
Revision as of 04:14, 1 October 2011
| LifeTrac | ||
|---|---|---|
| Home | Research & Development | Bill of Materials | Manufacturing Instructions | User's Manual | User Reviews | 
| |
| ||||||||||||||||||||||||||
Frame
Tools
- Jig
- Blocks
- Bolting
- Crescent Wrench
- Wrench (size)
- Ratchet (size)
- Drill/Reamer
- Level
- Square/Triangle
- Mallet/Hammer
- Punch
Materials
- Frame Pieces 16x
- Bolts
- Washers
- Nuts
Steps
- Setup
- Allocate Bolts
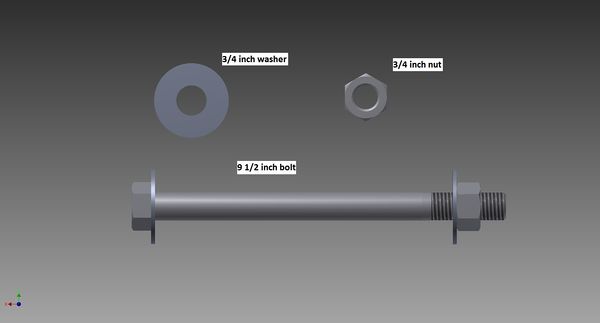
- Lay out 42 9-1/2 inch bolts on Assembly Table
- Place two washers on each bolt
- Loosely attach nuts.
- Allocate Bolts
- Lower Frame Assembly
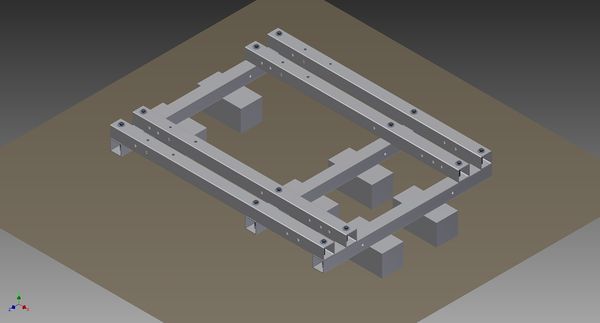
- Place Blocks on assembly area ground
- Place Lower Frame pieces (front-to-back) on Blocks
- Place Lower Frame crossbraces atop the front-to-back pieces
- Align holes
- Bolt Lower Frame together.
- Level the Lower Frame with Level
- Adjust Blocks
- Upper Frame Assembly
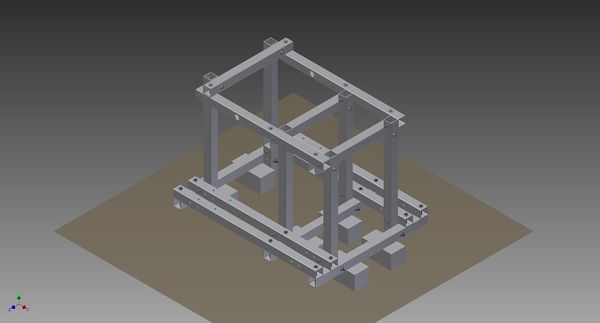
- Mount Vertical Frame Pieces to Lower Frame inner corners
- Tighten loosely. Leave room for play.
- Mount Upper Crossbrace Frame Pieces
- Mount Upper Front-Back Frame Pieces
- Tighten all frame bolts extra-tight.
- Mount Vertical Frame Pieces to Lower Frame inner corners
- Finished!
Potential Issues
- Bolt not fitting in hole?
- Ream hole
- Bolt fits, but stuck?
- Loosen nearby bolts, use punch + hammer to force bolt through.
Successful
| ||||||||||||||||||||||||||


