The printable version is no longer supported and may have rendering errors. Please update your browser bookmarks and please use the default browser print function instead.
LifeTrac Assemble Frame
Frame
Tools
- Jig
- Blocks
- Bolting
- Crescent Wrench
- Wrench (size)
- Ratchet (size)
- Drill/Reamer
- Level
- Square/Triangle
- Mallet/Hammer
- Punch
Materials
- Frame Pieces 16x
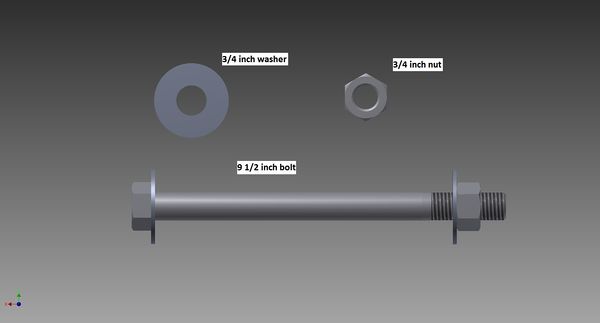
- Bolts
- Washers
- Nuts
Steps
- Allocate Bolts
- Lay out 42 9-1/2 inch bolts on Assembly Table
- Place two washers on each bolt
- Loosely attach nuts.
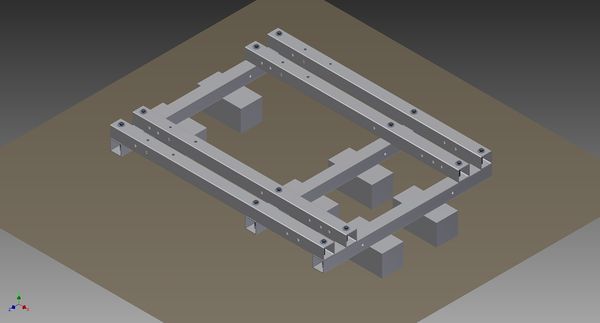
- Place Blocks on assembly area ground
- Place Lower Frame pieces (front-to-back) on Blocks
- Place Lower Frame crossbraces atop the front-to-back pieces
- Align holes
- Bolt Lower Frame together.
- Level the Lower Frame with Level

- Mount Vertical Frame Pieces to Lower Frame inner corners
- Tighten loosely. Leave room for play.
- Mount Upper Crossbrace Frame Pieces
- Mount Upper Front-Back Frame Pieces
- Tighten all frame bolts extra-tight.
- Finished!
Potential Issues
- Bolt not fitting in hole?
- Bolt fits, but stuck?
- Loosen nearby bolts, use punch + hammer to force bolt through.
Successful
Vann Miller
| v · d · eLifeTrac Fab |
|---|
| | Prepare |
Parts · Workspace · Safety · Tools · Jigs | | | Cut |
Chopsaw · Bandsaw · Torch · Torch Table | | | Drill |
Hole List · Magdrill · Drill · Torch · Torch Table | | | Misc |
Tread Rebar · Lathe Axles | | | Assemble | | | | Weld |
Collars · QA Plate · Wheel (Gussets · Plates · Treads) | | | Mount |
Arms · Attachments · Hydraulics · Wheels | | | Finish |
Paint · Test · Fun! |
|


