CEB Press/Manufacturing Instructions/Arms - secondary: Difference between revisions
Jump to navigation
Jump to search
| Line 25: | Line 25: | ||
== Fabrication Steps == | == Fabrication Steps == | ||
You will be torching the holes and welding the tab for the secondary cylinder during the final assembly of the machine. | You will be torching the holes and welding the tab for the secondary cylinder during the final assembly of the machine. | ||
For now: | |||
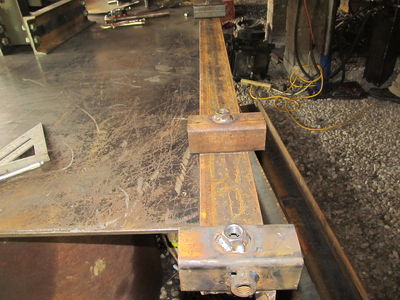
#Place the leg holders in their proper locations. | |||
#*They go on the 4" side of the angle. | |||
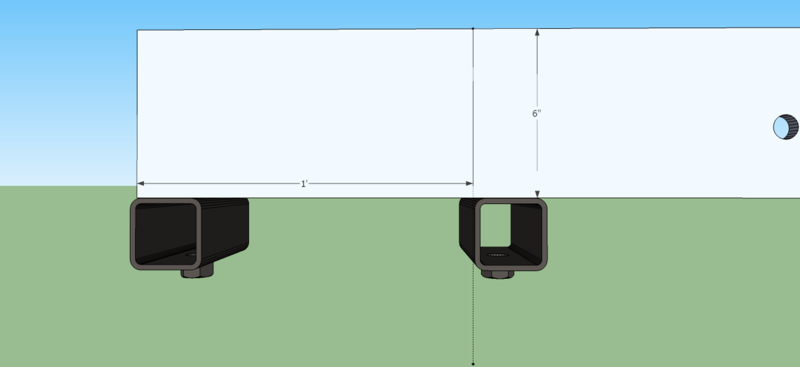
# | #*They are symetric. See Diagram for placement on each end. | ||
#Make sure they are square with the angle iron and centered vertically. | |||
#*Weld them to the machine. | |||
#*You may want to weld them so the nut is facing sideways instead of straight out, this way the bolts don't stick out any more from the machine. (They like to catch your clothing as you walk by) | #*You may want to weld them so the nut is facing sideways instead of straight out, this way the bolts don't stick out any more from the machine. (They like to catch your clothing as you walk by) | ||
#Put bolts in the outside leg holders on each arm. | #Put bolts in the outside leg holders on each arm. | ||
Revision as of 00:30, 14 December 2011
Main > Housing and construction > CEB Press > CEB press building instructions
| |||||||||||||||||||||||||
 The secondary arms connect the primary arm/frame assembly to the legs to support the structure.
Tools Required
- Cutting Torch
- Angle Grinder
- Welder
Materials Required
- 2 pieces 72" long - 4"x6"x1/2" angle steel
- 1 piece 3"x3"x1/2" steel
- Leg Holders(8)
Diagrams
Fabrication Steps
You will be torching the holes and welding the tab for the secondary cylinder during the final assembly of the machine. For now:
- Place the leg holders in their proper locations.
- They go on the 4" side of the angle.
- They are symetric. See Diagram for placement on each end.
- Make sure they are square with the angle iron and centered vertically.
- Weld them to the machine.
- You may want to weld them so the nut is facing sideways instead of straight out, this way the bolts don't stick out any more from the machine. (They like to catch your clothing as you walk by)
- Put bolts in the outside leg holders on each arm.
