CEB Press/Manufacturing Instructions/Hopper mounting plate: Difference between revisions
Jump to navigation
Jump to search
(redid it) |
No edit summary |
||
| Line 15: | Line 15: | ||
== Diagrams == | == Diagrams == | ||
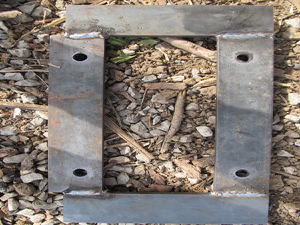
[[Image:hoppermountholes.jpg|Thumb|right|The hole locations, please redo]] | [[Image:hoppermountholes.jpg|Thumb|200px|right|The hole locations, please redo]] | ||
Revision as of 15:33, 27 September 2011
| |||||||||||||||||||||||||
![]() Warning: The documentation for the CEB Press is undergoing a thorough overhaul. CAD models and written directions are presently obsolete. For more information, see Talk:CEB_Press#Documentation_overhaul_in_progress. When the models, specifications and text on this article have been thoroughly reviewed, updated when necessary, and confirmed as whole and accurate, this warning may be removed.
Warning: The documentation for the CEB Press is undergoing a thorough overhaul. CAD models and written directions are presently obsolete. For more information, see Talk:CEB_Press#Documentation_overhaul_in_progress. When the models, specifications and text on this article have been thoroughly reviewed, updated when necessary, and confirmed as whole and accurate, this warning may be removed.
Tools Required
- Hole punch with 13/16" Die
- Welder
Materials Required
- 1/2”x3”x11 1/4” (2)
- 1/2”x3”x15” (2)
Diagrams
Fabrication Steps
- Punch the 13/16" holes in the 15" pieces.
- Weld the pieces together, insuring everything is square. And there is a 6" space between the 15" pieces. Skip around so the plate doesnt warp.
- Weld both sides, then grind one smooth, so you can install it.


