Ken Log
Monday, January 12, 2026
OSEB Living Lab Mind Map - Overview
- OSEB Living Lab - Expanded View
- The Brain - Microfactory
- The Stomach - OSEB Farm
- The Muscle - Infrastructure
- The Circlatory System - Circular Economy
- The Spirit - Sustainability & Ethos
Thursday, December 11, 2025
Preparation for Citizen Entrepreneurial Development Agency (CEDA) (of Botswana) loan application. Plan is to apply for BWP30million = US$2million.
- October 29, 2025 OSEB - CEDA Business Plan Expanded
- October 29, 2025 CEDA - OSEB Financial Projections
- Revised CEDA Guidelines June 2020
- CEDA Application Form Checklist
Thursday, August 14, 2025
🇧🇼 Title: “A New Dawn: Botswana’s Rebirth is unfolding” Posted 2 weeks ago on LinkedIn
Open Source Ecology Botswana (OSEB) Ideas for the Botswana Economic Transformation Program
OSEB Ideas for the BETP - Abridged Version
Botswana Economic Transformation Programme Call for Ideas Submission Form
Wednesday May 17, 2023
Using ChatGPT to learn Creative Writing [1]
Free online courses: [2]
Monday May 15, 2023
3D printing resources for Calibration:
*Print Quality Troubleshooting Guide: https://www.simplify3d.com/resources/print-quality-troubleshooting/
*
Friday May 12, 2023
Arrived back in Indonesia 2nd May 2023 after a 4 month work contract in Maldives. Back in Indonesia put back together my 18" frame with 8" halogen heated bed. Need to adjust for height of bed: it's not tall enough when using halogen heat bed.
Back to 3D printing: I want to go through this website by YouTuber Teaching Tech: Teaching Tech 3D Printer Calibration: https://teachingtechyt.github.io/calibration.html#intro to re-calibrate 3D printer.
Sunday Oct 9, 2022
OSEB Pitch Deck V5 2Oct 2022: [3]
Tue May 24, 2022
4 ways you can preserve the Earth's livability with open source - [4]
Fri May 13, 2022
Conversion Tables [6]
Convert imperial to metric KW to hp KVA to KW etc. etc.
Fri May 6, 2022
Developments in Ferrocement Construction in Botswana [7] 1991 document. Price for construction of 10m3 ferrocement tank in 1991 was P350 per m3 = P3,500. In 1991 US$1 = P2. Convert $1 in 1991 to equivalent $2.11 in 2022. Therefore, P3,500 tank $1,750. In today's money $1,750 = $1,750 * 2.11 = $3,692.50. Today $1 = P12.08. Therefore, Ferrocement tank would cost P($3,692.50*12.08) = P44,605.40. That seems excessive.
Price in Euro.
Source: AquaTech [8]
Unterbrunnweg 3, A-6370 Kitzbuehel/Austria
Tel: +43/664/1048297
aquatech@a1.net
www.aqua-tech.eu
9,800 liter tank price = EUR3,400 = P43,205.78. 1 EUR = 12.7069 BWP. Price is comparable. More if factor in transportation costs from Gaborone or Austria! Ferrocement tank built on site.
Sat Apr 9, 2022
Aquaponics Business planning folder: [9]
Source: US EPA [10]
Contents:
1_aquaponics_business_plan_guide_508_081116
1.urban_farm_business_plan_handbook_091511_508(1)
2a.urban_farm_business_plan_worksheets_091311_pdf
final_urban_farm_business_plan_worksheets_docx
final_urban_farm_business_plan_worksheets_xslx
agstar-handbook - Biodigester handbook
Aquaponics Planning Worksheet Template - Google slides for planning an Aquaponics business project
Tue Mar 29, 2022
World Food Program (WFP)Innovative Challenge 2022 [11]
OSEB WFP Pitch Deck [12]
Global Innovation Challenge for Zero Hunger: Application Form [13]
Sat Mar 19, 2022
OSEB Pitch Deck: [14]
Tesla solarroof [15]
Solar Shingles [16]
OSEB Board composition to be decided
Sat Feb 19, 2022
OSEB Meeting record note [17]
Wed Feb 16, 2022
Latest iteration of OSEB Campus Business Plan. Open for discussion. Main changes:
1. Change to Non-profit educational institution.
2. Apprentices pay-to-play
OSEB Campus Business Plan15Feb22
https://docs.google.com/document/d/1S3d5RoPI3O9RK4ejSOmNO-ciMAxH3RmA6Uxho6cRUfg/edit?usp=sharing
OSEBCampusProjections13/02/22
https://docs.google.com/spreadsheets/d/1C_hV6nQkh0gyWcPMir_r84qIM2PXqNHDj1K-sa9d9V0/edit?usp=sharing
OSEB Campus StartupCosts16Feb22
https://docs.google.com/spreadsheets/d/1-93DXtP3zCY53dwxvrQZ4ZRJvC1B6ufd5o4OQecxH8w/edit?usp=sharing
Wed Feb 9, 2022
Almost "finished" with Business plan - it's a living document and will continually be updated and revised as new information comes in or as experience dictates. Just need to write-up Executive Summary, then ready for submission to CEDA [18] for manufacturing loan:
OSEB Business Plan [19]
Microfactory Financial Projections [20]
OSEB Start-up Costs [21]
Tue Feb 8, 2022
OSEA (OSE Africa) group invitation links: WhatsApp OSEB Group link: https://chat.whatsapp.com/LSu1cKbKJFpCTijWnIclwd
Telegram OSEA Group link: https://t.me/+fgZgRUz_hII3Njk1
Sun Feb 6, 2022
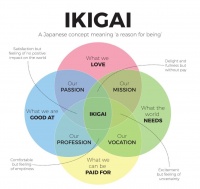
Ikigai [22]
- Are you doing something you love?
- Are you doing something you're good at?
- Are you doing something the world needs?
- Are you doing something you can be paid for?
Something that answers all four of these questions, the diagram suggests, is the key to finding your ikigai.
This is it, OSEA my ikigai.
Wed Jan 26, 2022
Grit:The Power of Passion and Perseverance [23]
Sun Jan 23, 2022
This 22-Year-Old Builds Chips in His Parents’ Garage [24]
Sat Jan 22, 2022
OSEA-B Start-up Costs 21/01/2022 - Document [25].
OSEA-B Start-up Costs - Spreadsheet [26]
Thu Jan 20, 2022
Universal Hydrogen - Fueling Carbon-free flight [27]
Mon Jan 17, 2022
OSEB Business Plan document[28] in Google Docs
Sun Jan 16, 2022
Fri Jan 14, 2022
Constructing a Compacted Gravel or Rubble Trench - [29] - Earth Block International
Wed Jan 12, 2022
Gravity Could Solve Clean Energy’s One Major Drawback [30]. Finding green energy when the winds are calm and the skies are cloudy has been a challenge. Storing it in giant concrete blocks could be the answer.
Botswana grapples with shortage of serviced land and housing units - [31] - Sunday Standard article 17th August 2020, by Joe Balise.
Mon Jan 10, 2022
OSE Botswana Planning:
1st Stage - Time Frame = 1st Year
* Borehole drilling @P300/m safe depth 200m +Eqpt Solar pump    ~ P300K - US$26K
* Genset 150KVA to provide initial power                        ~ P70K  -   $6K
* Workshop foundation 20mx15m + universal prototyping structure ~ P60K  -   $5K
* PV Roof $16K + batteries + inverters Africa Budget            ~ P1,056K - $90K
* Basic Advanced Workshop Eqpt Basic Advanced Workshop          ~ P910K   - $77.4K
* Inventory to produce 3 CEB presses + 3 Power cubes            ~ P350K   - $30K
* Subtotal                                                      ~ P2,746K - $234.4K
2nd Stage - 2nd year onwards
*CEB production + CEB press for sale
*CEB Housing Business plan - Housing Construction Business Unit
*OSE Botswana infrastructure build - Staff housing, Dorms + Kitchen & dining facility, Self contained cabins
Thu Jan 6, 2022
Compressed Earth Blocks. CEB Press v17.08. Large Workshop Structure.
Tue Jan 4, 2022
7 skills to land your open source dream job [32]. Universal Hydrogen[33] - Hydrogen powered planes. Fab Lab Bandung [34]. 50 Cool Things to 3D Print for January 2022 [35].
Sun Jan 2, 2022
site prep and foundation example - https://www.youtube.com/watch?v=w8sL27Tl88I&list=PL8XEQ1XKYNDU28EZTqiP_qMo3kriBsnMk. Tlou Drilling - borehole drilling and pump equipping [36].
Sat Jan 1, 2022
Proposal 2008 Facility Replication. Workshop foundation and space frames - rebar trusses, PV roof
Fri Dec 31, 2021
CEB Genealogy. CEB Press v17.08 latest working model. Cost of materials? Cost to CNC cut parts?
Thu Dec 30, 2021
Special Economic Zones Authority (SEZA) Botswana, is a parastatal under the Ministry of Investment, Trade and Industry established through the Special Economic Zones Act of 2015. SEZA began operating in April 2018. MandateTo Establish, Develop and Manage Special Economic Zones (SEZs) in Botswana. https://seza.co.bw/about-seza/
Greater Palapye Special Economic Zone (SEZ) is area where Mantshadidi is located.
Mon Dec 27, 2021
Fri Dec 10, 2021
Revise Z Babystepping steps in Marlin.
Thu Dec 09, 2021
Variable Z height above surface. Height of nozzle above the surface is not always constant. During cut when nozzle descends from Z100 to start position it does not always end up in the same place. Need to be able to adjust Z during cut. Z Babystepping not effective, steps too small thus no effect. Need to adjust Z Babystepping steps.
Wed Dec 08, 2021
Experimentation of nozzle speeds with 4mm Z height
https://atlanticaspiration.com/oxy-torch-settings/
Tue Dec 07, 2021
Z height tests at 3mm and 4mm nozzle height above surface. Splashing slag on nozzle at 3mm height. Chose to continue with 4mm nozzle height.
Mon Dec 06, 2021
Cleaning of Torch head nozzle - slag splashed up and coating part of nozzle - Remove gcode for Z height at 1mm - too close to surface, slag splashing up and flame out.
Repeat Z height test from 2mm - 10mm Z height.
Amended gcode script: Z Height Test gcode
Results of 3rd test starting at 2mm height.
Line 2mm Height - cut through metal little slag on rear side.
Line 3mm Height - complete cut but more slag on rear surface.
Line 4mm Height - complete cut least amount of slag showing
Lines 5mm, 6mm, 7mm, 8mm, 9mm and 10mm Height - Complete cuts however a lot of on rear surface.
Results of 4th test starting at 2mm Height:
Line 2mm height - a lot of slag splashing, covered nozzle - pierced metal but no cut
Lines 3mm, 4mm, 5mm, 6mm, 7mm, 8mm height - completed the cut with 3mm and 4mm height having the cleanest cuts on rear surface.
Line 9mm height - pierced but failed to complete cut, lot of slag splashing and flamed out.
Line 10mm height - aborted when torch flamed out at 9mm line.
Suspect metal is still hot from test 3 affecting test 4 results.  Best cuts are obtained at first trial of the day when metal is cold.
Conclusions: Best height is 3mm and 4mm. Best cut when metal is cold. Have to ensure Torch head is clean, no slag blocking holes.
Next steps - Perform repeat experiments at height 3mm and 4mm - repeatability of cut.
Sun Dec 05, 2021
Setting gas flow for acetylene => Set to lowest setting 2psi.
Performed test ZHeightTest.gcode - Perform Dry-run 1st - Cutting oxygen off and no flame to check movement correct.
Results 1st Test:
Line 1mm height - No penetration - Did not flame out (remove wait after Line 1mm and 2mm)
line 2mm height - Penetration but no cut
Line 3mm height - first proper cut
Line 4mm height - Cut OK
Line 5mm height - cut, but cut line width widening
Line 6mm height - lost cut almost at the end
Line 7mm height - complete on surface, rear side cut not all the way through along cut only 50% of cut right through.
Line 8mm height - wide cut at start thinning, also only 90% of cut all the way penetration.
Line 9mm height - wide cut at start, complete cut
Line 10mm height - wide cut at start, complete cut.
All the cuts plenty of slag on rear, not being blown away to create clean cut, maybe need more cutting oxygen???
Repeat Test: 2nd test
Second test was a complete failure, did not replicate results of first test. Reason: suspect oxygen setting different. Repeat test, Acetylene valve fully open (pressure preset at 2psi - unchanged), fuel oxygen knob turned on at minimum setting for blue tail to disappear
Repeat Test: 3rd Test
Sat Dec 04, 2021
To correct first: 1. Fix Z probe so that it is perpendicular to surface being cut and not swinging about - To avoid Z height variability => Z Probe fixed.
Continuing Z Height Tests: Create gcode script to carry out 10 cuts in a row without break varying Z height only:
Fri Dec 03, 2021
Taking a step back: Need to study parameters affecting cut. Cutting is not consistent every time. Need to understand why a cut fails and what are the parameters that affect a cut and how to set them so that a cut never fails.
The possible parameters that could change are:
1. Height
2. Gas flow
3. Cut speed - and piercing dwell time
4 cutting oxygen
5. Material composition
6. Water level
The above are likely in their order of importance. We know that you can cut only from a certain height.
Run experiments to determine which parameters a critical to a 'perfect' cut and quantify them, starting with height of nozzle above surface:
1. 10 straight lines next to each other, separated by 10mm.
2. Lines are 50mm long
3. Start at 1 mm height, last line is 10 mm height
Results so far:
At Z height 1mm nozzle too close to surface and flames out - no cut.
At 2mm Z height still too close metal was pierced but lost cut - i.e. stopped cutting while torch head moved 50mm.
At 3mm Z height  cut was good.
At 4mm Z height cut still good.
gcode files used:
Z Height 1mm
G28 ; home torch
G0 Z100 ; Raise nozzle 100mm
G4 P10000 ; wait 10 secs time to light torch
G0 F3000 X140 Y760 ; move to start position
G1 Z0 F3000 ; Lower nozzle ZOFFSET -7.79
G4 P10000 ; wait 10 seconds to heat up steel
M106 ; turn on cutting oxygen
 G4 P1000 ; wait 1 sec
G1 F500 X140 Y760
G1 X90 Y760
M107 ; Turn off cutting oxygen
G0 Z100
Z Height 2mm
G28 ; home torch
G0 Z100 ; Raise nozzle 100mm
G4 P10000 ; wait 10 secs time to light torch
G0 F3000 X140 Y750 ; move to start position
G0 Z0 F3000 ; Lower nozzle ZOFFSET -5.79
G4 P10000 ; wait 10 seconds to heat up steel
M106 ; turn on cutting gas
G4 P1000 ; wait 1 sec
G1 F500 X140 Y750
G1 X90 Y750
M107
G0 Z100
Z Height 3mm
G28 ; home torch
G0 Z100 ; Raise nozzle 100mm
G4 P10000 ; wait 10 secs time to light torch
G0 F3000 X140 Y740 ; move to start position
G0 Z0 F3000 ; Lower nozzle ZOFFSET -4.74
G4 P10000 ; wait 10 seconds to heat up steel
M106 ; turn on cutting gas
G4 P1000 ; wait 1 sec
G1 F500 X140 Y740
G1 X90 Y740
M107
G0 Z100
Z Height 4mm
G28 ; home torch
G0 Z100 ; Raise nozzle 100mm
G4 P10000 ; wait 10 secs time to light torch
G0 F3000 X140 Y730 ; move to start position
G0 Z0 F3000 ; Lower nozzle ZOFFSET -3.74
G4 P10000 ; wait 10 seconds to heat up steel
M106 ; turn on cutting gas
G4 P1000 ; wait 1 sec
G1 F500 X140 Y730
G1 X90 Y730
M107
G0 Z100
Thu Dec 02, 2021
Cutting blade 3 and 4. Blade 3 had a false start but ended well. Blade 4 started well but lost the cut halfway. Have to perform recovery of the cut next video:https://youtu.be/0bGCtotfZUw
Cutting blade 4. Blade 4 started well but lost the cut halfway. This video performing recovery of the cut: https://youtu.be/lrns61lfAQg
Wed Dec 01, 2021
Plan is the begin cut of 18 blades for one shaft of the shredder. Blades will be cut one by one.
1. Have you indexed the machine for loading?
Machine indexed marking positions for the steel to be cut.
2. How are you moving from one piece of steel to the next? Once cut, do you move the steel over, or move the torch head over?
Easier to move the steel for the new cut - keeping the torch in the same position.
3. Can you start with a hole inside - to make sure that you can do a good cut? Then run a real cut?
We could do that, however, I think we have the technique down quite well so no real need to.  We could do it for the first few cuts just to make sure.
4. What is your technique for reclaiming failed cuts?
Can retrace cut in reverse from gcode and simulate in CAMotics to verify before attempting recovery cut
Procedure to prepare blades for cutting: Source file for blades: [File:Bladeassy.FCStd]
- Download FreeCAD file - export as stl file
- Open in Cura
- Rotate the blade so that blade position of the points remains the same, only inner cut out rotates.  This to ensure blade fits in the 8" wide steel material.
- move blade position in cura to X=0 and Y=-290, slice.
- After saving sliced file, open in text editor and extract one layer in the middle, e.g. layer 10.
- add the following gcode at start of file:
**
Tue Nov 30, 2021
Previous attempt to cut 2 blades for the shredder was partially successful. The inner cut out for the 2nd blade failed about 3 quarters of the way into the cut. However, today managed to recover the cut by reversing the gcode from the end of the file and tracing backwards to approximately where the cut was lost. Using CAMotics, can retrace the cut.
Tue Nov 23, 2021
Intended Outcomes of 2 year Apprenticeship Program - For Ken Makunga
Tue Nov 16, 2021
Both X & Y Steps/mm set to 106.12 on Universal controller.
Check movement of Y axis - Y maximum = 782 as read on Pronterface (Y endstop position)
Set YMAX in Marlin to 780 on line 715.
Check Y axis motion Y0 to Y780 - measure = 30.6875" ≈ 779.4625mm
Check X axis motion from maximum position to endstop - Reading on Pronterface 600mm.
Set Line 716 XMAX 600 in Marlin.
Check G0 X600 - moved 23⅝" ≈ 600.075mm
Next make a square plot:
500mm square ≈ 19.6875" gcode:
G28; Home axes
G0 X0 Y280
G0 X500 Y280
G0 X500 Y780
G0 X0 Y780
Measurement check 19.6875"
9" square gcode: 9" ≈ 228.6mm
G28 ; Home axes
G0 X200 Y580; Start position near center of drawing board
G0 X200 Y351.4
G0 X428.6 Y 351.4
G0 X428.6 Y580
G0 X200 Y580 ; Back to start position
Mon Nov 15, 2021
Using Pronterface: https://www.pronterface.com/#download
To calibrate Ysteps/mm:
First move Y axes to Y0.
G0 Y500 --> Send - moved physically 19.5" ≈ 495.3mm
G0 Y0 Reverse direction - moved same 19.5"
G0 Y700 - moved 27⅝" ≈ 701.675mm
G0 Y0 - moved same distance.
G0 Y750 - moved 29⅝" ≈ 752.475mm
G0 Y0 - moved same distance.
Using NewSteps = OldSteps*(distance set/actual distance moved) =  106.46*(750/752.475) = 106.10.
Set 106.10 as New Ysteps/mm
X axis calibration:
OldSteps/mm = 80
G0 X0 - home X axis
G0 X500 - moved 14.8125" ≈ 376.2375mm
G0 X0 - moved same distance.
NewSteps = 80*(500/376.2375) = 106.32.
Set 106.10 as New X steps/mm same as Y axis.
Sun Nov 14, 2021
Troubleshooting motion on X & Y axes of CNC Torch Table:
Y axis force weak - motor struggling / jerking at far end of travel at Y0. Minimal force causes motors to skip.
Possible solutions:
1. Wire Y motors in parallel - currently wired in series
   Result: no additional benefit - motors skip when >5lbf applied.
2. Add an additional driver so each Y motor driven individually from own driver.
   Result: Y motors torque improved significantly - >20lbf to stop motors when in motion.
3. Possible 3rd solution add a 2nd Y motor at the opposite end of each Y axis.  Total 4 motors.  This solution not yet investigated.
Fri Nov 12, 2021
Calibration of CNC Torch Table Ysteps/mm
Y axis: Move axis Y 600mm -- measure moved: 17.75" ≈ 450.85mm.
Old Ysteps = 80steps/mm
New YSteps = old YSteps*(600/450.85) = 80*(600/450.85)= 106.46
Recheck movement in forward and reverse directions.
Wed Nov 10, 2021
To do list today:
Test CNC Torch Table - sample file.  Test feedrates.  Cut 1 blade :-)
Complete Halogen heat bed for D3D Pro2 and test.  Test print.
Work on shredder.
Tue Nov 9, 2021
Aluminium heat bed for 12" D3D Pro. Halogen heaters 4 off. Redesign attachment for heat bed due to reduced thickness of heatbed.
File:RiserPro2.fcstd. File:RiserPro2.stl
Mon Nov 8, 2021
Testing CNC Torch Table:
On software side - test a sample blade file, observe feed rates, post-process code to add cutting oxygen.

Logic:

1. Home and bed level
2. Move up to top of Z, set good feedrate
3. With z moving up, light torch manually
3.5 Wait 10 secs to adjust flame
4. Set good feedrate, start cut
5. Pause 10 seconds at any pierce point
6. Pierce and continue cutting until first exit point.
7. Turn off cut gas at exit point

Continue as needed to cut everything. We could probably cut 8 blades at one time. Start with one. Move to 4. Move to 8 on 2 pieces of stock.
3D Printer G-code Commands: List & Tutorial[37]
G-code commands reference sheet [38]
G-Code Q'n'dirty toolpath simulator [39]
Sun Oct 31, 2021
FAST application process [40]
Wanted: PhD Students to make a distributed future with solar-powered open-source 3-D printing and recycling. Contact Dr. Joshua Pearce - Apply here
https://www.appropedia.org/User:Kenmakunga
Seeded straw 2 buckets on 28th October and 3 more buckets today.
Mon Oct 25, 2021
File:Newquickmotorflanged.fcstd
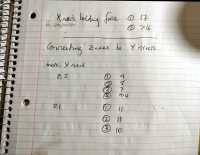
Z axis holding force data collection: . Problem was Z motors slipping when holding up heat bed. Stepper driver voltage measured at 0.6V - wired in parallel.
For comparison measured X axis holding force - 17lbf. Z motors fed off of Y drivers - slight improvement in holding force:
Wed Oct 20, 2021
https://gosh3d.store/ 3D printer store online now. Need Marketing focus. Need to update build manuals.
Sat Oct 16, 2021
Marlin CNC Torch Table: CNC Torch Table v21.08 Software
Thu Oct 7, 2021
Marlin_Giga for 3'x3' print bed and 6'x6' frame printer - D3D Giga Software
Fri Oct 2, 2021
Modified Marlin_universal code Line 489 - Reduced Esteps from 425 down to 100.
Thu Oct 1, 2021
Land Care Robot: https://www.youtube.com/watch?v=xinofsK_3oc&list=PLcSf9-SaCpDhbgtCl8BGS1NCnVoW2BK3k
Tue Sep 21, 2021
Uploaded new idler CAD and STL files to Gitlab. https://gitlab.com/opensourceecology.org/machines/d3d/-/tree/main. Improved idler has "bumps" to provide better grip for set screws.
D3D Universal build workshop - 3 days: Monday 20th - 22nd September 2021. 17 D3D Universal builds.
Sun Sep 19, 2021
Tue Sep 14, 2021
File:NewIdlerSymmetric.fcstd Revision 2 - "Bumps" on idler made wider (thicker).
Tue Sep 07, 2021
File:Basewithmotorside.fcstd Revision 2: Reduced Z motor plus platform height to 54mm from 60mm. This to allow Z motor to rest on support structure (2x12 board).
Mon Sep 06, 2021=
File:NewIdlerAsymmetric.fcstd - Modified to add "bumps" for set screw only to one side for applications such as on D3D Pro Z axis idler. File:NewIdlerSymmetric.fcstd
Sun Sep 05, 2021
Modified D3D Universal Basewithmotor piece. Increased height by 7mm and put hole in bottom: File:Basewithmotorside.fcstd, File:Uni2basepart1.stl.
Printing D3D Universal parts for next workshop - 10 sets.
Tue Aug 31, 2021
Preparing foundation for pouring concrete: Tying rebar and placing rebar chairs. https://youtu.be/O4QLVg09d34
Mon Aug 30, 2021
Pouring concrete on half of the new 3000sqft workshop: https://youtu.be/oV2KsWvejW0
Sun Aug 22, 2021
Halogen Heat Bed Instructional: https://docs.google.com/presentation/d/15eDMLQW5uglxXxxNP5u6n7uQUTysNERG3_8INUcCKLc/edit#slide=id.gec155b6c58_0_0
Sat Aug 28, 2021
Filling order for Four D3D Universal printers for University of Zimbabwe and two for Austria.
Fri Aug 27, 2021
D3D Universal 3 BOM: https://docs.google.com/spreadsheets/d/15W4Ob4dmUKv1JlNeOYlTdPOoGPmUZIzOX0k6U0kreQg/edit?usp=sharing - Updated to include halogen heaters and remove Nichrome heater parts.
Build instructions need to be updated for halogen heaters.
CNC Torch Table Motor piece CAD - File:CNC Motorpiece.fcstd
Preraing the ground for laying foundation for new 3000sqft workshop. Pouring concrete on Monday 30th August 2021: https://youtu.be/Hb55tPXMSns
Thu Aug 26, 2021
Printed out test prints to figure out correct hole size for FreeCAD to print correctly for 1" rods and bearings to fit. Printed holes are not perfectly round - imperfections in print. Difficult to determine which radius to use.
Mon Aug 23, 2021
Moment of truth: fitting 1" rods on idler and fitting 1" bearings in carriage piece. Result: They didn't fit. Holes in idler and carriage too small. Had to use heat gun to 'persuade' them to fit. Have to make hole bigger in CAD.
Working on motor piece redesign.
Sun Aug 22, 2021
Modified CNC torch table carriage by reducing height from 100mm down to 65mm. Reduces print time from 6hrs down to 4hrs.
https://docs.google.com/presentation/d/18M6Qw-2pqrRgK4g3G3Nkc_5tjLEJcZgKSP9BI0gHOqM/edit?usp=sharing
https://wiki.opensourceecology.org/images/7/7d/CNC_Torch_Table_Carriage.fcstd
Sat Aug 21, 2021
File:CNC Torch Table Carriage.fcstd
Issues
1. "Edit conflict: CNC Torch Table v21.08 3D CAD: You will have to merge your changes into the existing text." How to merge changes? - Answered by MJ
2. Still struggling with procedure (correct sequence of steps) to convert FCStd to stl for slicing in Cura. - Answered by MJ.
Powering the Nema23 from RAMPS using TB6600 drivers: https://drive.google.com/file/d/1fvd2yYRlahsU315zxUCbsCISAmMKwXC8/view?usp=sharing
Time-lapse - connecting the nema23 stepper motor to power and driving using TB6600 and signal from RAMPS board: https://youtu.be/NdLTT1zHNmA
Fri Aug 20, 2021
CNC Carriage design considerations:
Reduce size to fit on Universal print bed;
Align attachment holes with idler attachment holes
Attachment holes to enable attachment to other components from 2 planes
Thu Aug 19, 2021
File:CNC Torch Table idler2.FCStd stl - File:CNC Torch Table Idler5.stl
Wed Aug 18, 2021
120 Design Lessons - Day 25. CNC torch table idler prototype: File:CNC Torch Table idler2.FCStd
Printed out a trial print:
Tue Aug 17, 2021
Independence day Indonesia - "Merdeka!"
Working on CNC Torch table idler - prototyping new improved single piece idler.
Mon Aug 16, 2021
Today we spent the morning going through Seed Eco-Home (SEH) design improvements based on experience from last build. https://wiki.opensourceecology.org/wiki/Seed_Eco-Home_3.
https://wiki.opensourceecology.org/wiki/120_Design_Lessons_-_Day_24
Sat Aug 14, 2021
Day 38: Laying EPDM floor covering on carport roof: https://youtu.be/HcQkmNFs18M
Fri Aug 13, 2021
Day 37: Continuing work on carport: https://youtu.be/wwe-6SYc6G8
Thu Aug 12, 2021
Day 36: Working on carport: https://youtu.be/dTifwH2F1nw
Sat Aug 07, 2021
Day 32: Day off. Trip to Jamesport - Amish town.
Fri Aug 06, 2021
Day 31
Thu Aug 05, 2021
Day 30: Roof riser and Rim joists and joists have gone in. Roof panels going in and rigid insulation box. Next is 2 layers of 2inch insulation then OSB and roof waterproof covering.
Wed Aug 04, 2021
Day 29: The exterior walls on the 2nd floor have gone in, all except one. Top plate and rim joists going in as well as rafters/joists. https://youtu.be/m9Hc4ewWJq0
Tue Aug 03, 2021
Day 28: Morning rest. Afternoon start in workshop.
Idea: Get 6 D3D Universal printers up and running. Create a print farm. How to set up a business around the printers, providing printing services?
Mon Aug 02, 2021
Day 27 began with loading of 2nd floor wall modules for transportation to build site. Window modules were the heaviest, required 4 people to carry. On-site putting in 2nd floor exterior wall modules, all but one module installed. https://youtu.be/l_4PiigEAmI.
Sun Aug 01, 2021
Completed D3D Universal build. Testing and troubleshooting phase.
Fri Jul 30, 2021
Window build completion: https://youtu.be/eCKp97GAU-o
Thu Jul 29, 2021
Another day at the workshop working to complete last remaining 2nd floor exterior wall modules: https://youtu.be/uPgCsGPrTsY.
Afternoon at the build site: https://youtu.be/ch4P2ZZ5t9M
Wed Jul 28, 2021
Design fix to window and door modules:https://youtu.be/1UMGyThhab8
Tue Jul 27, 2021
Back in the workshop, continuing 2nd floor exterior wall module completion: https://youtu.be/UQ6ke2UIfmU
Mon Jul 26, 2021
Week ahead planning:
Today: first floor done.
Tuesday: second floor
Wednesday: roof
Thursday - carport
Friday - interior walls
Saturday - continue interior
On-site build progress: https://youtu.be/6iKDmd0GSeA.
In the workshop completing 2nd floor exterior walls: https://youtu.be/MLd09yQusPw
Sun Jul 25, 2021
Universal D3D Printer build continued...
Sat Jul 24, 2021
Change of pace today: making Universal D3D Printer - 6inch print bed:
Fri Jul 23, 2021
Completed 1st floor wall modules. https://www.youtube.com/watch?v=YOcW4xlt72M. And Double Door Module: https://www.youtube.com/watch?v=6b7kV9K1NJM. Finally to the build site and assembling corners: https://www.youtube.com/watch?v=65Nv9v5kUNk.
Global Open Source Holding LLC - GOSH LLC
Thu Jul 22, 2021
Day 19: Change of pace today: After morning briefing, straight to workshop to finishing touches to 1st floor wall modules. Target is to complete 1st floor wall modules so can begin placing exterior wall modules on foundation. https://www.youtube.com/watch?v=a_Bevy4_9-E
Wed Jul 21, 2021
Day 18 at the workshop: https://www.youtube.com/watch?v=DEMqZEDM9OI&t=28s. Slowly but surely the wall modules for the 1st floor are getting completed.
Tue Jul 20, 2021
Day 17 at the workshop: https://www.youtube.com/watch?v=IHhVfd_TD3g
Mon Jul 19, 2021
Day 16 at the workshop: https://www.youtube.com/watch?v=39puf_WDOf8. Time-lapse video of completing wall module assembly. We also had a visit from Bob Berkebile renown Kansas City Architect to see our Seed Eco-Home 2 Wall modules.
Sat Jul 17, 2021
OSE Apprenticeship day 15: https://youtu.be/Hg_eLKx3ukQ at the workshop - organizing the wall modules and numbering them sequentially. Completing one wall module using housewrap, external plywood (has to be trimmed to size removing overlapping lip), fiberglass insulation and electrical boxes.
Fri Jul 16, 2021
Day 14 of the OSE Apprenticeship - https://youtu.be/RqKgknknO1s. Afternoon at the foundations installing sill plate.
Thu Jul 15, 2021
Day 13: https://youtu.be/QQY-w6_NXC8 Time-Lapse view of the day's afternoon session in the workshop, completing more modules.
Wed Jul 14, 2021
Day 12: https://youtu.be/vGoK0ud8dcQ Time-Lapse view of the day's afternoon session: A day at the site.
Tue Jul 13, 2021
OSE Apprenticeship Workshop Practice Day 11 - https://youtu.be/KB2NpU0QTag
Mon Jul 12, 2021
OSE Workshop Time-Lapse video Day 10 - Completed Double door build and 2nd story Staircase wall module No. 69: https://youtu.be/VSb12K8rX6M.
Sun Jul 11, 2021
- Global Open Source Holding LLC - GOSH LLC. GOSH_LLC_projections_Jul_11_21 - https://docs.google.com/spreadsheets/d/1XVyTVMq2pS1scZSBdIx0LgxKz17sfoJh1XyrO4m-7cs/edit?usp=sharing
- Free Plan - Business Plan Template - https://docs.google.com/document/d/1roo7DZReXhU5wLIxnEnksMWjt58Hr62JhozUbqOA1WI/edit?usp=sharing
- OSE International Apprentices U.S. Visa Sponsorship
Thu Jul 8, 2021
Tarpaulin fish tank costs in Indonesia
- OSE Workshop practice - Day 7 - Continuing Seed Eco-Home wall module build - https://youtu.be/EEouPbpJGg8
Sat Jul 3, 2021
120 Design Lessons - Day 3. Open Source High Temperature 3D Printer Industry Standards. High Temperature Heated Enclosure.
Sat Jun 26, 2021
Redesign of Universal base - Base arms pictures: https://photos.app.goo.gl/SE89bkzQ5Rep3RS77
https://wiki.opensourceecology.org/images/8/80/Lower_arm.FCStd
https://wiki.opensourceecology.org/images/0/01/Upper_Arm4.FCStd
Tue Jun 15, 2021
Began work to redesign the universal base. Plan is to split it into 2 halves. In one half incorporate the Y axis idler and in the other half the Z axis motor piece. https://wiki.opensourceecology.org/images/9/97/Left_Half_Base.FCStd
Wed Jun 2, 2021
Realised to check Arduino board to check if it's working, open Arduino IDE and plug in Arduino board into serial port. If its working OK, the serial port should automatically appear. I bought 4 RAMPS bundles including LCD, RAMPS and Arduino Mega. The Arduino boards are Chinese clones and 3 of them didn't work. One ended up smoking when powered up. Need to buy 3 replacement Arduino mega boards - try to buy genuine Arduino boards.
7th attempt to print universal base was successful, although mains power tripped after over an hour into the print. Found a work around online. Measure the print height when it stopped. Reprint using the measured height as starting point for continuation print. Set measured height as minus Z value in cura. After second print, I glued the two pieces together. Photos: https://photos.app.goo.gl/yB86zCCZs1iLJFX29.
Also began printing more of D3D Universal parts.
Mon May 31, 2021
Yesterday made 6 attempts at printing universal base. Failed 6 times. 6th attempt failed due to a failure in extruder temperature control. Extruder temp went way up and smell of burning filament. Failed after 3hrs and 16mins. I don't know why temp control failed - This morning temp control is working fine, I need to monitor closely.
One other print failed due to Y1 axis belt clamp disintegrating. Had to replace belt clamp and belt. Belt - poor quality - broke when re-tightening belt.
Not sure why the other prints failed, some because of layer shift, others - a mystery. (note to self) Important to document immediately to avoid forgetting important information!
Pictures of the 6 failed prints: https://photos.app.goo.gl/yB86zCCZs1iLJFX29
Making 7th print attempt of the uni base today.
Made my video of interest for OSE Apprenticeship program application: https://youtu.be/qZDUHccEZJY
Still need to raise the money to pay for fees. Plot (of land in Botswana) very slow in selling (to raise funds), no serious buyers yet. US Embassy visa interview scheduled for June 10th at 7am in Jakarta. If I get the visa, we'll sell the car to pay fees.
Thu May 06, 2021
Issue with Z Bed Support for securing the rods that hold up the bed. The thinner side of the supports keep breaking off. Can't use set screws to secure rods. Instead resorted to using cable ties.
https://photos.app.goo.gl/ZCekmkhcfVmWNQor6
Success uploading Marlin to printer. Previously had issue with my Mac Book Pro (OS 10.13.6 - 2015) not seeing printer, i.e. no serial port appearing in Arduino. Was getting error message: "Serial port does not exist or your board is not connected". Fix found at: https://github.com/adrianmihalko/ch340g-ch34g-ch34x-mac-os-x-driver.
Powered D3D Pro 2 (12" Heat Bed) for the first time. Using 240VAC mains through RCCB. Blower fan (Spiral shapped fan bowing across nozzle) starts up as required.
Test of Nozzle and bed heating: Nozzle heat OK and temp display OK. Bed heating - nichrome heater burnt out - Have to remake or use halogen lamps as MJ suggested.
Test of extruder Motor - No movement using "Move Axis" command. Test of X axis motor - Also no movement - To investigate further tomorrow.
Tue May 04, 2021
My first D3D Pro started exhibiting layer shift along the X axis. Checked belt tension - OK. After loosening belt and removing X motor, found the pulley had shifted down towards the motor body and was rubbing against the motor housing. Pulley re-positioned so that there is a gap between pulley and motor housing and used semi-permanent Loctite 243 on the set screws (grub screws) securing the pulley to the motor shaft. After fix test print was OK.
Google pictures: https://photos.app.goo.gl/bEYkxTfrKmk4sfMfA
Wed Apr 28, 2021
Wiring 4 Z motors for lifting 12" bed.
Reference material: D3D Pro 3 Z Series wiring: https://docs.google.com/presentation/d/1bByf3PmjpFA3a9bqet27Hjl1LKSI5rf5zeDrFS1tRZc/edit?usp=sharing
https://photos.app.goo.gl/47PdcxocMfmKEDM28
Making up heating element and adding heat bed thermister. https://photos.app.goo.gl/VavTLJkLcLWvoCBHA
Tue Apr 27, 2021
Universal extruder assembly and wiring.
https://photos.app.goo.gl/Do8FRQ8e4z9ur2M88
Wed Apr 14, 2021
Redesign of D3D Pro 2 control panel.
Changes needed to replace 120Vac GFCI with 240Vac RCCB. Redesign carried out in FreeCAD 0.16: https://wiki.opensourceecology.org/images/8/8e/Control_Panel_12in_R2.fcstd
https://wiki.opensourceecology.org/images/f/f5/Control_Panel_12in_R2.stl
Thu Apr 8, 2021
Recording of FreeCAD "Feature Feature" exercise: https://youtu.be/mPLDC9rPtRQ for OSE FreeCAD Badge.
Fri Mar 19, 2021
Found heat bed not heating up. Further investigation found nichrome wire burnt up at one end of heating element. Remade connection to fence wire. Heat bed now heating up OK.
Add Pictures: https://photos.app.goo.gl/kQsw8V1K1uL3bt6e9
Tue Mar 16, 2021
Found 5015 print cooling fan blower stopped running. Bought a replacement and fitted OK. 4010 Heat sink fan also not running. Noticed during printing - Info screen showing fan running but physically fan wasn't running. Measured voltage at fan cables showed 12Vdc. Removed fan and applied 24Vdc directly to fan supply cables - Fan is dead. Ordered a replacement, expected to arrive by Friday 19th March.
Need to work on FreeCAD, learning and then modifying controller 3D print part to accommodate a 240Vac RCCB (Residual Current Circuit Breaker) to replace the GFCI which is 120Vac. Power supply in Indonesia is 240Vav.
Wed Mar 10, 2021
Began build of 12" bed D3D pro. 12 pieces of 14" angle iron painting and assembling frame completed. Welding 12" heat bed box as well as 8" heat bed. Need more practice welding! Ran out of spray paint.
https://photos.app.goo.gl/WekdRTSxySQWagANA
I was amused by Ashwin's narrative about being shy infront of a camera when discussing with Marcin. It also made me realise I needed to record my builds. Started recording 12" bed D3D pro build. still need to edit footage and provide link to video.
Tue Mar 2, 2021
Completed ordering parts for 1 D3D Pro 12" bed, 1 D3D Pro 8" bed and 2 D3D Universals. Almost complete. Need to organise to have Extruder heatsink block made locally.
Sun Feb 28, 2021
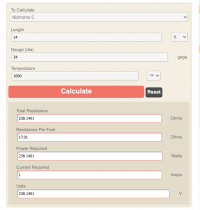
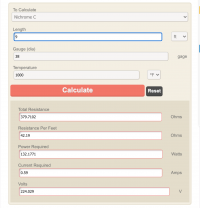
Calculations for 240Vac supply to Heat Bed. Mains supply in Indonesia is 240Vac. https://wiki.opensourceecology.org/wiki/Nichrome_Wire_Calculator.
14' of 34awg Nichrome wire for D3D Pro - 4' fibreglass inner 2mm diameter and 5' fiberglass outer 6mm. Wrap 14' nichrome wire on 4' of the the 2mm diameter fiberglass. Thread into 5' fibreglass sleeve of 6mm diameter. use fence wire to connect to nichrome wire and the 200degC wire on the other end of the fencewire. Detailed instructions here: https://wiki.opensourceecology.org/wiki/Heatbed_Build#General
For D3D Pro 2 - Use 14' of 34awg Nichrome wire in two loops. See: https://wiki.opensourceecology.org/wiki/D3D_v20.04_Build_Instructions - Bed Build instructions for making up the heater element.
9' of 38awg Nichrome wire for D3D Universal.
Sun Feb 21, 2021
Updated permissions for Business Plan and Financial projections - Anyone can edit:
3Dimensi Indonesia Business Plan: https://docs.google.com/document/d/16MUrbJsQJ6PyKMFCFMGyophWc1_NJkUBsMNNK0UQP5s/edit?usp=sharing
3dimensi Indonesia Financial Projections: https://docs.google.com/spreadsheets/d/1YNRubB4DYepi2t8DnEVFMd57hvZMeBOIKm47E1VJar8/edit?usp=sharing
Continuing to order parts for one 12" bed Pro, one 8" bed pro and two universal machines.
Currently printing out parts for the 12" bed Pro.
Fri Feb 19, 2021
Ordered 10 rolls of PLA+. 4 Black, 3 Grey, 2 Blue and 1 White. Already have 1 Red in stock
2 Black rolls for D3D PRO 2 (12" Bed); 2 Grey rolls for D3D Pro (8" Bed); 1 Blue roll for D3D Universal; 1 Black roll for another D3D Universal.
Spare rolls for printing stuff for show: one roll each Black, White, Blue, Grey and Red. Price each Rp300,000 for 3mm filament (approx US$20).
Sun Feb 14, 2021
In preparation for building one 12" bed Pro, one 8" bed pro and two D3D Universals spreadsheet with BOM list for all parts needed compiled: D3D Indonesia BOM.
Template for cutting mild steel for making heat beds: [[41]
Wed Jan 27, 2021
Proposed business name "3dimensi" Indonesia (not finalised yet)
3dimensi Business Plan link: https://docs.google.com/document/d/16MUrbJsQJ6PyKMFCFMGyophWc1_NJkUBsMNNK0UQP5s/edit?usp=sharing
3dimensi Financial Projections link: https://docs.google.com/spreadsheets/d/1YNRubB4DYepi2t8DnEVFMd57hvZMeBOIKm47E1VJar8/edit?usp=sharing
3dimensi Business Plan Presentation - Google Slides: https://docs.google.com/presentation/d/1U-v1FXyG6X59VePRQLkMZDoN7RRzugcX4GuMFXSiVmE/edit?usp=sharing
Angel Investment Network Indonesia - www.angin.id. Organisation that screens and connects entrepreneurs with investors.
ANGIN Pitch Deck and Layer1 and Layer2 Questionnaires: https://docs.google.com/document/d/12kiizBHLL8jNVGBJyaK8Dxegoo9k34NtiWdXN_gRxBU/edit?usp=sharing
Mon Jan 25, 2021
D3D Pro BOM Indonesia: https://docs.google.com/spreadsheets/d/1nBVyxK_W46d3mDSFMnj9aSUYoy32VwRlO83qdWATPoc/edit?usp=sharing
D3D Universal BOM Indonesia: https://docs.google.com/spreadsheets/d/120cEOiqhddD1kUu45EIsh2WtuVuZ8CBf2KAve_zA9A0/edit?usp=sharing
Thu Jan 21,2021
Cost of D3D Pro and universal parts did not take into account cost of 3D printed parts:
D3D Pro printed parts 2.32kg filament to print @ Rp330,000 per kg. Total Rp765,600 (US$51.04)add to cost of parts for D3D Pro = US$350 or Rp5,250,000. Selling price could be Rp10,500,000 (US$700)
D3D Universal parts 0.923kg filament at Rp330,000 per kg. Total Rp330,000 (US$22) add to cost of parts for D3D Universal = US$287 round up to US$290 or Rp4,350,000. Selling price could be Rp8,700,000.
Wed Jan 20, 2021
Prints are looking much better.
Completed D3D universal BOM Indonesia. Basically will source all parts locally. Of course some parts come from outside, namely China, but I won't be dealing with customs and importation issues for now.
D3D Pro Indonesia cost of parts estimate: Rp4,500,000 (US$300) including 20% markup for shipping costs. I am thinking selling price will be Rp9,999,000 (US$667) for fully built machine and Rp7,299,000 (US$487) for kit.
D3D Universal Indonesia cost estimate for parts: Rp3,975,000 (US$265) including 20% markup for shipping charges. Selling price could be Rp7,950,000 (US$530) for fully built printer and maybe Rp5,962,500 (US$397.50) for kit.
I Still have to run the numbers in the financial projections spreadsheet to check how feasible it is, what the breakeven point is and how much will now be needed for startup as opposed to when I used cost of goods sold as US$500 for D3D Pro and US$300 for Universal, with selling prices Rp22.5million (US$1,500) and Rp14.925million (US$995) for Pro and Universal respectively.
Tue Jan 19, 2021
Success at last! I managed to print a tablet holder, a 2hours 50minutes print job, without any issues of filament stopping mid-print. It all had to do with my filament. The previous filament I was using was a no-name cheap quality filament that caused all that trouble printing. I have a new higher quality filament PLA+ and I'm happy to say finally I'm getting much better looking prints.
Mon Jan 18, 2021
D3D Pro BOM Indonesia completed. Estimate US$300 to procure parts including shipping.
Working on D3D Universal BOM Indonesia.
Thu Jan 14, 2021
Extruder cooling fan is on and confirmed blowing air across extruder nozzle. Fan runs as soon as power is switched on.
Still having filament stopping extruding mid-print, intermittently. Extruder motor feels quite warm, not excessively hot. Today I printed a name tag for my wife (designed on FreeCAD 0.16). Printed for 16minutes and reached the end OK. Print is not so good looking, but I'm proud of it as possibly my first complete print. I have issues with moisture absorbed by filament so print looks rough. I'm planning to buy a filament dryer and better quality filament, hopefully by next Monday.
Z offset needs adjusting. Nozzle too close to print bed, ploughing into print.
Wed Jan 13,2021
https://wiki.opensourceecology.org/wiki/D3D_BOM_Indonesia_Jan2021
Sun Jan 10, 2021
![]() Hint: Is your extruder cooling fan on? You seem to have extruder overheat. Fan should be on all the time from when you turn printer on.
Hint: Is your extruder cooling fan on? You seem to have extruder overheat. Fan should be on all the time from when you turn printer on.
Problem: Filament stops extruding mid print. Tried the following solutions:
- Aggressive retraction: Reducing retraction speed from 25mm/s to 12.5mm/s - No joy.
- Increase extruder temperature by 5 deg C to 235 deg C - Still no joy.
- Lowering print speed from 25mm/s to 12.5mm/s - No joy.
After 4 attempts to print Hollow cube at 200%, print still fails with filament not extruding mid print.
Video recording of D3D Pro printing Hollow Calibration cube: https://youtu.be/3XKqUHGs6VM.
Filament stops being extruder after about 4 minutes.
Extruder motor feels hot to touch. Could this be a contributing factor?
Sat Jan 02, 2021
Finally cracked it! Extruder was over extruding. Found procedure to calibrate extruder https://www.matterhackers.com/articles/how-to-calibrate-your-extruder?rcode=YTUBE. Extruder (Esteps/mm) original value set was +0425.00. In the end reduced to +0103.11 (edit line 489 Marlin code). Finally able to get a decent first print. Not perfect, but at least print resembles what calibration should look like. Useful resource on calibrating 3D printer: (https://www.youtube.com/watch?v=qddYsbHawno).
First Calibrate extruder.
Next level bed. (Bed levelling doesn't happen automatically when starting print - Have to look into how to make that happen)
Next set 1st layer height (Babystepping Zaxis) then set and Z-offset and Store Memory.
Do calibration prints.
Print bed drops suddenly after printing completed - Have to look into how to stop that happening.
Printing Resources:
Thingiverse: https://www.thingiverse.com/
Print Quality Troubleshooting Guide: https://www.simplify3d.com/support/print-quality-troubleshooting/
Troubleshooting Guide to Common 3D Printing Problems: https://all3dp.com/1/common-3d-printing-problems-troubleshooting-3d-printer-issues/
Time Log
How to log the time? I am getting a "CSRF verification failed. Request aborted" error message.
Spent 7 hours today. 3 hours calibrating extruder. 4 hours getting familiar with printing, making prints, calibration cubes, benchy, baby groot, D3D Pro bed clamp, Micro all in one 3D printer test. Nice having printer humming away in the background.
Next step how to improve print quality. Improve print surface, how to get print surface looking smooth?
Wed 30th Dec 2020
Meeting with Marcin. Very interesting and enlightening. Planning to work closer with OSE. Discovered D3D Pro profile can be uploaded directly into Cura. Solved problem of filament reversing out of extruder. Still have problem of setting extruder height above heatbed optimally. When print starts I select "Tune" to "Babystep Z" setting nozzle height just above heat bed. Record Z offset value to add to Z offset in "Control" menu -> "Motion" and then save memory. Problem is as printing continues the heatbed is not being lowered sufficiently at each successive line, result being the nozzle ends up ploughing into the print. Also print of 10mm Hollow cube ends up 28mm tall.
I'm seriously considering OSE mentorship program as the best and quickest possible way to create a viable and profitable business replicating and seling OSE open source machines as well as collaborating to improve the machines to be the best in the world. Business creation to replace lost income source.
Mon Dec 21, 2020
Wiki Bio: Applied for wiki Account - waiting for approval and password. Username: kenmakunga. Kenneth Makunga, currently residing in Bandung, Indonesia. Interested in open source hardware to create profitable businesses. Currently working on replicating the D3D Pro 3D printer to create a business around that. I’m a former aircraft maintenance engineer (Avionics), now approaching retirement age. Currently unemployed which is why I am working on setting up a 3D printer manufacturing company here in Indonesia.
22/12/2020
Begin historical log: Thursday 12/11/2020 - Order for D3D Pro kit & registration for Collaborative design webinar done.
Thursday 10/12/2020 - 1st of 2 boxes for kit arrived. Departed to attend niece’s wedding in Sukabumi 100Km from Bandung, weekend trip.
Monday 14/12/2020 - Unpacked first box. Checked contents against packing list. Began assembling idlers and controller. Noticed failed Left Corner print. Ordered new print from 3dprint.id. Cost Rp475,000 (~US$34), shipping Rp12,000 (US$0.85).
Monday 14 - Saturday 19 December - working on assembling what I could from 1st box. Idlers and controller. D3D Pro build manual needs updating to show assembly using 1-piece axis 3D printed parts.
   • GFCI included in kit only suitable for 120Vac mains supply.    Using 220Vac here in Indonesia.    Need solution to replace GFCI from kit: Kit GFCI = 67mm long x 33mm wide x 40mm height.
   • Possible solutions:
           ▪ Replace GFCI with a 220vac GFCI - challenge is finding one with similar or same size - search Alibaba;
           ▪ Relace with a traditional Residual Current Circuit Breaker (RCCB) (Rp93,480 ≈ US$6.64) () challenge is size 45mmx45mm and also have to add one socket outlet for USB connector.
           ▪ Use a 220vac to 120vac step-down transformer/converter - how much power (watts) does D3D printer use? Energy usage – 77W for electronics, 30-150W average for heatbed for 50-178C heat bed temperature.    Heat bed max power is 450W.    (Disadvantage: one additional thing to buy, although would be OK for 1st printer.    Subsequent printers modify for 220vac supply).
                   ◦ 200W converter - Rp222.435 ≈ US$15.57
                   ◦ 300W converter - Rp519,400 ≈ US$36.36
                   ◦ 500W converter - Rp280,000 ≈ US$19.60
Thursday 17/12/2020 - replacement part arrived. Printed with 0.8mm nozzle, 0.3mm layer.
Saturday 19/12/2020 - 2nd box arrived with remaining kit parts. The heavy stuff, the steel angles and rods and stepper motors. Started assembling frame and the axes. Replacement part looked pretty, but not as tough as OSE printed part when banging away with mallet, replacement part cracked - though not badly - still using it.
Tuesday 22/12/2020
installed motors. Note: motors need to to be installed on axes before axes are attached to frame. Reason: screws holes for attaching screw for motor not accessible (covered over) when axis attached to frame. Wednesday 23/12/2020 Spent day hunting for step down transformer. In the end it wasn’t necessary. I have a voltage stabiliser which we use for our treadmill, to protect against frequent power outages. Turns out the stabilser also has a 110vac output and its rated at 3000watts. Still need to find a permanent replacement for GFCI for future builds. Can’t carry the stabilser around - too big. Installed the drive belts for all the axes.
Thursday 24/12/2020
   1. Centering Z axis using a combination square and a spirit level.    Question: how to fix Z axis frame attaching parts so they don’t move?
   • Z axis lower frame attaching part cracking when socket srew inserted    to attach to idler.
   2. Build Heater Element for Heated Bed:
       1. Measure fiberglass sleeve - 9’.
       2. Measure and mark off 3.5’; 4.5’; 6” and 6”.    Total 9’.
       3. Apply insulation tape to both sides of mark before cutting.
       4. Cut fiberglass tape on markings.
       5. Measure nichrome wire - 15’.
       6. Wrap nichrome wire round 3.5’ fiberglass sleeve
       7. Feed nichrome wire around sleeve into 4.5’ fiberglass sleeve.    Finicky business.    Wires kept catching on sleeve.    Had to wrap electrical tape around nichrome wire and high temp wire connection so as not to snag on fiberglass sleeve.
       8. Missing 50mm socket screw for heat bed cover plate.    Bought replacement Rp250 ≈ US$0.02
       9. 14” rods for heat bed are a tad too short.    14.5” better I think 14&3/4” (fourteen and three quarter inches)
       10. Began to add controller to frame.    Appears a bit short to span from vertical frame to vertical frame.    Maybe because I didn’t have a heat gun and used a hair dryer (not hot enough) to straighten controller frame so it didn’t come out quite straight.    No worries for now, its my first build and won’t be up for sale.
Friday 25/12/2020
Extruder build and controller wiring. Excellent resource by Irvin Inzurriaga YouTube video showing how to wire D3D Pro printer (https://www.youtube.com/watch?v=hWzM90JEi8Q). Extruder build requires heat tightening (Why? Is it due to expansion?).
       ◦ How to carry out heat tightening when wiring is not yet complete?
       ◦ What is supply voltage to heater? - 24VDC.
First power-up without complete extruder build. Idea is to attempt heat tightening of nozzle against heat break.
   • Using 110VAC output from voltage stabiliser unit.
   • Screen lights up OK.
   • Fan runs.
   • No power to heater block… - Go to Control -> Temperature -> Nozzle.    Set temp to 230deg C - Temp rises and heater block gets very hot, very quickly.    Tightened Nozzle against heat break.
   • Wiring and checking X motor rotation and X axis end stop - OK.
   • Wiring and checking Y motors operation and Y axis stop - OK.
   • Wiring and checking Z motors operation and Z axis stop.    Z axis stop OK.    Z motors problem.    Rods holding heat bed too short (or did I assemble incorrectly?).    The 14” rods barely make it to the Z axes carriages.    So when motors try to lift bed, not straight and jams on the way.    Slight mod:    replaced original 14” bed rods with 15” rods.    Now Z axis motors operation OK.
   • Continue to extruder build:
       ◦ Heat tightening done using controller.    Next time just apply 24 vdc to extruder heater cables.
       ◦ Order Loctite semi-permanent thread lock.
Saturday 26/12/2020
Completed D3D Pro build.
   • Z axis operation erratic - belt slipping.    Have to use 6mmx10mm set screws to lock Z axis rods in place at idler and motor ends so can tighten belt without rods sliding.
   • Orientation of gantry not clear.    Which way should extruder face?    I have it facing Z1 axis
Sunday 27/12/2020
First print on D3D pro - disaster. Not what I expected - Much more difficult to set printer up correctly to print. Haven’t managed it yet.
   • How to centre gantry so print start in the middle ( or on the bed)?
   • Having trouble getting the first layer height correct.    What should be gap between nozzle and bed? (paper width?)
   • How far away from bed should Z height probe be?
   • Trouble with bed movement up - closer to gantry Z axis motors appear to jam or slip    - a lot of shuddering motion like bed too heavy for motors to lift.
   • Ultimaker Cura software settings?    Using 3mm PLA filament, layer height 0.4mm, 1.2mm nozzle
   • How to stop filament from retracting when starting print?    Each time print starts the extruder motor retracts and filament comes out of the heat break.
   • How to save settings on LCD controller panel? - the save memory and load memory selections - nothing happens when these are selected.    - (User manual for D3D Pro/Universal explaining all functions of LCD controller.)
Mon 28th Dec 2020
Continuing to learn more about actual 3D printing. Cura settings important. Need to buy more filament to practice with.

