OSE Lesson - Universal Axis
Trashcan content
Sizes and its applications
- 8 mms (5/16") rods: Used for D3D Universal
- 1 inch rods:
- 2 inches rods:
wikipages
Intro
- The Universal Axis is a modular and scalable CNC axis which can be used to create cartesian CNC machines. We have so far prototyped 8 mm, 1", and 2" rod versions of this. The core of the axis is belt drive and linear motion rods where carriages are pulled on the rods. The axis system may be used for the X, Y, and Z axes of cartesian robot system. The system is scalable to any size and number of axes. Rotary axes may also be used with this system The system uses a combination of 3D printed parts, metal plates, and belt-driven shafts. Applications include 3D printers, CNC torch tables, heavy duty CNC machines, and many other production machines.
- Both the belts, drive pulleys, and linear bearings may be 3D printed. This remains as future work.
- Force limits - the universal axis does 50 lb precision force (10 micron resolution using 16 microstepping and 1/2" diameter pulleys) per 15 mm wide high precision GT2 belt strand with nema 23 motors. So in practice we can safely get up to 600 lb of precision drive force if we use 2-sided drive (like Y1 + Y2), 2 motors per axis, 3 belts per axis. Screws can be used for higher force. If we want more than 600 lb force with belts, we could use belts other than the tiny GT2 belts.
- Applications - precision machining, automation, digital fabrication construction sets. A generic platform for precision motion and linear actuation.
5/16" Universal Axis
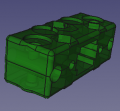
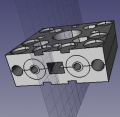
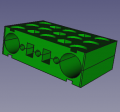
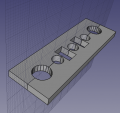
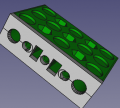
There are 14 unique parts in the Universal Axis:
Limits
We have built up to a 2 Meter Tall 3D Printer and a 1 cubic meter 3D printer using the 8 mm (5/16") Universal Axis:


Simplification
Part Library
Visual History:


Gallery:
One piece idler. - FreeCAD -File:Newidler.fcstd. STL - File:Newidler.stl
Simplified Universal Axis Motor Side - FreeCAD -File:Simplified motor side.fcstd. STL - File:Simplified motor side.stl
Simplified Universal Axis carriage: File:Simplified carriage side.fcstd. STL - File:Simplified carriage side.stl
 Simplified Universal Axis Idler Side - FreeCAD - File:Simplified Idler Side.fcstd. STL - File:Simplified Idler Side.stl.
Carriage closure. File:Carraigeclosure.fcstd. STL - File:Carriageclosure.stl
Carriage with closure. File:Carriage+closure.fcstd.

Applications of 5/16" or 8 mm Universal Axis So Far
- 3D printer - see our 3D Printer Manual
- Fluid Handling Robot
- Circuit mill - see D3D CNC Circuit Mill
1" Universal Axis
So far it was used to prototope a CNC Torch Table.
It interoperates with the 8 mm axis:
2" Universal Axis
See 2" Universal Axis.
Universal Axis Development Directions
Current Work - Universal Axis Designer in FreeCAD
See Universal Axis Designer in FreeCAD.
Future Work
Example of CNC Circuit Mill Configuration, 5/16" Axis
See full documentation at D3D CNC Circuit Mill
Intro
The following is a 5/16" or 8 mm version of the universal CNC axis described at http://opensourceecology.org/3d-printer-construction-set-workshop/
Larger axes will also be built, up to 2" for heavy duty CNC machining, with plastic parts sandwiched between metal plate as a plastic/metal composite structure. See calculations for beam deflection at Heavy_Duty_CNC_Construction_Set.
Universal Axis - Working Document
- P1 - Visual Linked BOM (VLBOM)
- P2 - extruder stepper motor mounting
Concept
WebGL
Build
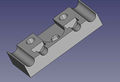
Carriage
From Michel Dhoore in Belgium in 2016. Early prototype using larger carriage pieces for larger machines.

Frame
Axis
BOM
Order


Frame Parts

CAD
FreeCAD and STL Files for Printing
See 3D Printer Part Library for all printer parts.
Originals from 2016 by Michel Dhoore
This file has the carriage belt tensioners, not shown below.
Universal Axis with Magnet Holes 2017
![]() Hint: Under development Feb 2017
Hint: Under development Feb 2017
- File:Universal axis carriage side.fcstd. File:Universal axis carriage side.stl.
- File:Universal axis idler side.fcstd. File:Universal axis idler side.stl
- c
- If using 6x10x3 mm flanged bearings (See BOM), then need a 1 mm spacer: File:Idlerspacer.fcstd. File:Idlerspacer.stl
Fabrication
- Print time - 3hr27min for the idler end -

Belt Tensioning
One Axis Attached to Frame
See Also
Communications
Industry Standards
- This one appears to be open source - [1], but has about 4x the unique count and lacks scalability and right angle connection ability.
Links
- 3D Printer Manual - first application of the Universal Axis
- OSE Germany appears to be doing non-coordinated development on this for their Universal Prototyping Kit. [2]
- 3D Printer Design Evolution
- 3DP Construction Set workshops - December 2016 - [3]
- 1" Universal Axis
- 2" Universal Axis
- Open Source Digital Fabrication Construction Set
Videos
Documentation, files, etc
End of trashcan content - start of real content
| OSE 9 Day STEAM Camp | ||||||
|---|---|---|---|---|---|---|
 | ||||||
| Day 1 | ||||||
| Lesson-1 | Welcome & OSE Introduction | |||||
| Lesson-3 | OSE Lesson - D3D Universal 3D Printer | |||||
| Lesson-4 | Universal Axis | |||||
| Lesson 5 | Universal Controller - 1 hour | |||||
| Lesson-6 | D3D Universal - Wire & Calibrate | |||||
| Lesson-7 | FreeCAD | |||||
| Day 2 | ||||||
| Lesson 3 | Collaborative literacy and OSE product development | |||||
| Lesson 4 | Modular Electronics 1h | |||||
| Lesson 5 | Designing an Arduino Uno in KiCAD 1h | |||||
| Lesson 6 | Build a circuit plotter 1h | |||||
| Lesson 7 | Plotting and Etching an Arduino Uno 2h | |||||
| Lesson 8 | Soldering an Arduino together 2h | |||||
| Unsorted | ||||||
| OSE Lesson - Plotting and Drill Combined Exercise 1h | ||||||
| ||||||
| Lesson Repository | ||||||
About this lesson
Purpose of this lesson, what will we build, and why. Where does this product fit in human technology
- Subject(s) -
- Course Topic -
- Time allotment - 1 hour
Learning Objectives
Course Content
Product specifications and requirements
pdf-file of full downloadable version
Prerequisites
Prerequisite lessons
You need to have an understanding of
- xxx - covered in lesson yyy
- xxx - covered in lesson yyy
Prerequisite tools and parts
You need to have the following parts to get the most from this lesson:
- xxx - built in lesson yyy - can be bought from *link*
How to enroll
There are three alternatives to enroll
- DIY
- Prerecorded
- Webinar - recordings, live participation, Q&A
Background reading
Background reading - background information, videos, etc - to prapare for the lesson (in addition to earlier finished modules)
Hardware instructions
BOM
BOM: Parts, sources, and tools. Would be good to have one BOM for this alone + part of e.g. the D3D Universal BOM. See section Universal Controller of the D3D Universal BOM
3D Printing files
Instructions
hardware picture
embedd 3d view
language agnostic instructional
iconic representation of the product's main building blocks (See Open Source Technology Pattern Language
Diagram of how it works - google slides
KiCad file source
Blender assembly animation
Technical drawings (from Freecad)
Scale experiment instructions
Modularity experiment instructions
Course Completion
Grading and test
Incentive Challenge
Review
Teacher's corner
Schedule
- 0-15 min
- 15-30 min
- 30-45 min
- 45-60 min Round up, try to quit before the end of the class to give people some time to go to the loo before the next class.