CEB Press/Manufacturing Instructions/Arms - secondary: Difference between revisions
Jump to navigation
Jump to search
(+warning) |
|||
| Line 1: | Line 1: | ||
{{Category=CEB press building instructions}} | {{Category=CEB press building instructions}} | ||
{{Template:CEB Press Manufacturing Instructions Navbox}} | {{Template:CEB Press Manufacturing Instructions Navbox}} | ||
{{Warning|The documentation for the CEB Press is undergoing a thorough overhaul. CAD models and written directions are presently obsolete. For more information, see [[Talk:CEB_Press#Documentation_overhaul_in_progress]]. When the models, specifications and text on this article have been thoroughly reviewed, updated when necessary, and confirmed as whole and accurate, this warning may be removed.}} | |||
[[Image:Secondaryarms.jpg|400px]] | [[Image:Secondaryarms.jpg|400px]] | ||
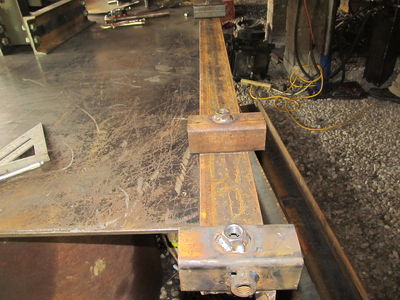
The secondary arms connect the primary arm/frame assembly to the legs to support the structure. | The secondary arms connect the primary arm/frame assembly to the legs to support the structure. | ||
Revision as of 01:35, 24 September 2011
Main > Housing and construction > CEB Press > CEB press building instructions
| |||||||||||||||||||||||||
![]() Warning: The documentation for the CEB Press is undergoing a thorough overhaul. CAD models and written directions are presently obsolete. For more information, see Talk:CEB_Press#Documentation_overhaul_in_progress. When the models, specifications and text on this article have been thoroughly reviewed, updated when necessary, and confirmed as whole and accurate, this warning may be removed.
Warning: The documentation for the CEB Press is undergoing a thorough overhaul. CAD models and written directions are presently obsolete. For more information, see Talk:CEB_Press#Documentation_overhaul_in_progress. When the models, specifications and text on this article have been thoroughly reviewed, updated when necessary, and confirmed as whole and accurate, this warning may be removed.
 The secondary arms connect the primary arm/frame assembly to the legs to support the structure.
Tools Required
- Cutting Torch
- Angle Grinder
- Welder
Materials Required
- 2 pieces 72" long - 4"x6"x3/8" angle steel
- 1 piece 3"x3"x1/2" steel
- Leg Holders(8)
Diagrams
Front Arm
Back Arm
Fabrication Steps
see Leg Holders
- Clamp the leg holders in their proper locations (two at each end, and two 12" away from the end) and weld them in place.
- Clamp one angle iron arm to each side of the primary arms, the 6" side to the underside of the primary arms, with the 4" side facing outwards from the assembly.
- Torch thru the holes on the primary arms to make two 3/4" holes on each secondary arm.
- Clean up the torch slag with an angle grinder.