D3D v20.04: Difference between revisions
Jump to navigation
Jump to search
| Line 109: | Line 109: | ||
|- | |- | ||
! scope=row | 19 | ! scope=row | 19 | ||
| [[Data Collection]] || [[D3D_v20.04 Data Collection]] || | | [[Data Collection]] || [[D3D_v20.04 Data Collection]] || 15 | ||
|- | |- | ||
Revision as of 05:17, 20 April 2020
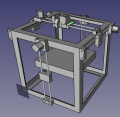
Developent Template
Specifications
- 12" heat bed
- 1400W heat bed
- Transitioning to OSE Universal Gearless Extruder
- Based on D3D Pro geometry
Working Doc
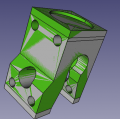
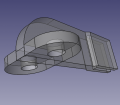
3D CAD


D3D v2004 Assembly - FreeCAD -File:D3d v2004.fcstd
Auto parallel piece. File: File:Autoparallel.fcstd File:Autoparallel.stl
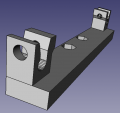
New bed holder. File: File:Newbedholder.fcstd File:Newbedholder.stl
Panel holder. File: File:Panelholder.fcstd File:Panelholder.stl
Cut List
Using 3D Printer Workbench 2020:
- X - [2] 22”
- Y - [4] 21”
- Z, bed, spool holder - [9] 17”
Firmware
- Firmaware goes back from the 2-wire endstops to 3-wire endstops with indicator light to make fabrication easier. File:Marlin D3D Pro v1.0.zip no longer works.
- New firmware builds upon the last version with 3-wire endstops - from 3D Printer Genealogy - the first version that had 2-wire endstops was D3D v19.02. Change log from v19.12 firmware states " Change log: endstop_reversing was reversed on X and Y compared to former versions". Thus, chaning this only would suffice - reversing back to the opposite of File:Marlin D3D Pro v1.0.zip
- New file: File:Marlin D3D Pro 2.zip
Heater Element
(See Nichrome Calculator)
Notes:
- Fiberglass sleeve used - HTG fiberglass, does not fray like standard high temperature sleeving (1000F) and is rated for . See [1]. Note that the resin can burn out at the 650C (1200F) workign temp. Sleeve has VW-1 flame resistance. Made of fiberglass, it does not burn out, but may fuse and lose fiber structure.
- Inner core: 5' long wraparound of 2mm tight braid fiberglass sleeve - 600C - [2]. Started with 5', wrap was more like 4' long.
- This is packed into 4' of 6 mm tight braid fiberglass sleeve.
- Fence wire is used to couple 200C wire to nichrome, in order not to burn out 200C wire. Nichrome is wrapped around the fence wire 5-10 turns
- Copper wire is soldered to the fence wire.
- 10" end piece of 6 mm tight braid sleeve covers the 200C wire, fence wire, and ends of nichrome.
- 2 strands of nichrome heater element are made, each 14' long, each about 600W.
- Ends, covered by 6 mm tight braid sleeve - stick out the finished bed. Third wire set is the thermistor, which is wrapped with 2 mm tight braid so it doesn't melt out.
Heater Optimization
Theoretical idea:

But, ga 18 can't bend easily using a cordless drill.
- 20 feet of 20 ga wire appears to be most convenient - 1 piece, max at 1200F. Current 500W heater is 1200F max, and works well.

- 14 feet of 24 ga works perfectly by hand to get a good wrap over 4 feet, and goes fast, about 1 minute pending tieups:

Heater Element Wrapping Procedure
- Cut 14' of ga 24 nichrome
- Cut 5' of tight 2 mm fiberglass sleeve
- start the wrap of nichrome on one end of sleeve
- Attach other end of sleeve to a free-spinning rotor
- Once enough to go inside a cordless drill chuck - grab the nichrome wrap and turn on the drill in reverse to start wrapping. Tension the sleeve against the rotor
- Wrap away! A person should be able to wrap 4 feet long just by holding a cordless drill