CEB Press: Difference between revisions
| Line 111: | Line 111: | ||
=Electronics Troubleshooting= | =Electronics Troubleshooting= | ||
==Arduino== | |||
Is the Arduino noticeably broken? Check the top and bottom surfaces for signs of a short circuit. Look for black burn marks. | |||
Is the Arduino mounted correctly? The Arduino's conductive electronics should not be touching any external conductive surfaces. | |||
Does the Arduino have enough power? The electrical input should be 7 volts or higher. Check the input voltage with a multimeter. | Does the Arduino have enough power? The electrical input should be 7 volts or higher. Check the input voltage with a multimeter. | ||
| Line 117: | Line 123: | ||
Does the Arduino have the right code uploaded to it? If unsure, upload the latest operation/testing code. | Does the Arduino have the right code uploaded to it? If unsure, upload the latest operation/testing code. | ||
==Solenoid Driver== | |||
When the Arduino runs through its code, the solenoid driver LEDs should light up. More specifically, a control LED and a drive LED for a given channel should light up at the same time. If the LEDs do not light up properly, the LED circuit may have been short-circuited or bypassed. If the control LEDs do not light up properly, the Arduino may be broken and unable to send digital output.. If the drive LEDs do not light up properly, the solenoid driver may have a broken MOSFET. | |||
==Sensor== | |||
When the sensor has 5V to its Vin and 0V to its GND, then the voltage between the signal pin and GND should switch depending on the sensor's magnetic latching. Use a multimeter to monitor the signal-GND voltage and wave/flip a magnet- the voltage should fluctuate between 2 approximate low/high values. | |||
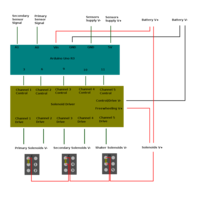
Check the sensor to Arduino wiring. Arduino 5V to Sensor Vin, Arduino GND to Sensor GND, Arduino A0 to Primary Sensor Signal, Arduino A1 to Secondary Sensor Signal. | |||
Check the sensor's placement relative to the magnets. The sensor being too far, too close, or improperly angled will cause CEB operation problems. | |||
The Arduino may have broken analog input pins. | |||
=Collaborative Production Run - September 24-26, 2012= | =Collaborative Production Run - September 24-26, 2012= | ||
Revision as of 08:01, 17 December 2012
| CEB Press | ||
|---|---|---|
| Home | Research & Development | Bill of Materials | Manufacturing Instructions | User's Manual | User Reviews | 
| |
Introduction
The Liberator is OSE's automatic, high throughput (up to 16 bricks per minute) Compressed Earth Brick Press. It is named The Liberator because it is intended to free people from the single highest cost of living - housing. See Cost of Living and GVCS Naming Convention.
Status
Prototype IV built in a Collaborative Production Run. Build and use the CEB Press to make Compressed Earth Blocks to make all sorts of structures!
Mechanical
- CEB Press Prototype IV - Complete CAD in Solidworks - File:CEBIV-new.zip STEP AP203 - File:CEBIV.step, STEP AP214 - File:CEBIV2.step, STL - File:CEBIV.stl, x_t - File:CEBIV.x t, x_b File:CEBIV.x b, 3DXML File:CEBIV.3dxml -
- Complete Fabrication Drawing Files - File:CEBIVFABFILE.zip - from after to 9.28.11. Sheet file is up to date. Drawing files need to be linked to sheet files.
- Fabrication Diagram - File:CEBIVDiagram.png.zip
- Fabrication Diagram Index - File:CEBIVIndex.ods
- Complete Fabrication Drawings - File:CEBIVFab.pdf - corrected after September 24-28, 2012 Collaborative Production Run, and needing many corrections after November_23,_2012_Collaborative_Production_Run.
- Embedded set. Each drawing number corresponds to a part in a Fabrication Diagram and to a part in the Master Index. (is this the version with corrections after the production run?)
Grate (including deflectors, hinges, and supports)
CEB Hopper (including saddle)
CEB Shaker (including shields)
CEB Legs (including holders and feet)
CEB Outer Frame (including drawer rollers and shields)
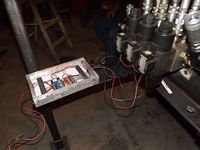
Hydraulics
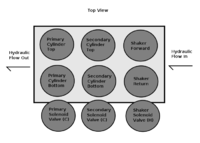
Quick connect fittings and modular solenoid valves are used for easy modification.
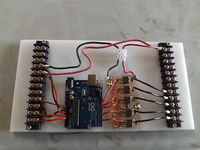
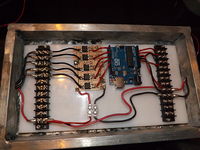
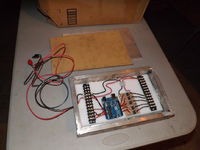
Electronics - CEB Press IV
12V Battery or Power Supply suffices. Peak current is <5A.
Terminal Case x1 with 300mm x 150mm area x 50mm height working volume
Terminal Block x2 with 120mm length x 25mm width
Arduino Uno R3 Board from NKC Electronics via Amazon
Code
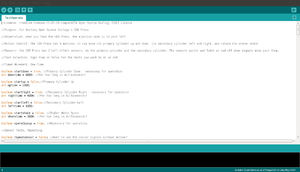
Testing and Operation Code - Last Updated November 25, 2012
Arduino Uno R3 Board from NKC Electronics via Amazon
How to upload code to the Arduino microcontroller
Code Functions
- Sensor signal strength monitor
- Sensor latching monitor
- Cylinder full motion-sensed cycling
- Continuous brick pressing
Code Features
- Boolean menu and important variable values at beginning of code!
- Motion-time-calculated compression and release durations
- Serial write feedback during testing and operation!
- Multi-sample-averaged sensor signal processing!
- Proper motion ordering for minimum-trouble operation!
Testing
- Avoid excessive hydraulic pressure! Make sure you have a correctly installed pressure relief valve on your hydraulic circuit. Start testing the CEB Press with a low pressure setting on the pressure relief valve.
- Avoid hydraulic fluid leaks and non-motion! Check that all hydraulic connections are tightened/connected and theoretically leak-free.
- Avoid premature sensor latching! Check that the sensors are mounted parallel to the magnets. Sensor should be not too close but not too far from magnets
- Make sure that the middle primary magnet is passed by the end of the primary cylinder's compression motion
Electronics Troubleshooting
Arduino
Is the Arduino noticeably broken? Check the top and bottom surfaces for signs of a short circuit. Look for black burn marks.
Is the Arduino mounted correctly? The Arduino's conductive electronics should not be touching any external conductive surfaces.
Does the Arduino have enough power? The electrical input should be 7 volts or higher. Check the input voltage with a multimeter.
Is the Arduino correctly power-wired? Check the wiring between the Arduino and the electrical input. Positive to Vin, negative to GND.
Does the Arduino have the right code uploaded to it? If unsure, upload the latest operation/testing code.
Solenoid Driver
When the Arduino runs through its code, the solenoid driver LEDs should light up. More specifically, a control LED and a drive LED for a given channel should light up at the same time. If the LEDs do not light up properly, the LED circuit may have been short-circuited or bypassed. If the control LEDs do not light up properly, the Arduino may be broken and unable to send digital output.. If the drive LEDs do not light up properly, the solenoid driver may have a broken MOSFET.
Sensor
When the sensor has 5V to its Vin and 0V to its GND, then the voltage between the signal pin and GND should switch depending on the sensor's magnetic latching. Use a multimeter to monitor the signal-GND voltage and wave/flip a magnet- the voltage should fluctuate between 2 approximate low/high values.
Check the sensor to Arduino wiring. Arduino 5V to Sensor Vin, Arduino GND to Sensor GND, Arduino A0 to Primary Sensor Signal, Arduino A1 to Secondary Sensor Signal.
Check the sensor's placement relative to the magnets. The sensor being too far, too close, or improperly angled will cause CEB operation problems.
The Arduino may have broken analog input pins.
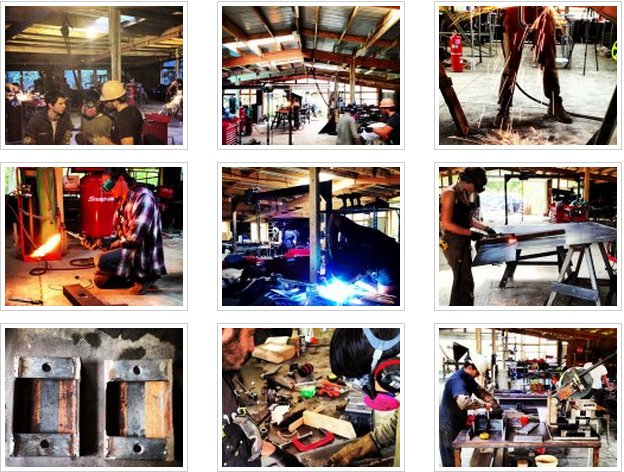
Collaborative Production Run - September 24-26, 2012
See also CEB 4 Design Planning (June 2012) and CEB Press Collaborative Production Results.
More images on Facebook.
Collaborative Production Run - November 23, 2012
November 23, 2012 Collaborative Production Run
| CEB Press | ||
|---|---|---|
| Home | Research & Development | Bill of Materials | Manufacturing Instructions | User's Manual | User Reviews | 
| |
Overview
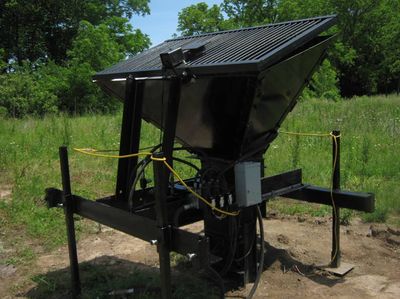
The "Liberator" Compressed Earth Block Press is a machine that makes compressed earth blocks (CEBs).
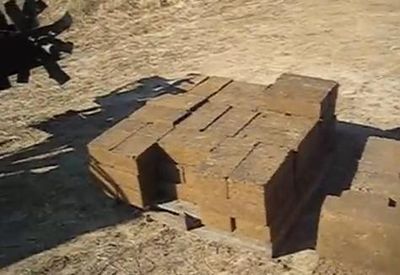
The CEB Press takes earth/dirt/soil and compresses it tightly to make solid blocks useful for building. Compressed earth blocks have many advantages as a building material: by making the building materials from the readily available dirt on the building site, they eliminate the need to transport bricks from elsewhere, reducing financial cost and environmental impact. Compressed earth blocks are very strong and insulate well against both heat and sound, making for very energy-efficient building (especially combined with the energy savings from not needing to transport them from offsite). Best of all, the material they use is already on-site and does not need to be purchased -- quite literally, dirt-cheap! See the wiki page on Compressed Earth Blocks and the CEB category for more details on building using CEBs.
The Liberator has been fully designed and tested by the Open Source Ecology team. Because the Liberator is an open source technology, you can freely download instructions to build your own from materials you can obtain yourself, or contact opensourceecology[at]gmail[dot]com to buy a kit or a finished machine.
Building a machine yourself might seem intimidating, but every step of the process is fully documented and the OSE community is available on our discussion forums if you need help, advice, or a little hand-holding.
Using the CEB Press, two people can build a 6 foot high (1.83m) round wall, 20 feet (6.1m) in diameter, 1 foot (30cm) thick, in one 8 hour day, though construction time will vary somewhat depending on preparation time, what equipment is available (tractor to prepare the ground and move the blocks where they need to go), the quality of the soil, and other factors. The bigger the block size, the faster a wall can be erected, but at the cost of heavier blocks that are more of a strain to work with. Blocks from The Liberator average 25 pounds (11.3kg).
See CEB Design for more information.
Updates
Videos
Product Ecology
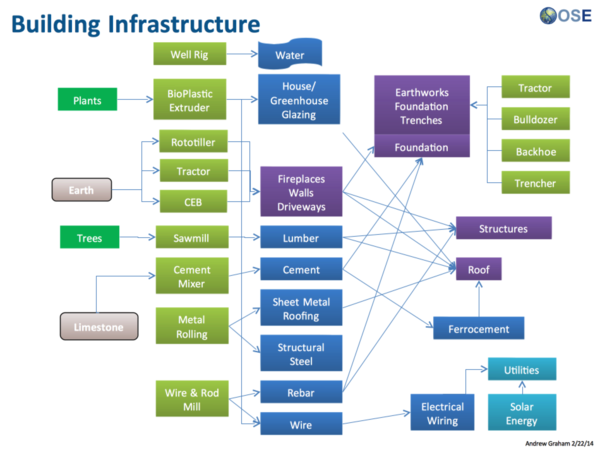
| From | Uses | Creates | Enables |
|---|---|---|---|
|
Components
|
Status
- Currently the CEB is at product release status and is being actively manufactured at Factor e Farm and in Texas. The presses will be used heavily as a part of the Factor e Farm Infrastructure Buildout 2011.
- The CEB documentation is being actively upgraded to meet Fabrication_Procedure_Standards with the goal of serving as a reference implementation for GVCS documentation.
- Eventually the torch table will be used to automate the fabrication of the CEB machine, reducing fabrication time by an estimated 20 hours and, thus, the cost to build the machine.
- The first independent replication is in process as of Sep. 2, 2011, by James Slade and Jason Smith in Texas.
- CEB 4 design planning
- CEB Press V
See Also
